
The smallest things can sometimes have the biggest impact on productivity. Mastering the Gmail autocomplete and Smart Compose features can turn crafting emails into an enjoyable, swift, and time-saving experience.
In this blog post, we’ll tell you how to use this helpful feature to your advantage. We’ll guide you through the setup process and offer tips on maximizing its potential, so emailing is a breeze. Ready? Let's get into it!
What is Smart Compose, Gmail’s autocomplete feature?
Smart Compose is Gmail's autocomplete feature that predicts and suggests text as you type. By default, the feature uses artificial intelligence to analyze your writing patterns. It considers the context of your email and the phrases commonly used in similar situations.
As you begin typing, it offers real-time suggestions for words, phrases, or entire sentences, making the email composition process quicker. What’s great is that Smart Compose evolves with your writing style over time. This means that it starts offering increasingly accurate and personalized suggestions.
Beyond its default functionality, you can refine Smart Compose further by adding your own suggestions. This makes it an even more versatile and personalized tool. So, let’s see how you can harness the full potential of the smart compose feature:
How to change your Gmail autofill settings
Once you’re in your Gmail, here’s how you can change your autofill settings:
Step 1: Go to Gmail settings

Click the gear icon in the top right corner to open the quick settings. Then, click the ‘See all settings’ button.
Step 2: Scroll down to suggestion settings
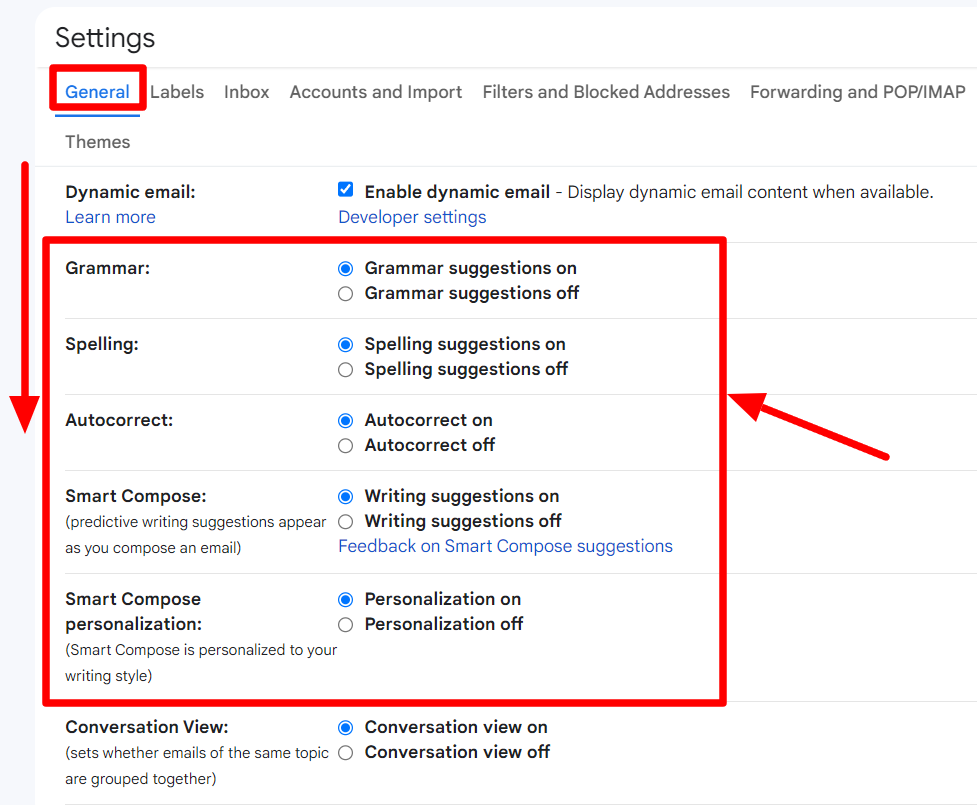
Scroll down under the ‘General’ tab to find the suggestion settings. There are five settings here that you can change to customize your autocomplete suggestions. Let’s go over each setting one by one in the next step.
Step 3: Change autofill settings to your preferences
The first setting that you can change to alter your smart compose suggestions is the Grammar setting. This feature automatically checks and suggests corrections for grammatical errors as you compose emails. Whether it's fixing tense issues, improving sentence structure, or suggesting more precise wording, the Grammar setting enhances the overall quality of your messages.
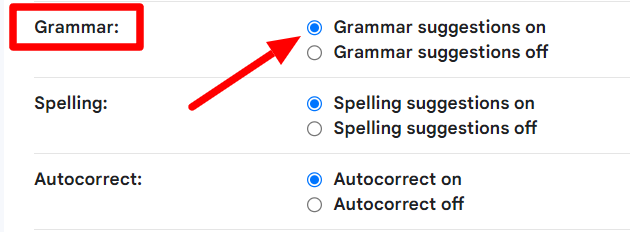
To turn it on, simply ensure that the ‘Grammar suggestions on’ is selected.
The next setting to consider changing is the ‘Spelling’ setting. This is a crucial component of impeccable written communication. It instantly highlights and suggests fixes for misspelled words, ensuring your messages are error-free.
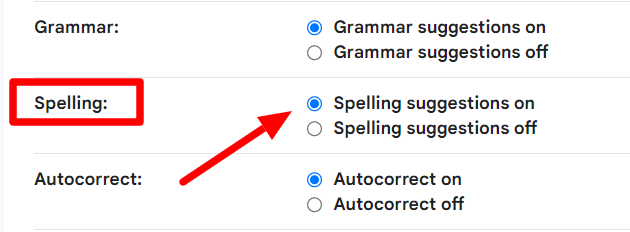
To ensure it’s on, check that the ‘Spelling suggestion on’ is selected.
Let’s move on to the ‘Autocorrect’ feature. This feature proactively identifies and corrects mistakes, saving you from typos and ensuring polished communication.
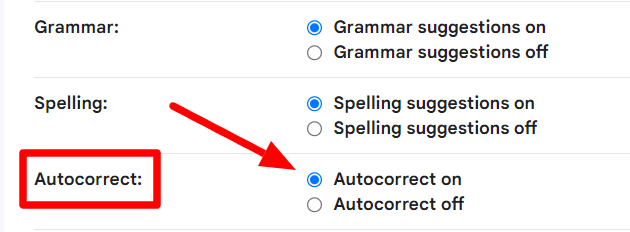
Ensure the ‘Autocorrect on’ is selected to turn this setting on.
The next two settings to pay attention to are the ‘Smart Compose’ and the ‘Smart Compose Personalization’ features.
The ‘Smart Compose’ feature analyzes your writing patterns and context to offer real-time suggestions for words, phrases, and complete sentences. It’s a great tool if you’re seeking a time-saving approach to crafting emails in Gmail.
The Smart compose personalization setting takes email efficiency to a new level. This feature adapts to your unique writing style and offers increasingly personalized suggestions as you compose messages. It considers your past writing patterns so that the predictive text is more accurate and aligned with your preferences over time.

Ensure that ‘Writing suggestions on’ and ‘Personalization on’ are selected in the Settings to activate these features.
Step 4: Remember to save your changes
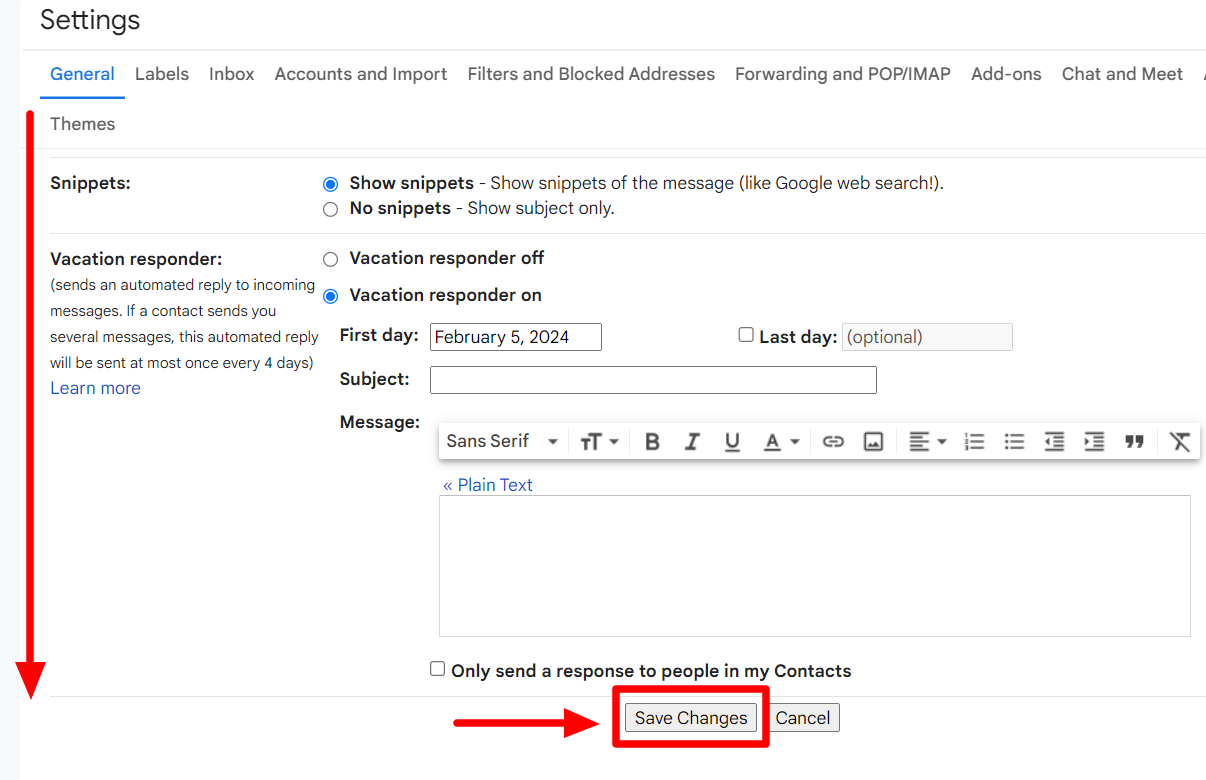
Once you have your settings configured to your preferences, scroll down all the way and click the ‘Save Changes’ button for these changes to take effect.
How to delete email addresses from Gmail autocomplete
There’s one more place where the autocomplete feature in Gmail comes into effect: when you insert the email addresses in the ‘To’ field. It’s a really helpful feature, but it can create issues sometimes if there are old email addresses you don’t want popping up each time you’re addressing the message. Deleting email addresses from Gmail Contacts is the only way to deal with this.
Step 1: Go to Google Contacts
Navigate to your Google Contacts page.
Step 2: Search for the email address

Search for the contact you want to delete by entering the contact's name or email address in the search field. Click on the right contact in the autocomplete options to go to it.
Step 3: Delete the contact
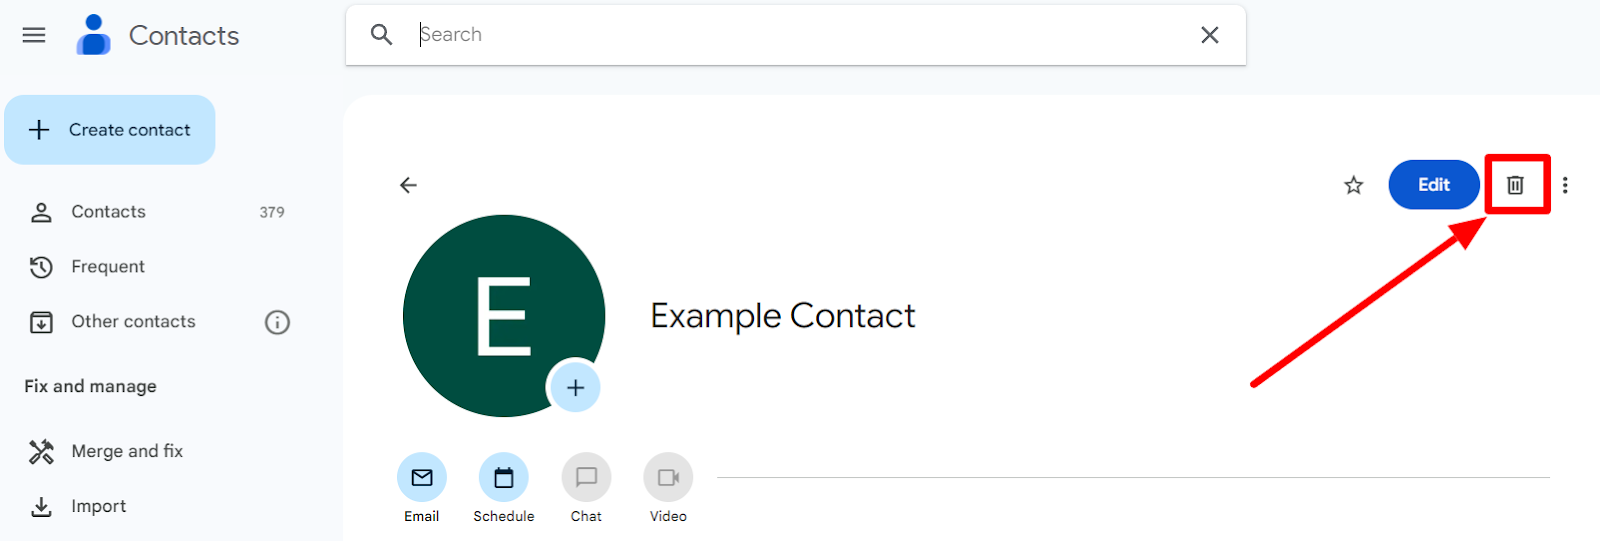
Click the ‘Delete’ button in the top right corner (trash can icon) of the contact detail window to delete the contact. With that, you’re done!
Check out more Gmail how-tos on the YAMM blog
Customizing Gmail to your needs and preferences can profoundly affect your workflow and productivity. If you found this tutorial helpful, check out more on the YAMM blog! YAMM blog brings you helpful Gmail tutorials in an easy-to-understand manner, making your daily dealings with your favorite email provider easier and more streamlined.
Check out the YAMM blog for your daily dose of Gmail how-tos!