
Email is an essential tool for effective communication. Knowing how to print out emails is often necessary, whether for personal or professional purposes.
However, sometimes header information in the email is unnecessary, or you may want to delete personal information from a print-out of an important email message. This can take some serious time and effort if you don’t know how to print emails without the header.
Thankfully, there’s a way to eliminate headers so you can focus on the essential content and save valuable time. In this blog post, we’ll explore how to print an email without the header on Gmail. Let’s go!
The Simplest way to print an email without the header in Gmail
There are different ways to do this, but the most obvious solution is to simply highlight the body text and print that out. This is straightforward, but it won’t be printed in email format.
If you’re instead looking for how to print an email without the header, we have a method that, once you’ve got it down, can be customized to any situation. It does involve using the inspect element feature. If you’re not familiar, it can look intimidating, but fear not! It’s very useful, and we’ll guide you through the process.
How to print an email without the header on Gmail using inspect element
Step 1: Click “Print” on an email in Gmail
Navigate to your Gmail. Locate the email you want to print and open it.

Click the “Print” button (printer icon) in the top right corner to print the email.

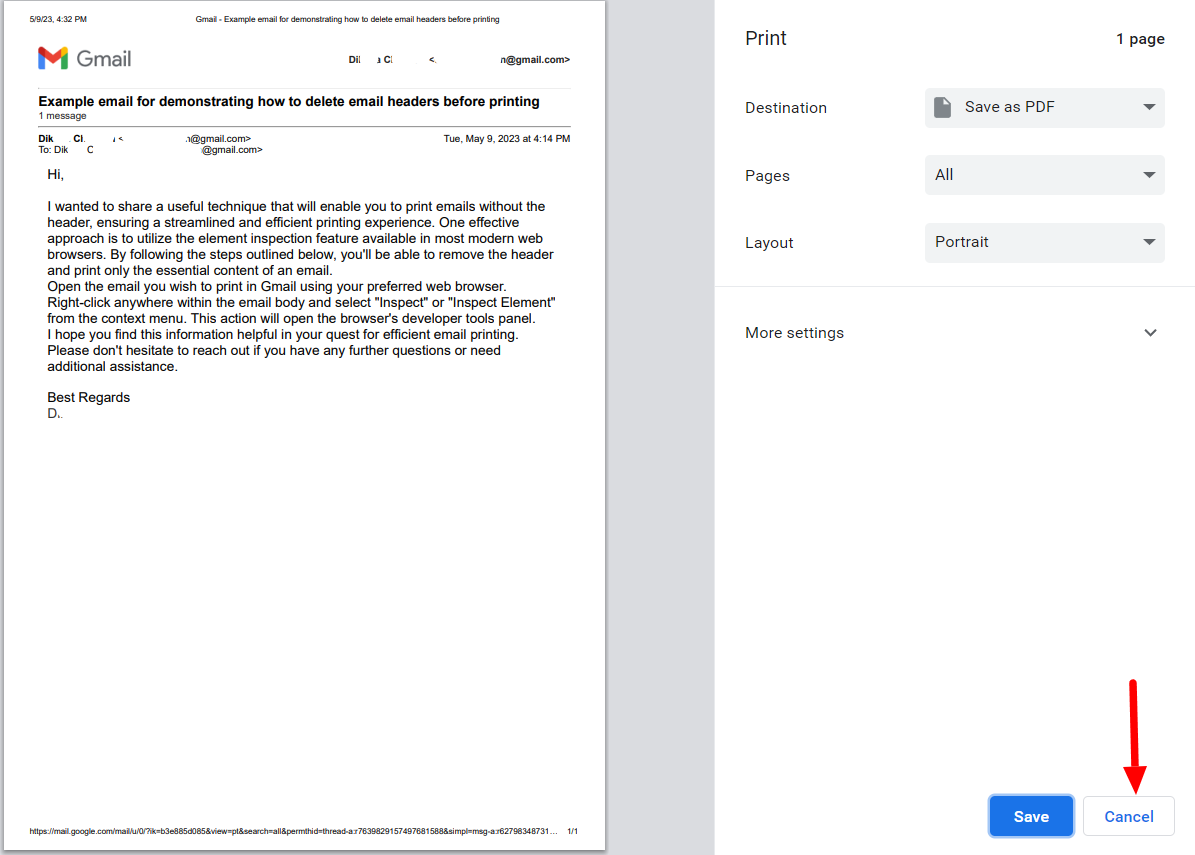
Step 2: Cancel print
This will open up a print preview window. Click “Cancel” here and you’ll be left with your email in a print view in your browser.
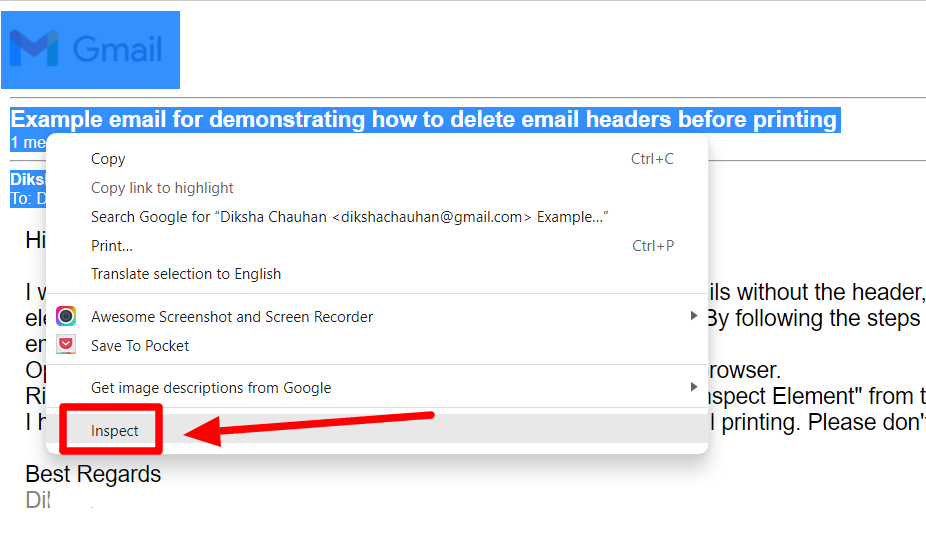
Step 3: Highlight the header
Select the elements that you want to delete in the email. This might include the Google Gmail logo, the sender’s email, the subject, and other details like the date and time of the received email.

Step 4: Inspect element
Now, right-click on the highlighted element and click “Inspect.”
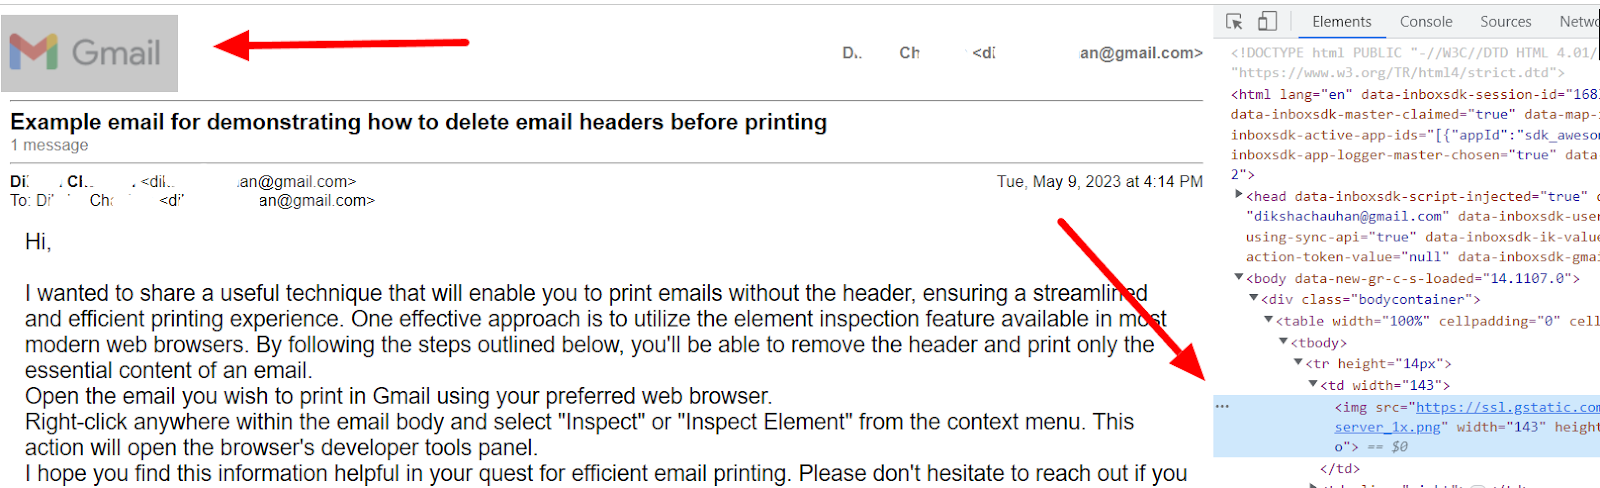
This will open up another window with the code for all the elements on the page. The element you’re highlighting will automatically be highlighted on this page, so don’t worry about knowing the code!
Step 5: Hide or delete element(s)
Now, right-click on the highlighted code and click “Delete element” or “Hide element” in the inspect element window. We’ll start by deleting the Gmail logo.
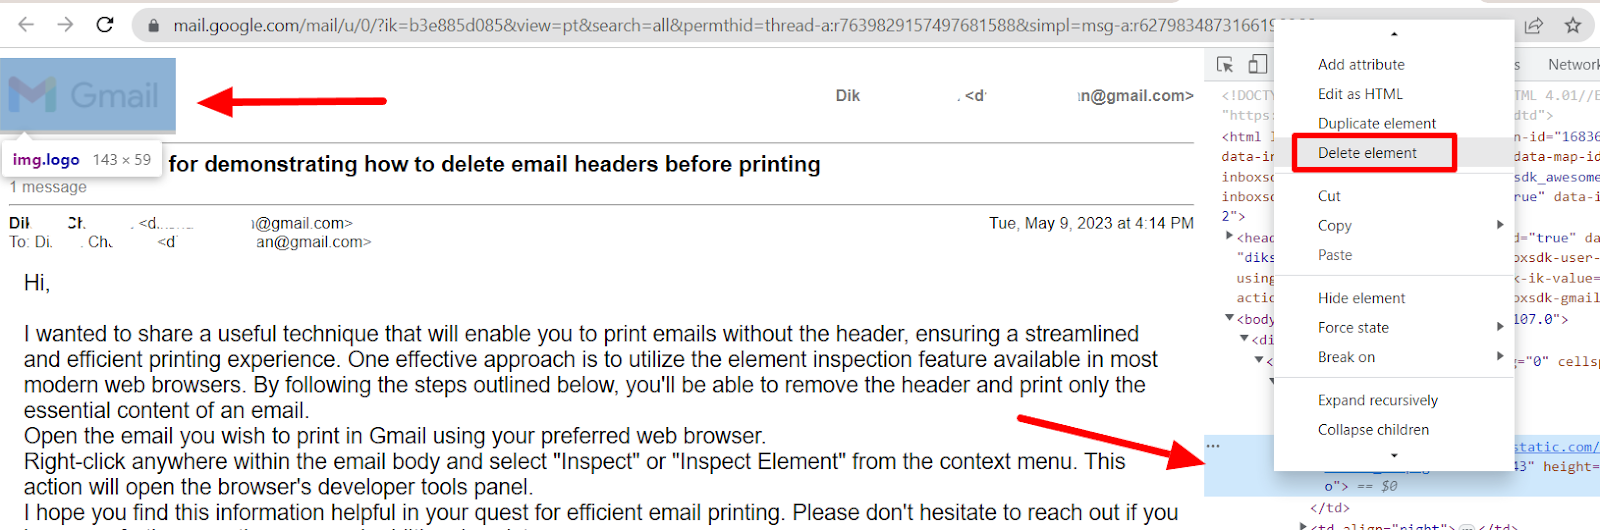
When you delete the element, it should disappear on the page like so:

And that’s it! You can go and eliminate whatever you need to from the header.
It’s important to remember a few things when using the inspect element on your browser:
- It's not permanent. You’re simply deleting the elements from the print preview window for the purpose of printing. The original email in your inbox remains unaffected.
- The code for different elements is located in different positions on the page, which is why it’s best to move element by element while using this technique.
- Spaces and padding around the text are also elements. You may highlight and remove them if you wish.
The main benefit of this technique is unlike using an extension, this method is entirely customizable to your needs. You may simply remove the Gmail logo and leave the rest of the information (like sender’s details) or remove everything but the body text.
When your email appears as you want it to before printing, you can simply close the inspect element window by clicking the “X” button in the top right of the window.

Step 6: Print the page
Lastly, right-click and select “Print” in the menu. You can also click the three dots button in your browser window and select “Print” there.

A print dialogue box will open up. Check the page and layout settings and click “Print” to print your email.

Find out other Gmail hacks on the YAMM blog
And that’s it! You now know how to print an email from Gmail without the header. The great thing about this technique is that you can use it to manipulate any of the elements on the page. While inspecting elements is a bit daunting, there’s no harm in getting it wrong! Just refresh the page and start again.
Knowing these kinds of tricks can really help save valuable time and boost productivity. If you’d like to learn more about Gmail hacks, why not head on to the YAMM blog? We’ve got tons of helpful tutorials just like this!