

We've all been there. You block someone on Gmail, and then a few weeks later you realize that you need to unblock them. Whatever the reason, unblocking someone on Gmail is a pretty simple process.
So what happens when you block someone on Gmail? In this article, we'll walk you through the steps to unblocking someone on Google and to unblocking all blocked email addresses.
So let's get started!
How to unblock an email address on Gmail
Step 1: Go to Gmail settings
You may be wondering how to see blocked contacts on Gmail, and the first step is to head over to your Gmail settings. You can access your settings by clicking the gear icon in the upper-right corner of your Gmail inbox and then selecting "See all settings" from the drop-down menu. A new tab or window will open, and you'll be directed to your Gmail settings.

Step 2: Go to the “Filters and Blocked Addresses” tab
Navigate to the "Filters and Blocked Addresses" tab, which is located on the top of the page next to the "Accounts and Import" tab.
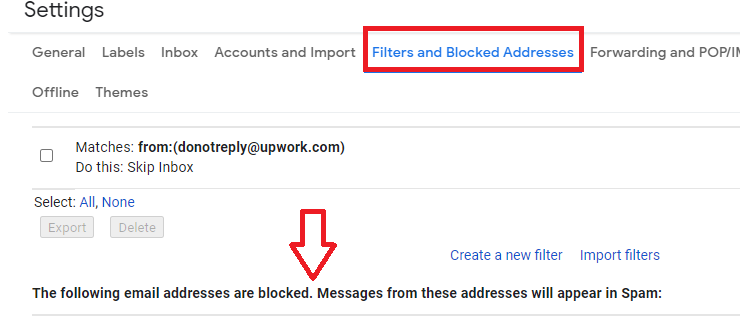
When you're in the "Filters and Blocked Addresses" tab, scroll down to the "Blocked Addresses" section. All of the email addresses that you've blocked will be listed here.
Step 3: Select and unblock email addresses
To unblock an email address, simply click the checkbox next to the email address that you want to unblock and then click the "Unblock" button.
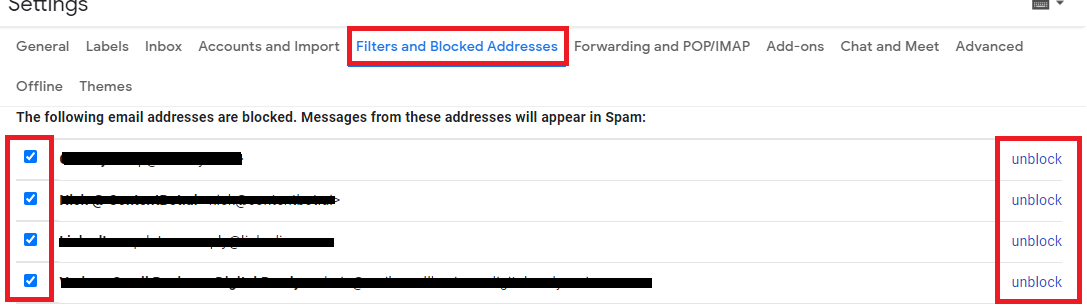
A pop-up box will appear, confirming that you want to unblock the selected email address. Simply click "Unblock" to confirm.

And that's it! Once you've unblocked the email address, all future emails from that address will go to your inbox.
However, keep in mind that these settings are only available on the desktop version of Gmail—you won't find them on the mobile app. Learn how to unblock emails on the Gmail mobile app, you'll have to search for specific emails from the person you want to unblock and then unblock them from within the message. It’s easier just to take care of it on your computer.
Now, let's say you want to unblock all email addresses you’ve previously blocked. Let’s take a look at how to do so on Gmail.
How to unblock all people on Gmail
Step 1: Go to Google Account
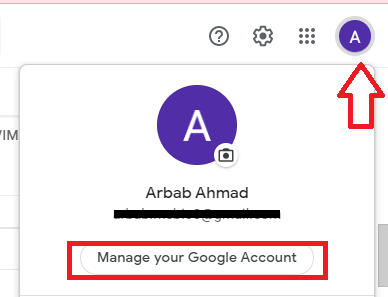
The first step to unblock all Gmail blocked addresses is to go to your Google Account security settings. You can access these settings by clicking on your profile picture in the upper-right corner of your Gmail inbox and then selecting "Manage your Google Account" from the drop-down menu. It'll open up a new page with your Google Account settings.
Step 2: Click “Protect your account”
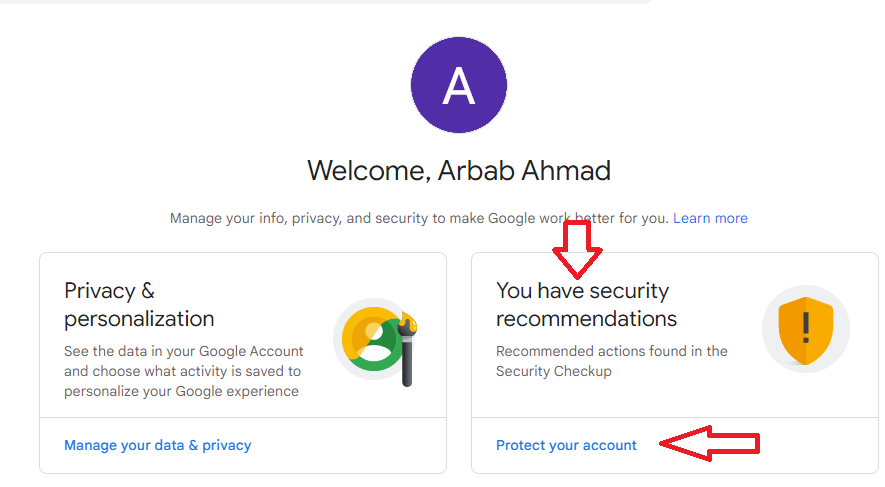
On the next page, scroll down to the "You have security recommendations" section and click on the "Protect your account" link. A new page will open with a bunch of security settings such as recent security activity and account recovery options.
Step 3: Click “Gmail settings”
On the bottom of the "Security Checkup" page, you'll see a drop-down link that says "Gmail settings." If you’re wondering how to see blocked contacts on Gmail, then this is where you’ll find them. Click on this link and you’ll be able to see all your Google blocked email addresses in Gmail.

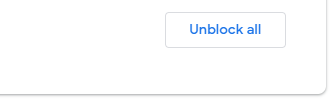
Step 4: Click “Unblock all” to unblock all email addresses
At the bottom of the blocked email addresses list, you'll see a button that says "Unblock all." By clicking this button, you’re effectively removing all email addresses from your Gmail blocked list. Since all of the blocked email addresses will be unblocked and you'll be able to receive emails from them again.
Unblocking someone is as easy as blocking them
And that's it! Those are the two ways to unblock someone on Gmail. As you can see, it's just as easy to unblock someone as it is to block them. So if you ever need to unblock an email address, now you know how to do it.
If you want to learn more about managing your Gmail inbox, be sure to check out our other Gmail tips and tricks. We've got a bunch of great articles that'll show you how to get the most out of your Gmail account. Thanks for reading!