
Gmail signatures are a great way to make a lasting impression. They are the final touch to emails and can be used to provide the recipient with important contact information.
With the help of Gmail email signatures, users can easily build relationships with colleagues, customers, and clients. Furthermore, they can be used to add a bit of flair to emails, making them more engaging and memorable.
In this post, we’ll show you how to change up your Gmail signature and offer some advice on signatures in general.
How to edit your Gmail signature
Given all the benefits of Gmail signatures, it would not be surprising if you already have one. If that’s not true, you can go ahead and follow this guide!
However, there is often a need to change and update your signature as per changes in your professional life. Here are the steps on how to edit your signatures in Gmail .
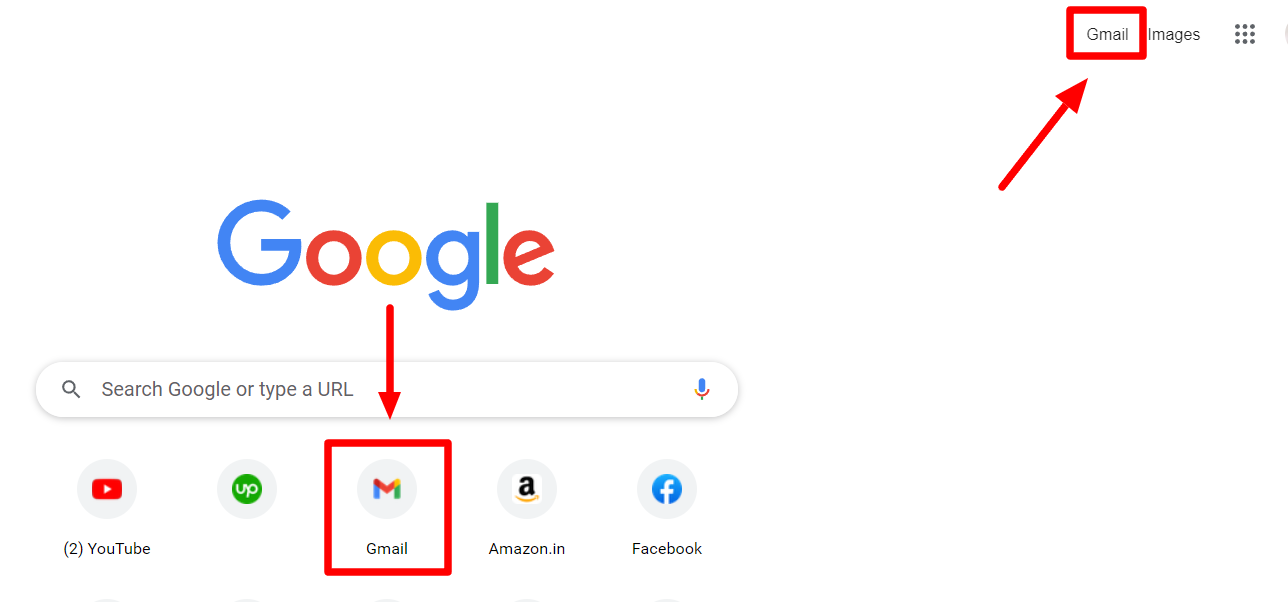
Step 1: Log into your Gmail account
Navigate to Gmail to get to your Gmail account. If Google is your homepage, you can simply open a new tab and find the shortcut in the top-right corner.
Step 2: Go to Settings
After reaching your Gmail inbox, click the gear icon on the top right corner to open the “Settings” menu. This will open the “Quick settings” menu only. So, click the “See all settings” to open the detailed settings menu.

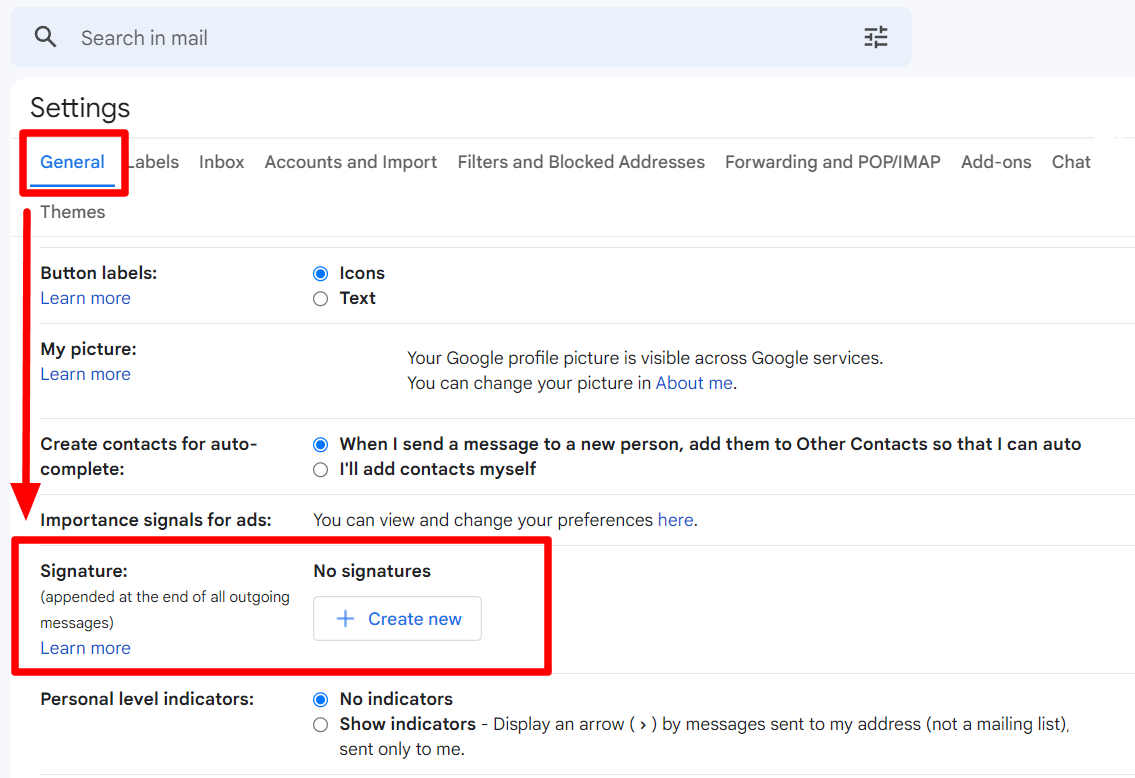
Step 3: Go to “Signature” under General tab
To find your current Gmail signature, look under the “General” tab. You’ll have to scroll down to find the “Signature” setting.
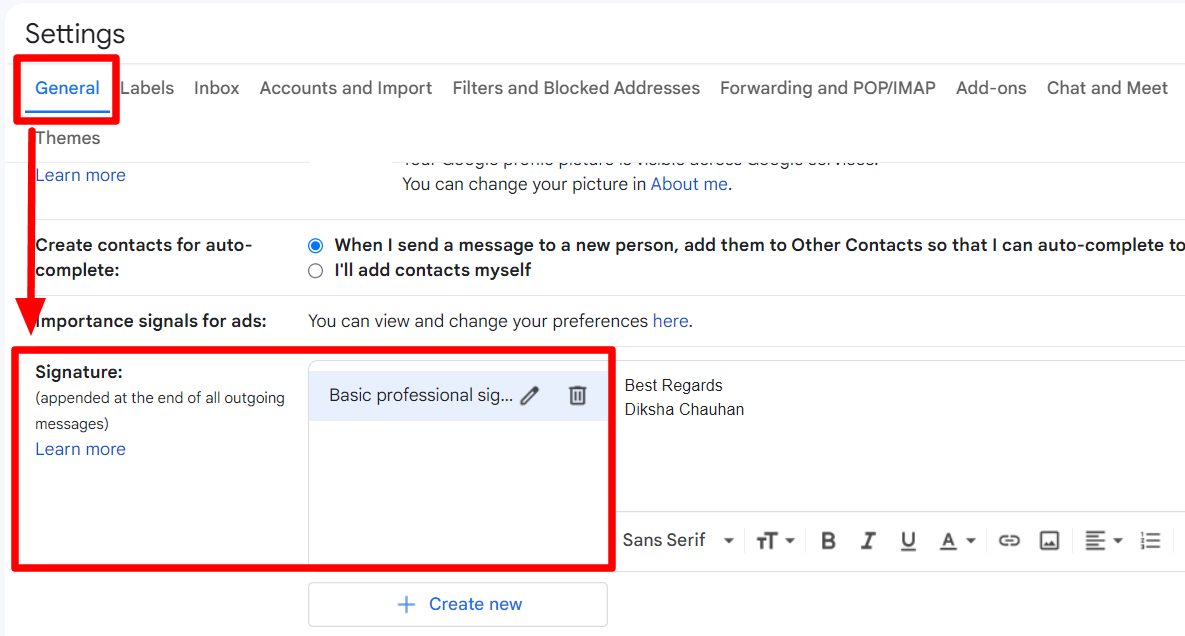
Here, you’ll see your existing signature. If you’d like to edit it, go to the next step. If you’d like to create a second signature, go ahead to Step 4b.
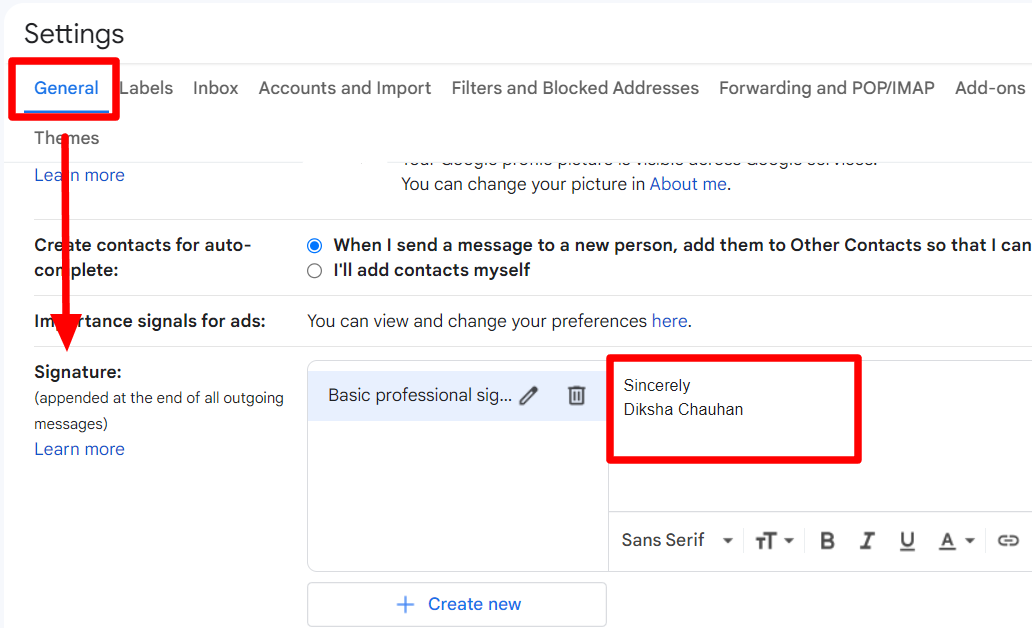
Step 4a: Edit your existing Gmail signature
To edit your existing Gmail email signature, simply edit the text in the Signature window next to the signature name.
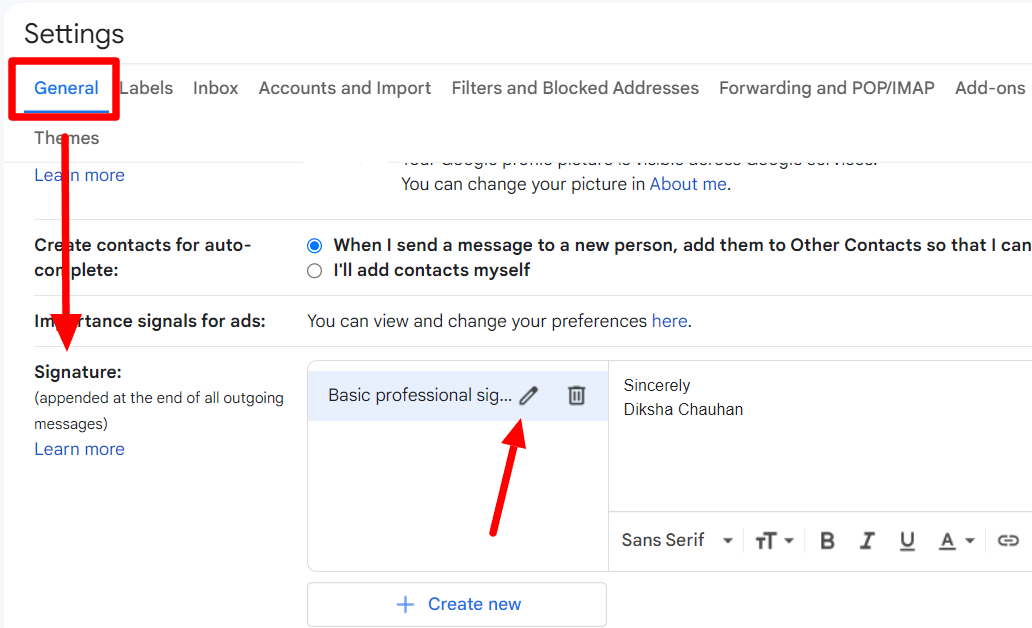
If you’d like to edit the Gmail signature name, you can do that by clicking the edit button next to it and entering the new desired name. After doing this, scroll down and click “Save changes.”
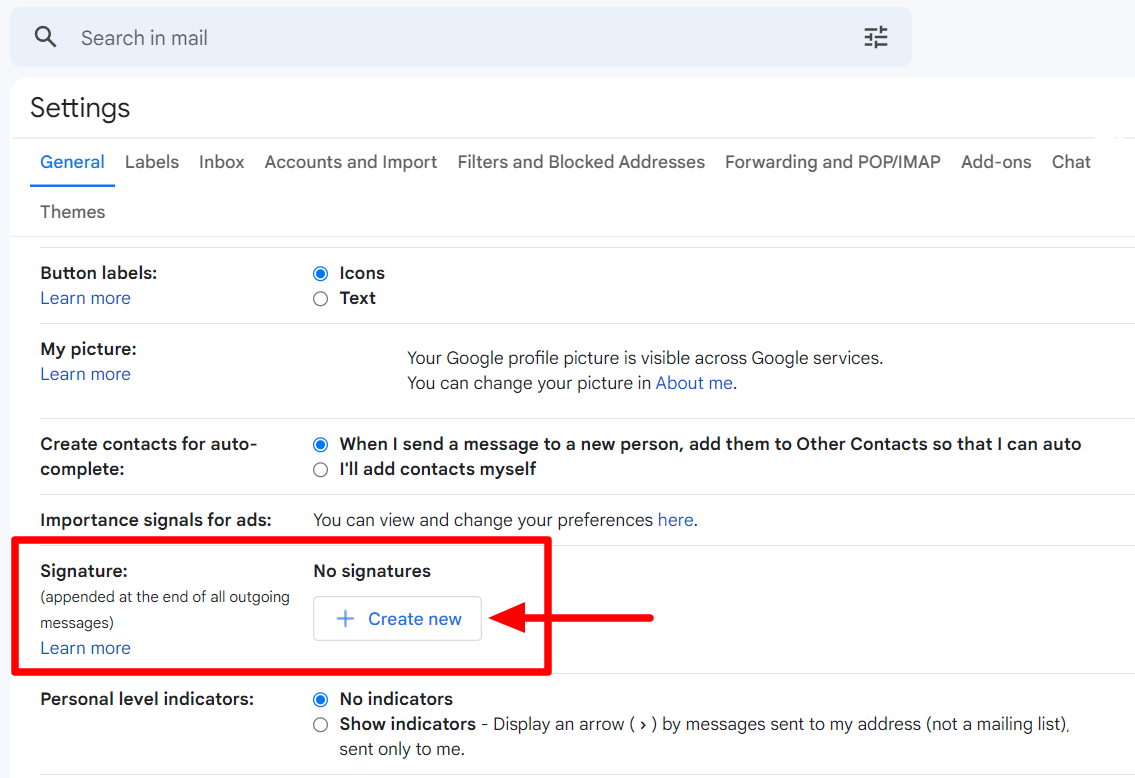
Step 4b: Create a new signature
Gmail allows you to have multiple signatures. If you want to create a new signature in Gmail, look under the General tab in the Signature setting.
Click “Create new” to start creating a new signature.
A new window will come up, and you’ll be prompted to provide a name for your new signature.
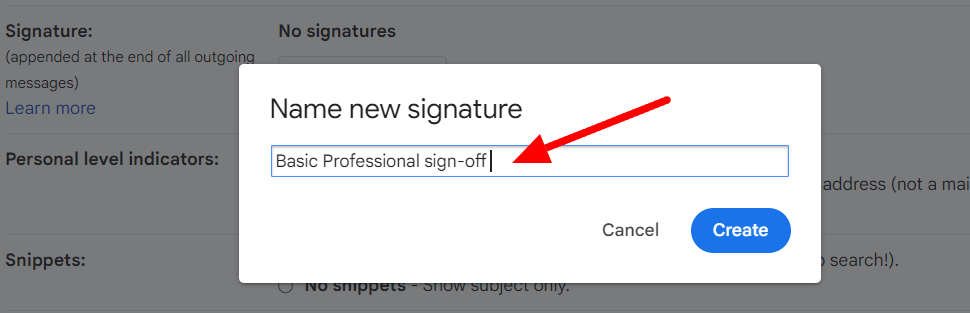
Input the name and click “Create.” Note that this is only the name for the signature and not the signature itself.
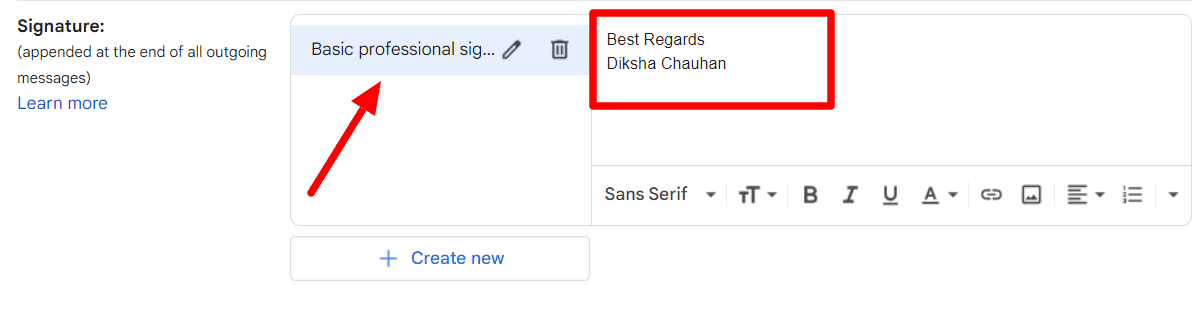
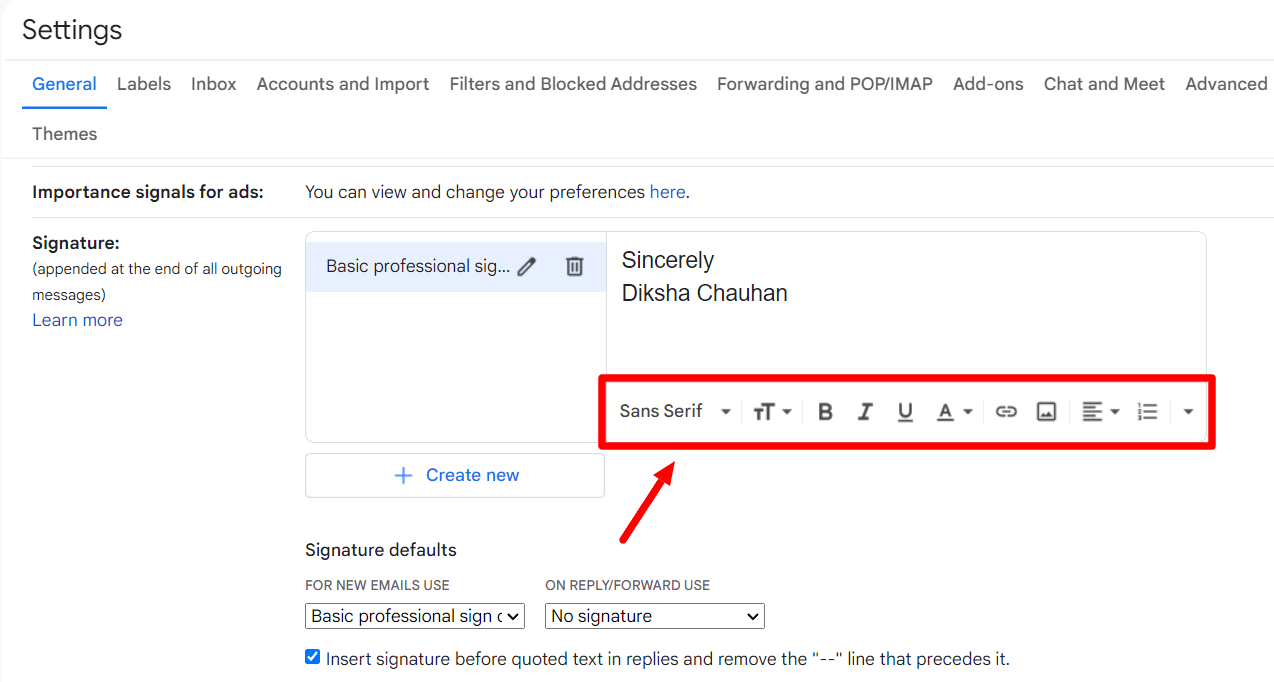
A new window will open in Settings after entering a signature name. Here, you can enter the signature that you want. You’ll see a formatting menu at the bottom of the text box. You can change the font type and size, italicize or bold your text from here. You can also insert a hyperlink in your signature or even upload an image.
When you’re done, don’t forget to scroll all the way down and click “Save changes.”
Step 5: Change your Gmail signature defaults
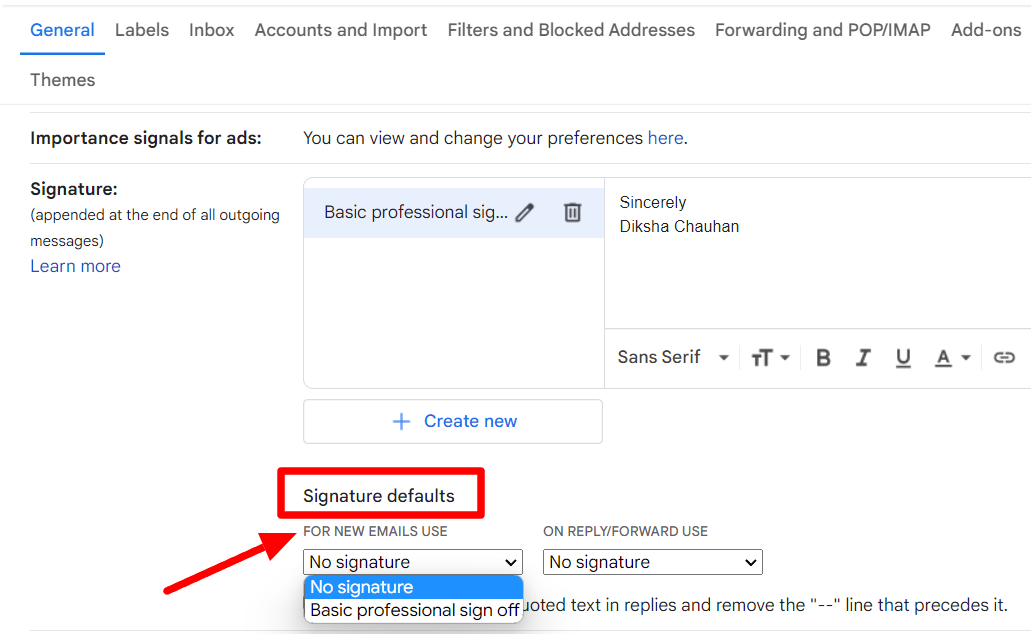
While you’re editing your Gmail signature, it’s also worthwhile to check your signature default settings. Signature defaults are the settings that dictate how and when Gmail uses your signature. If you have multiple signatures, this really comes in handy.
The first setting is for new emails. If you’d like to use your signature in new outgoing emails, you can select the name of the signature you’d like to include.
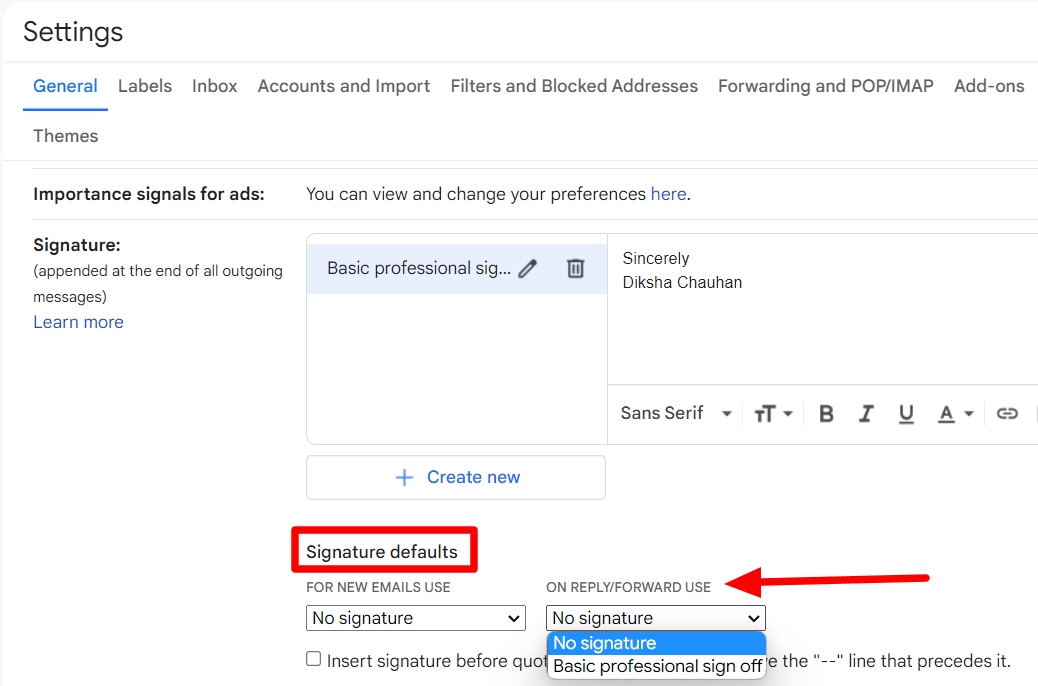
The next one is for setting up signatures for replies and forwarded emails. You can pick no signature or include any one of your already set-up signatures.
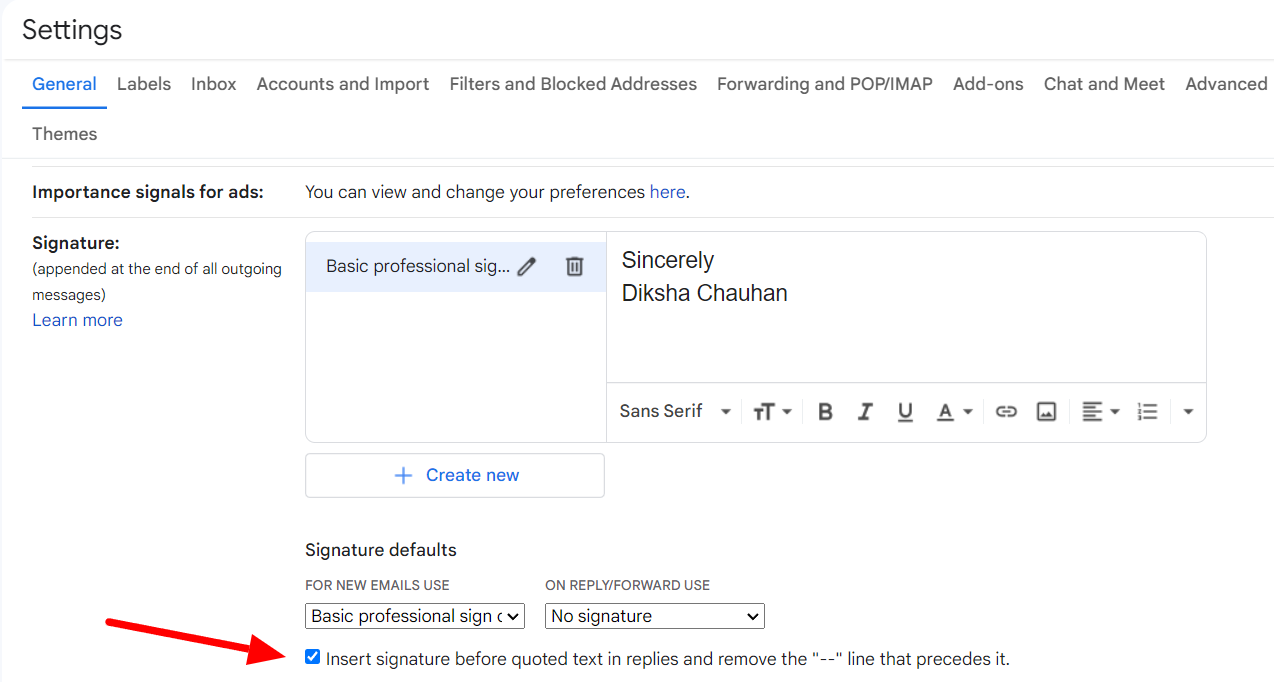
If you’d like your signature to show before the quoted text in emails and without the “--” line, you can check the box at the bottom of the signature email default settings.
Step 6: Save changes
It’s important to note that after making changes, you must scroll down on the Settings page and click “Save Settings.” This step will ensure that your settings are saved and take effect.
Step 7: Test out your Gmail signature
Now that you’ve set up all the settings for your new signature, you may want to test it to see how it looks under an email. Click the “Compose” button on your Gmail inbox page to do this.
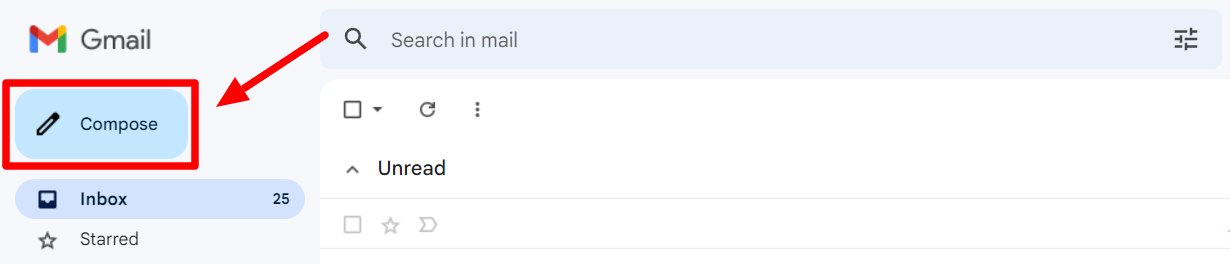
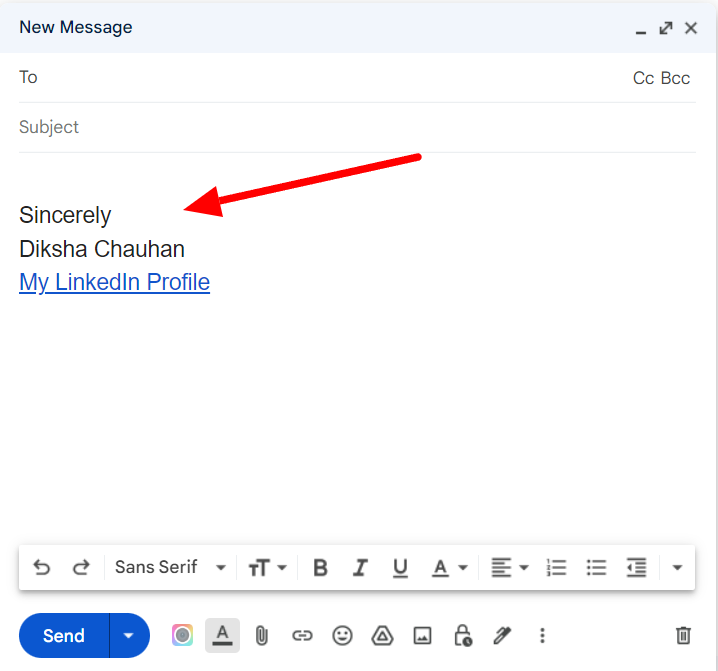
This will open a new message window, showing how your signature will be displayed at the bottom of a new email.
Our advice on adding Gmail email signatures
What to include in your Gmail signature
What you include in your Gmail signature is primarily dictated by whether you set it up for professional or personal emails. However, you can include your image, name, and preferred pronouns in both cases.
For professional or business emails, you may want to include important information, such as company name, website link, and contact numbers. If you have a branded business, including a company logo and your title is also essential. You can include the full address if you have a local business.
You have a little more freedom with a personal email signature. You can still add your website, contact numbers, and socials, but you can design them to reflect your personality or personal philosophy.
How to add an image to a signature in Gmail
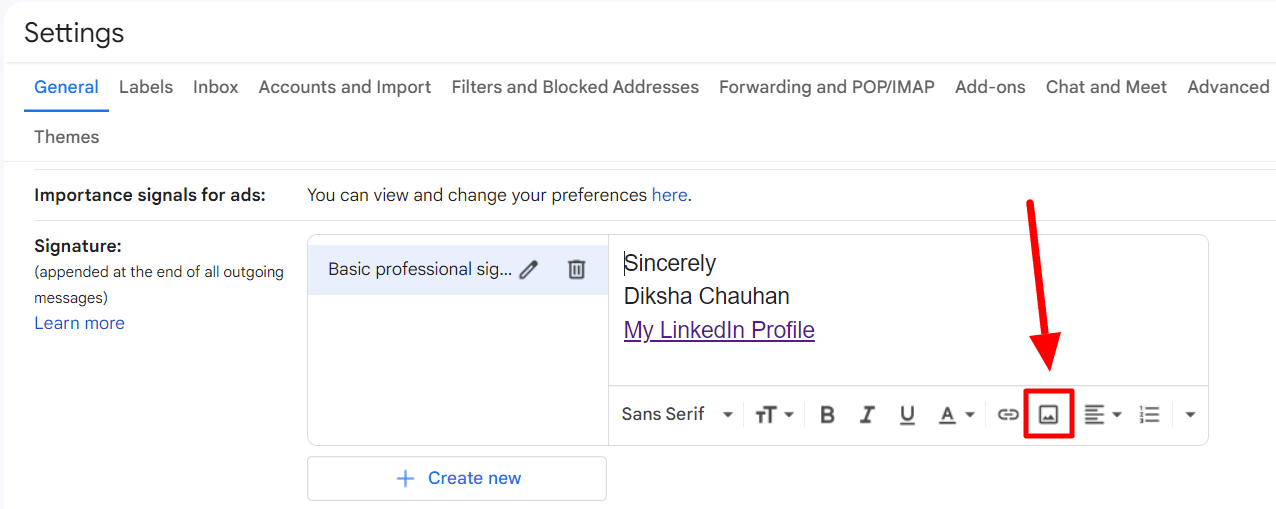
Adding your picture, a company logo, or a brand logo in the form of an image is a great strategy to stand out and make a lasting impression with your Gmail signature. Adding an image to a Gmail signature is easy.
In Settings, you’ll find an “Upload Image” button under the signature text box in the formatting menu. When you click this button, you’ll be prompted to select an image or upload a new one from your computer to be integrated into your signature.
If you're using this option, it may take some formatting to align and get the image as you want. That’s why it’s recommended that you use any signature design services available online to get a professionally designed custom signature that is easy to use.
How to remove Gmail signature altogether
If you’d like to remove your Gmail signature, there are a couple of ways to do that.
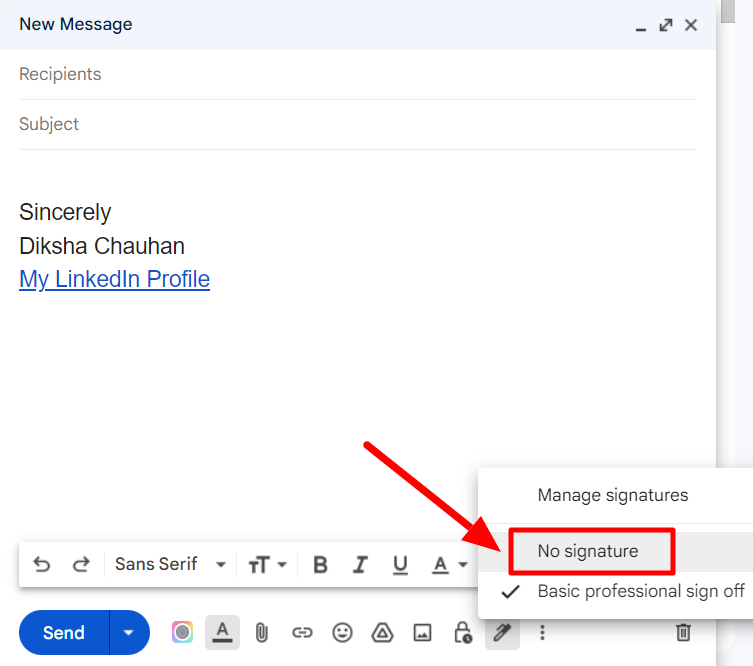
If you just want to remove signatures from one particular email, look for the “Insert Signature” button at the bottom of the new message window and click it.
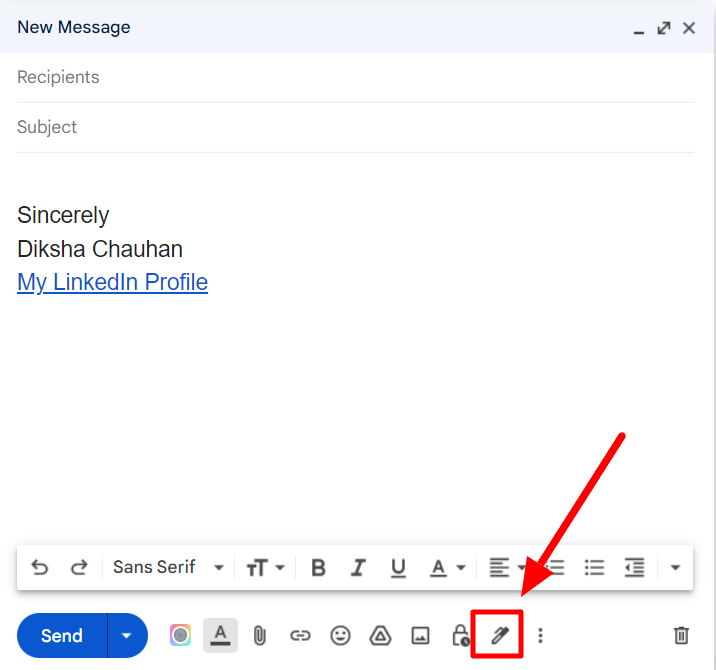
This will open a menu where you can click “No signature” to exclude a signature from just that particular email.
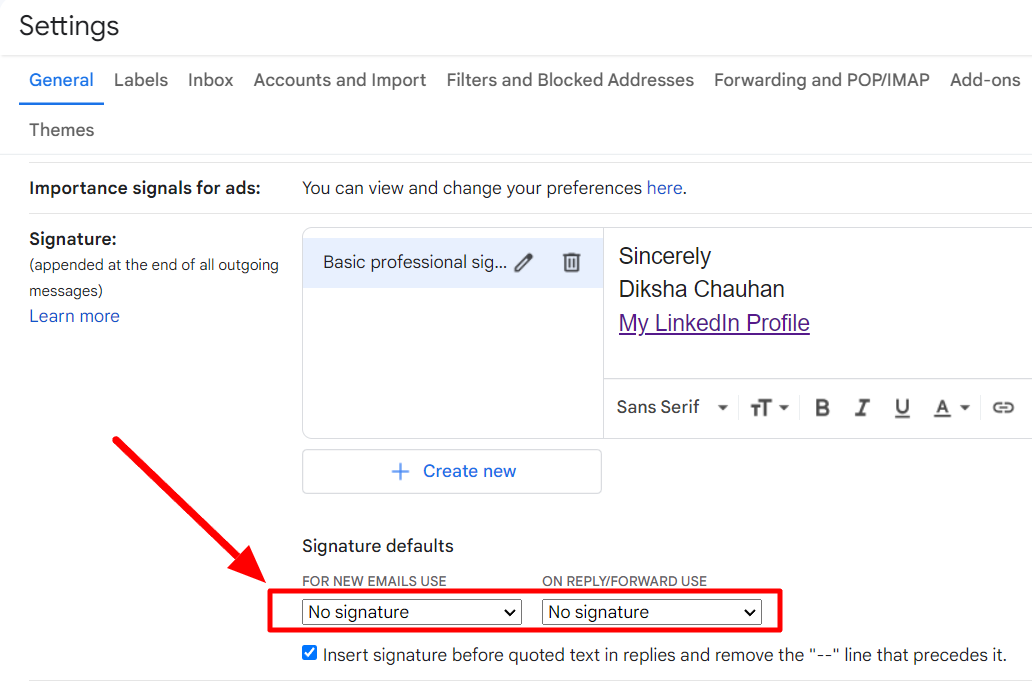
To make this setting permanent, you can again go to Settings and select “No signature” in your signature defaults. This will not delete the signature from your Gmail account, and you can still choose to use it later if you need to.
If you want to remove signatures because you’re facing issues, try this signature troubleshooting guide.
Learn everything you can do on Gmail at the YAMM blog
To sum up, setting up and changing Gmail signatures is easy and can be done in a few simple steps. Gmail offers many features to make your signatures stand out and reflect your brand or personality to make a lasting impression on your recipients.
Gmail has many other features that can help your brand or business. If you want to learn about the other features of Gmail and how to leverage them to your advantage, check out the YAMM blog.