
Using inline images in Gmail can be a great way to spice up your emails and make them more engaging. Whether you're sending out a newsletter, a promotional email, or just want to share something with your friends and family, adding pictures to emails can help draw attention.
In this article, we'll outline how to put an image in the email body in Gmail so you can start sprucing up your emails. From finding and inserting an image into your email to making sure it looks right, we've got you covered.
So let's get started!
How to embed a picture in email on Gmail
Step 1: Go to Gmail
The first step is to launch your Gmail account. To do this, open up a browser window and go to Gmail. You will then be asked to enter your Gmail address and password.
Step 2: Compose an email to embed an image
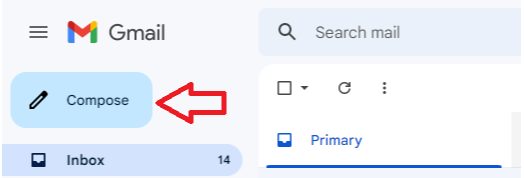
To insert pictures into the body of the email, you’ll need to compose one first. To do this, click on the "Compose" button that’s located at the top left of your email window.
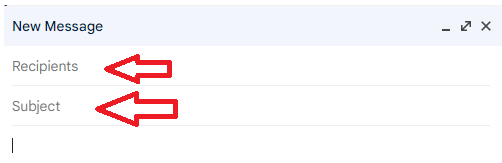
This will open up a new window where you can compose and send out your email message. Simply enter the email address of the recipient, type in your message, and then move on to the next step.
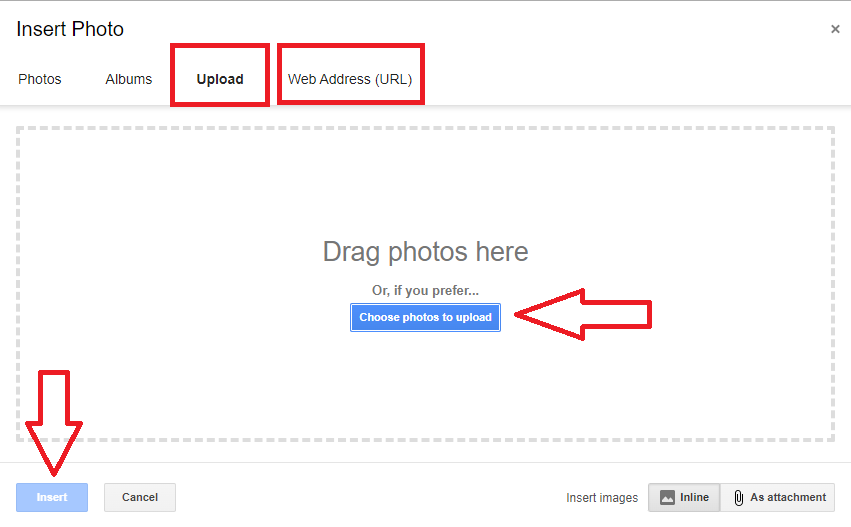
Step 3: Click “Insert photo” to insert pictures into the email body
Now you will need to embed the image into the email message. To do this, click on the "Insert photo" button that is located at the bottom of the message window. This will open up a new window with your most recent photos and images, as well as options to upload a new one or search the web for an image.

Step 4: Choose your image
If you would like to upload a new photo from your computer, simply click the "Upload" option and then select the image you want to add. Once the image has been uploaded, click on the "Insert" button to add it to your message.
If you would like to search for an image online, simply click on the "Web Address (URL)" option and paste the URL of the image into the search box. Once you have found an image that you like, click on the "Insert" button to add it to your message.
The image will be inserted as an inline image, meaning it will be visible in the body of your email.
Step 5: Resize and edit the alt text
Once you have inserted your image, you can resize and move it around. To do this, simply click on the image and drag the corners to resize it. You can also add a caption or alt text to the image by clicking on it and then selecting the "Edit Alt Text" option.
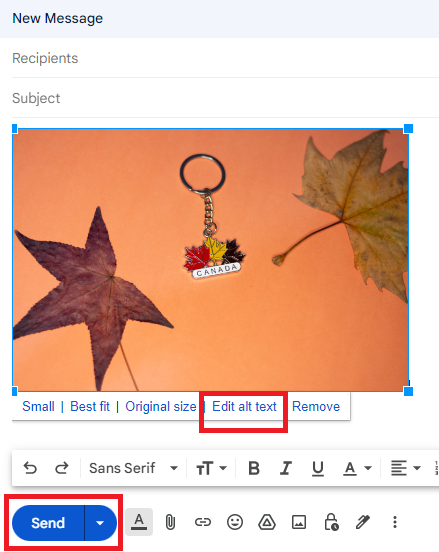
This will open up a new window where you can enter the description of your image and then click ''Apply'' to save your changes. Alt text is important for accessibility purposes because of the use of screen readers.
And that's it! You have now successfully inserted an image into your Gmail email message. Now all you have to do is send it out and wait for the recipient's response.
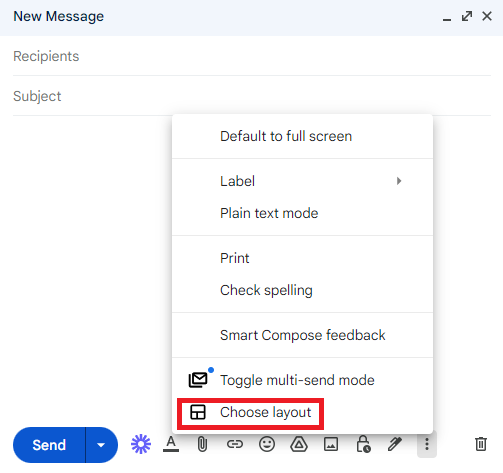
However, using the regular Gmail interface can sometimes feel a bit limiting when it comes to inserting images inline. There are no alignment options this way. Thankfully, Gmail Layouts offer an alternative—you can use them to customize your emails and add much more sophisticated inline images.
Using Gmail Layouts for inserting images into the email body
What are Gmail Layouts?
Gmail Layouts is a feature in Google Workspace that allows you to add images and text inline in your emails. By using Gmail Layouts, you can create beautiful emails that look more like newsletters than plain-text messages.
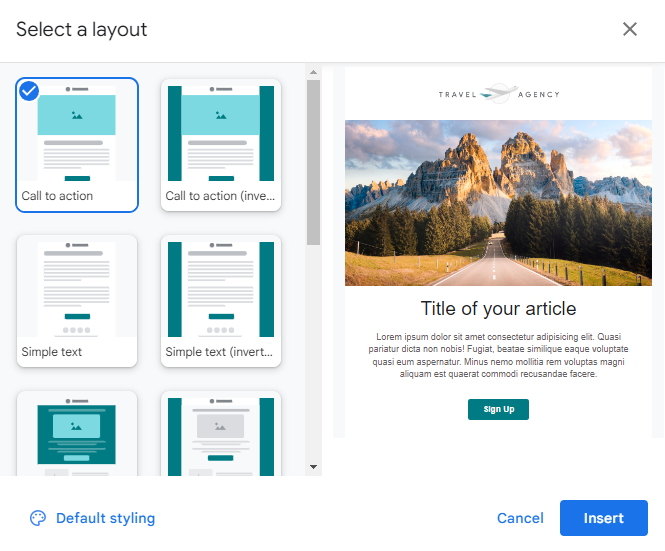
You can customize your layout by adding images, formatting text, changing fonts and colors, and more. This makes it easier to share information with your contacts in an organized and aesthetically pleasing way.
It also allows you to include images that are typically difficult to insert into emails, such as cards, infographics, and logos. You can use pre-made templates to quickly create a great-looking email or create your own from scratch.
Once you have the layout ready, you can send it to your contacts just like any other email in Gmail. You can also save the layout as a draft and edit it later, or schedule the email to be sent at a different time.
However, to use Gmail Layouts, you need to have a Google Workspace account. If you don't have one, you can sign up for a free trial and enable the feature. Once you've enabled the feature, you can start creating amazing emails with Gmail Layouts.
Benefits of using Gmail Layouts
Gmail Layouts allow you to insert a template with a designated alignment of images. Using a regular email only allows you to resize the image to fit the text, but with Gmail Layouts, you can create a much more visually appealing email. It also saves time by being able to quickly insert images and format text with just a few clicks.
Gmail Layouts is also helpful for creating emails that are more engaging and eye-catching. You can add attention-grabbing images, buttons, and other elements that draw people in and make them want to click through your emails.
Plus, it's easy to use and requires no coding knowledge, so anyone can create beautiful, custom emails in minutes.
Step up your email game with great image layouts
So, there you have it—a guide on how to put an image in the email body on Gmail and using Gmail Layouts to create eye-catching email content. With these tips, you'll be able to add beautiful images to your emails and stand out from the competition.
So, what are you waiting for? Start creating amazing emails with Gmail Layouts today and take your email game to the next level! Good luck, and happy emailing!