
Google Sheets is the go-to option for many people when it comes to handling a large quantum of data. However, with large quantities of data comes the problem of proper categorization and segmentation.
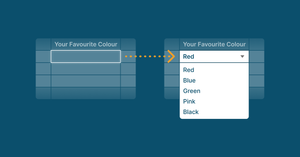
Drop down lists or menus are a great way to achieve that segmentation. Unfortunately, the ability to create drop down menus in Google Sheets isn’t something that everyone has, especially people who are new to Google sheets.
If you’re one such individual, then this guide on creating a drop down list in Google Sheets was made for you. In this guide, you’ll not only learn how to insert a drop down list in Google Sheets but also how to remove it.
How to Make a Drop Down List in Google Sheets
Step 1: Sample Google Sheet to add drop down menus in
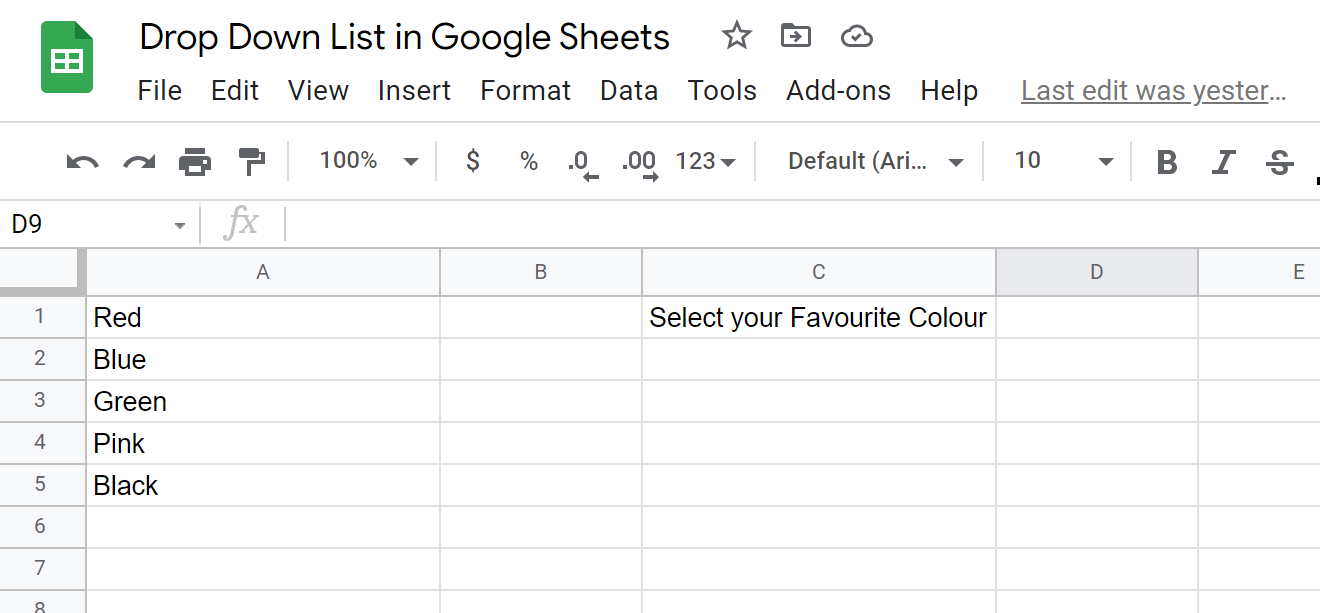
To learn how to create a drop down list in Google Sheets, you need a spreadsheet ready. The Google Sheet that I will be using has some colours stored in one column and using that data I want to create a dropdown in the adjacent cell.
Step 2: Creating a Drop Down List in Google Sheets with Data Validation
To add a drop down list in Google Sheets, we are going to use a feature known as Data Validation. Data Validation in Google Sheets allows you to set certain parameters around numbers, dates, and text that prevent you from making input errors.
To add the drop-down list in Google Sheets follow these steps:
- Select target cell where the drop-down has to be

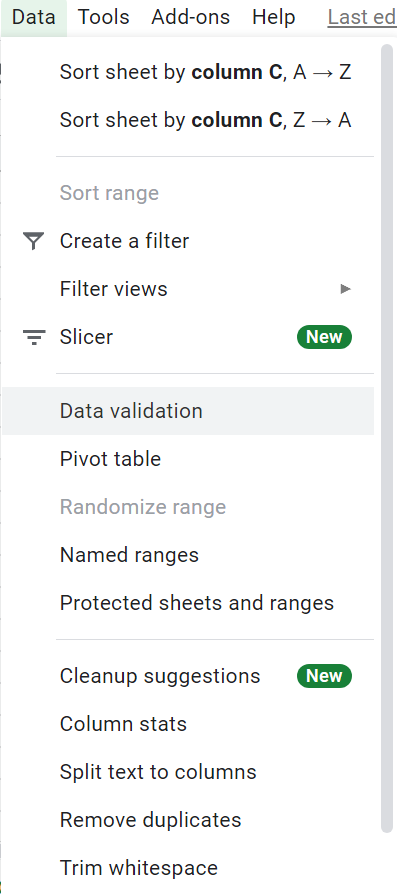
2. Click on Data and select Data Validation.
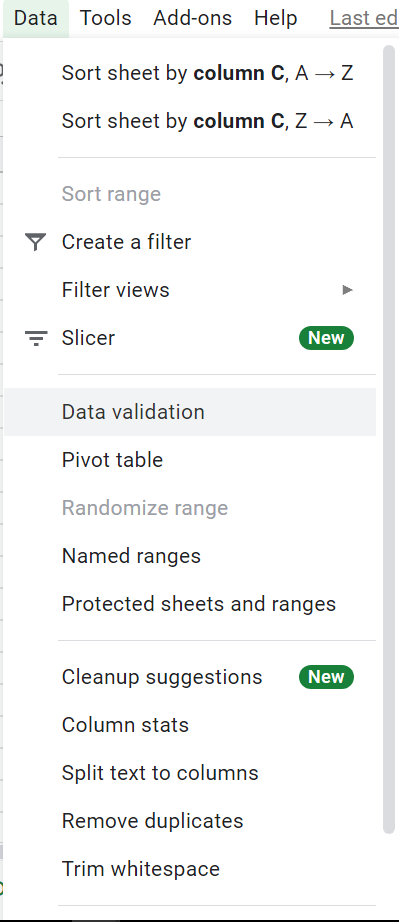
3. On clicking Data Validation, it will bring up a box where you need to add some further details.
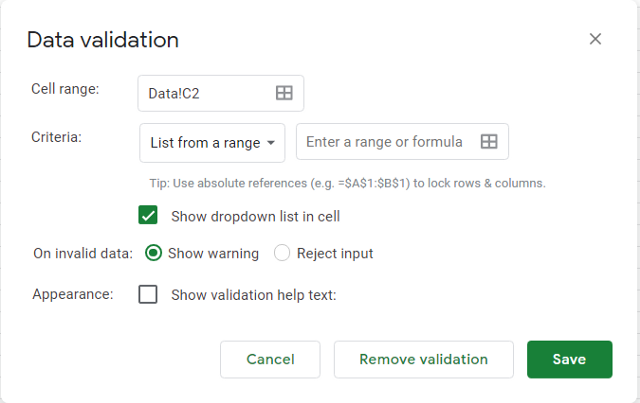
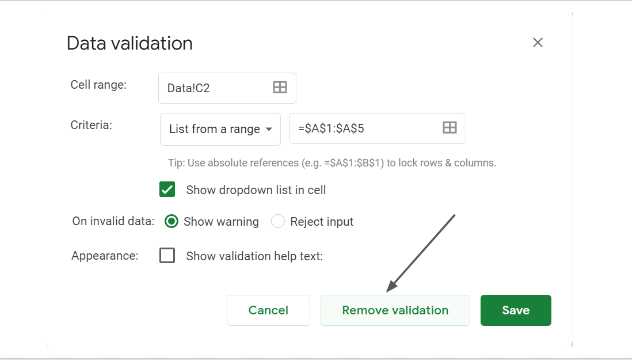
Here you need to specify the cell range where you want to add the dropdown. Next, you need to specify the criteria for Data Validation. Since we already have a range from which we need to create the dropdown, we are going to specify the range in the box. After filling in all the details, the box should look like this.
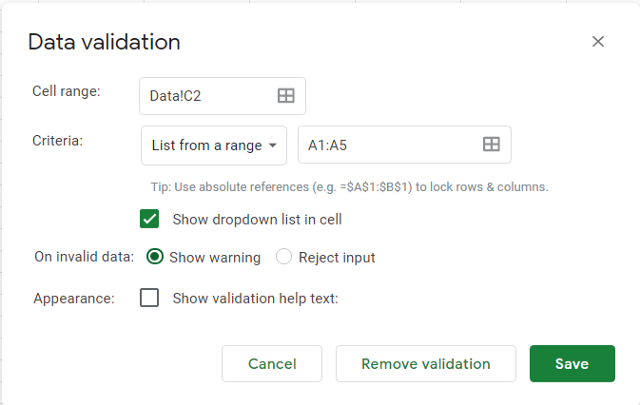
After filling in the details click on Save.
Need help in removing duplicates on your Google Sheets? Learn how here.
Step 3: Check the Dropdown in Your Google Sheet
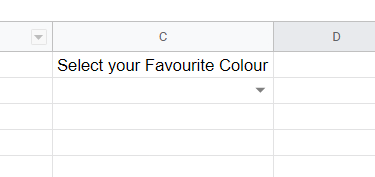
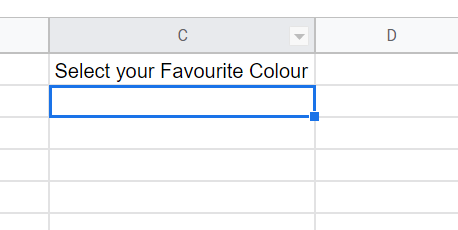
On clicking the Save button, you will see a dropdown in the Google Sheet’s cell specified by us.
If you click on the down arrow, you can see all the contents have successfully come into the dropdown menu in the Google Sheets.
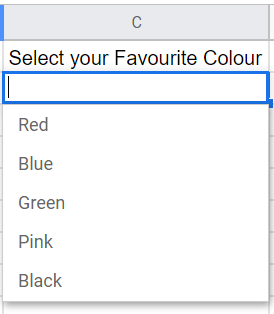
Here you can select the value from the dropdown list provided. If the user puts in a value that is outside the given range, it will show an error.

Here I have put in a colour outside the given range, giving me an error saying the input must be present in the range.
Step 4: How to Remove Drop Down List in Google Sheets by Removing Data Validation
Until now we have added the data validation, specified some criteria and created the dropdown list, now let’s go ahead and delete the dropdown. Here are the steps you need to follow in case you’re wondering how to remove a drop down list in Google Sheets:
- Select the cell where the dropdown is added

2. Open Data and select Data Validation.
3. Click on Remove Validation.
4. Upon removing the data validation, the dropdown will get removed from the selected cell.
Here you can see that the Dropdown has been removed from the cell.
Need help with Google Sheet Formulas? Learn these 9 useful formulas for efficiency.
Summary: How to Create a Drop Down Menu in Google Sheets
In this blog, we saw how to add a dropdown in Google Sheets using Data Validation.
If you prefer watching a video, we have got you covered.
I hope you have understood how to create and delete dropdowns in Google Sheets using Data validation. You can send your feedback to aryanirani123@gmail.com.