
If you want to stay on top of your messages, learning about the different Gmail forwarding settings becomes crucial. Forwarding settings allow you to automatically send incoming emails to another address, ensuring you never miss an important message.
In this post, we’ll look at the different types of forwarding options that Gmail offers. We’ll also break down the step-by-step process of setting up each so you get the most out of this option. Ready? Let’s get into it!
What is forwarding in Gmail?
Forwarding in Gmail simply means sending an email from your inbox to another. Whether you send an email to another individual’s email address or even another one of your email addresses, it’s still called forwarding.
Gmail offers two options for forwarding emails from your inbox: manually and automatically. Learn how to forward emails in Gmail manually and automatically.
While you can forward emails manually and even forward a whole email chain in Gmail, automatically forwarding emails is particularly helpful if you manage multiple email accounts. To do this, you have to add a forwarding email address to your Gmail account.
How to add a Gmail forwarding address
Here’s how to add a forwarding address to your Gmail account.
Step 1: Go to Gmail forwarding settings
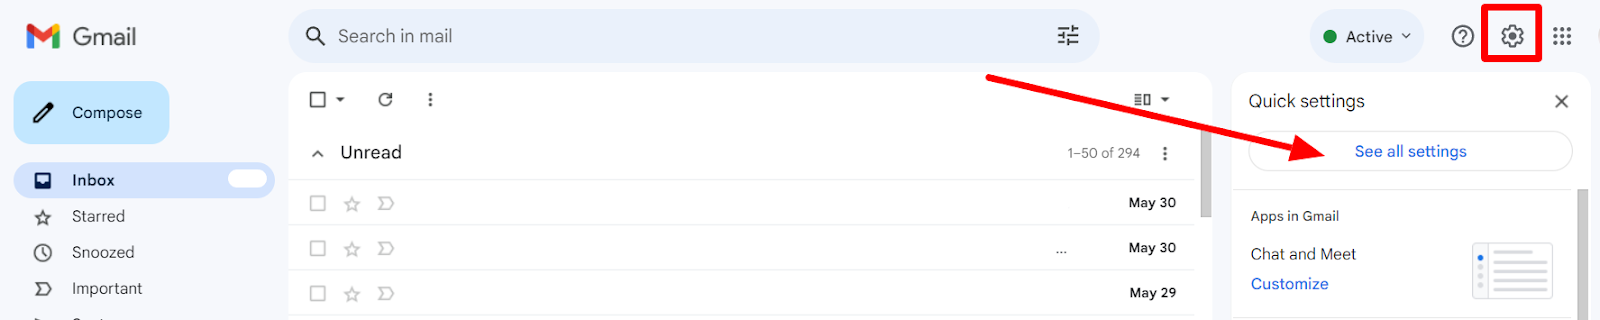
Click the Settings button (Gear icon) in the top right corner, then click ‘See all settings.’
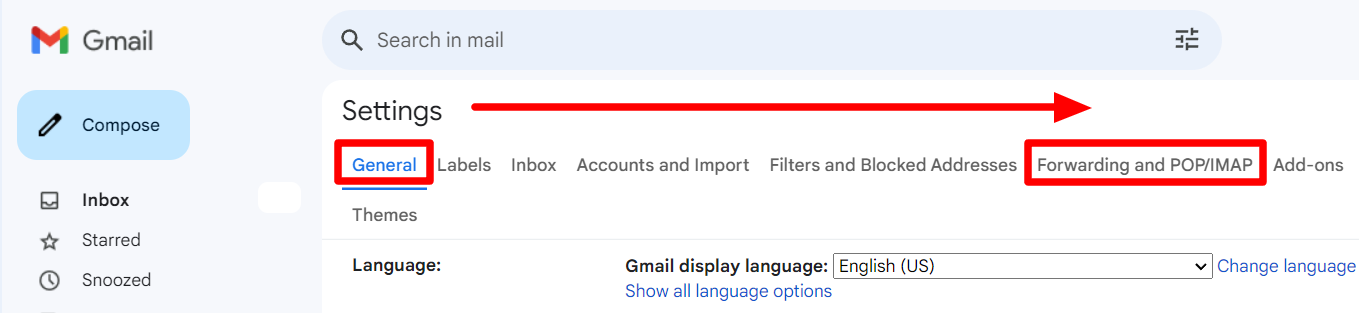
Toggle over to the ‘Forwarding and POP/IMAP’ tab from the ‘General’ tab.
Step 2: Add a forwarding address
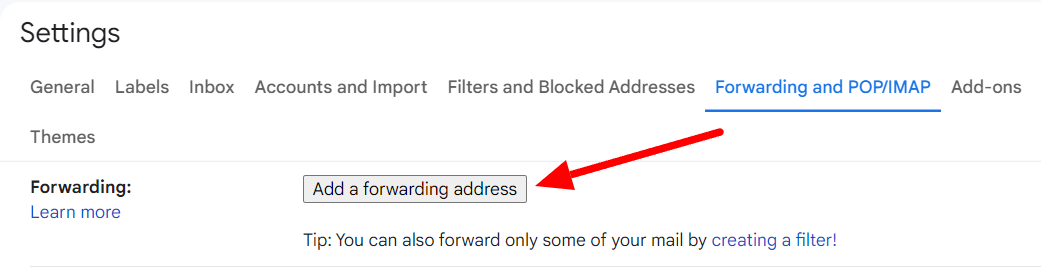
Click on the ‘Add a forwarding address’ button.

Enter the email address to which you want to forward your emails and click ‘Next.’ Google may require you to prove your identity at this point.
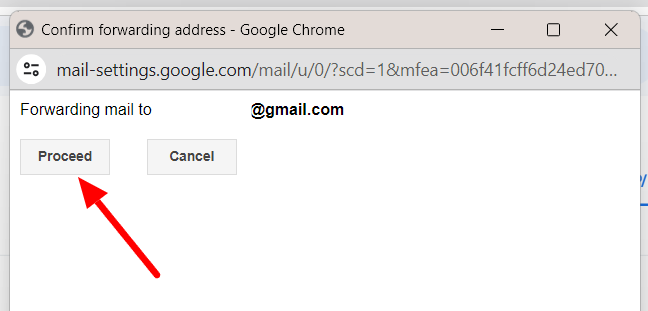
Check that the correct email address is displayed in the next window and Click ‘Proceed.’
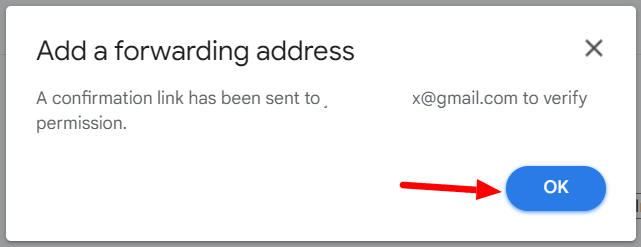
Google will now require you to confirm this address by clicking a sent link.
Step 3: Verify the address you chose
Sign into the Gmail account associated with your desired forwarding email address.

Find and click on the email from Gmail with the confirmation link.
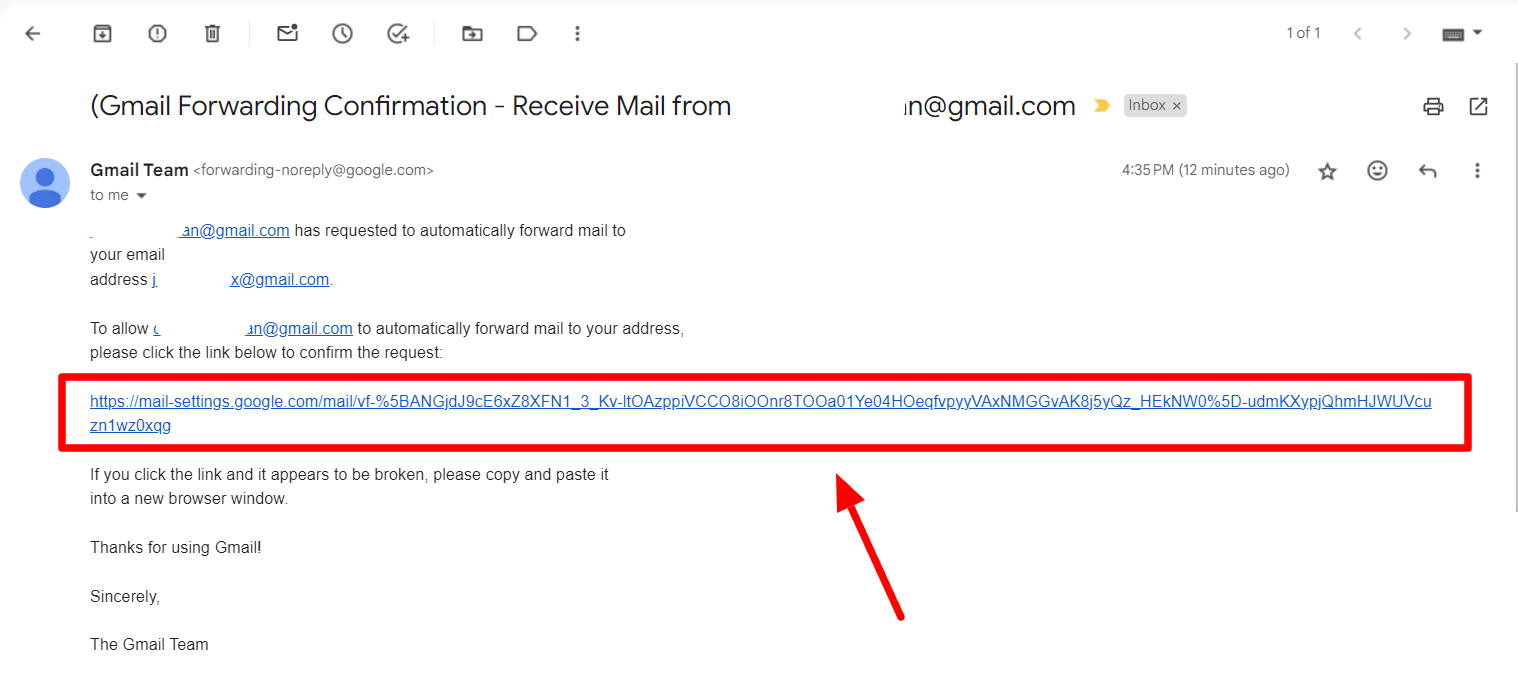
Click on the link to verify the forwarding email address.
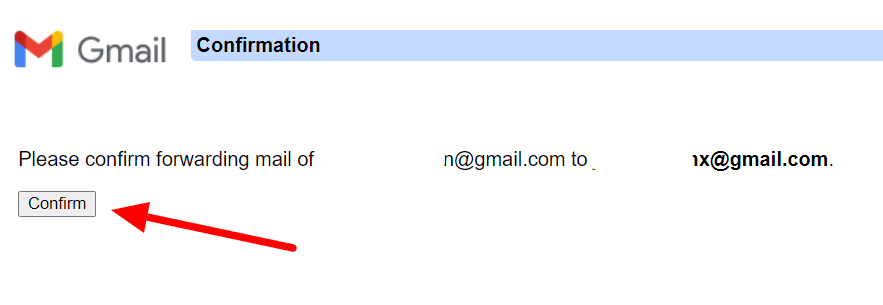
Click ‘Confirm’ on the window that pops up.
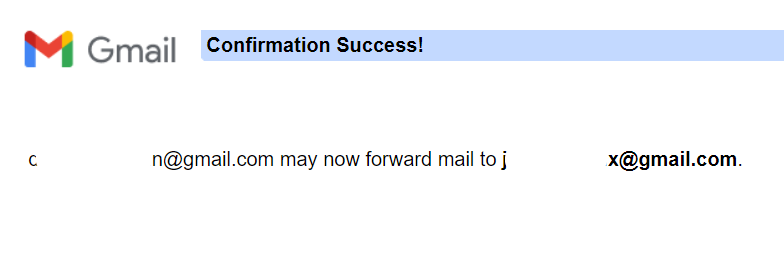
Gmail will now show a confirmation window. There’s one more step left, though.
Step 4: Save changes
Return to your Gmail settings for the primary account.
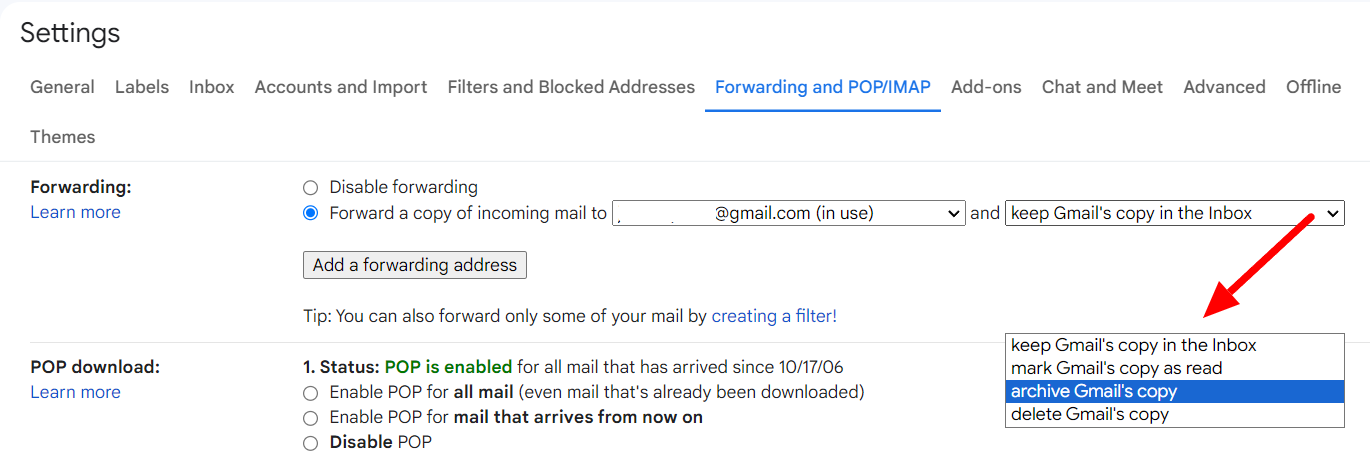
Select the ‘Forward a copy of incoming mail’ option under the ‘Forwarding and POP/IMAP’ tab and select what you want Gmail to do with the emails received in the primary account.
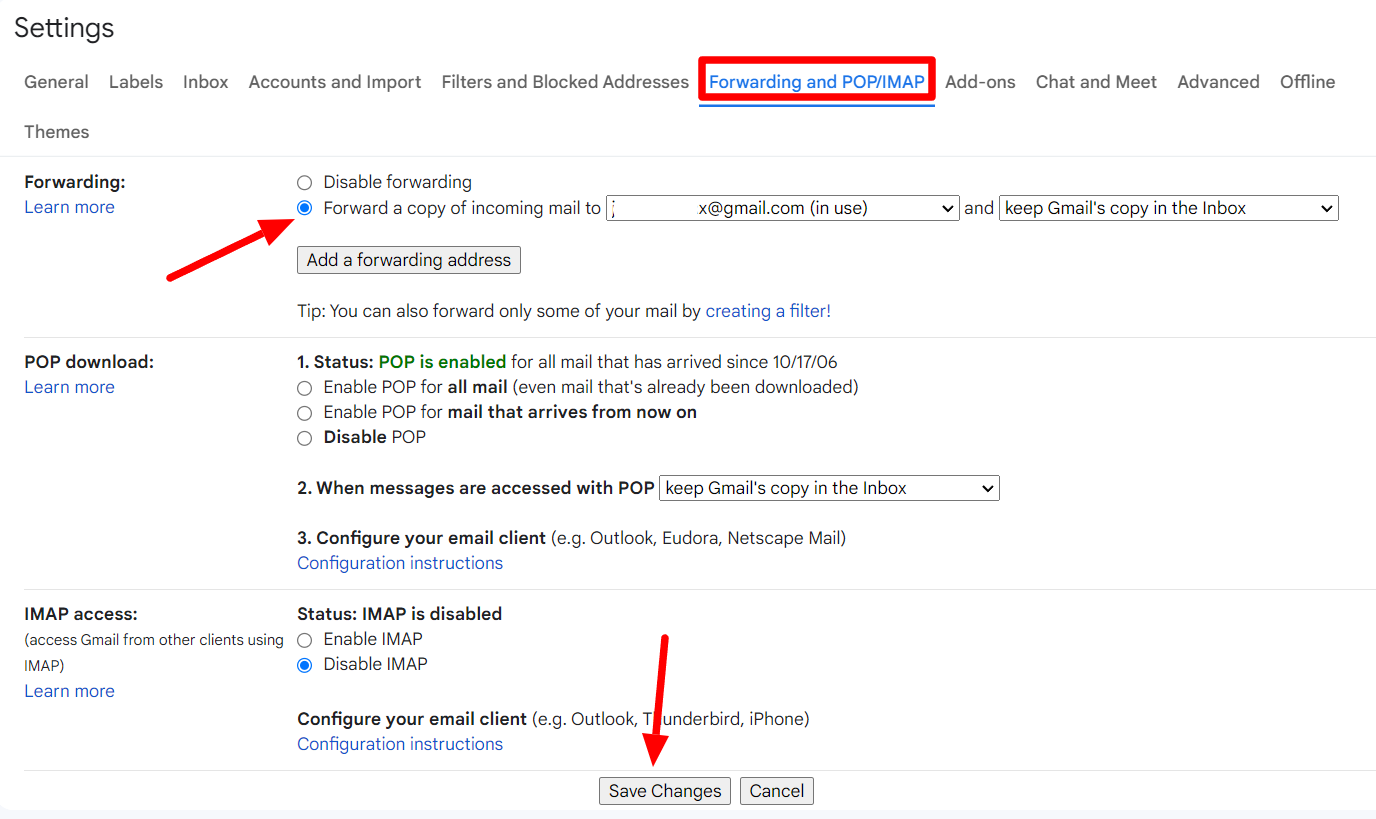
When satisfied with your selected option, click ‘Save Changes.’ Your emails will now be forwarded to the forwarding email address.
The above method ensures that all your emails are forwarded to a forwarding address. However, sometimes, you may want only specific emails to be forwarded to another email address. In such a case, you can set forwarding rules in Gmail.
How to set forwarding rules in Gmail
Here’s how you can ensure that only specific emails are forwarded to another address.
Step 1: Open advanced search options

Click the ‘Show search options’ button next to the search field.
Step 2: Set your criteria
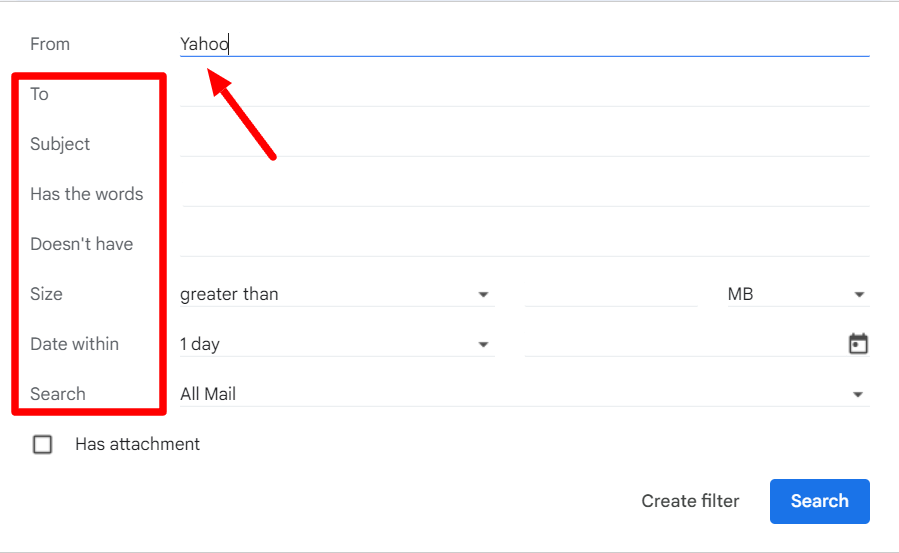
Here, enter the specific criteria to isolate the emails you want to be forwarded. You can use the ‘From’ criteria to forward email addresses from a particular email address. You can also choose to filter these emails based on other factors like ‘to,’ ‘subject,’ ‘size,’ and more.
Step 3: Create a forwarding filter
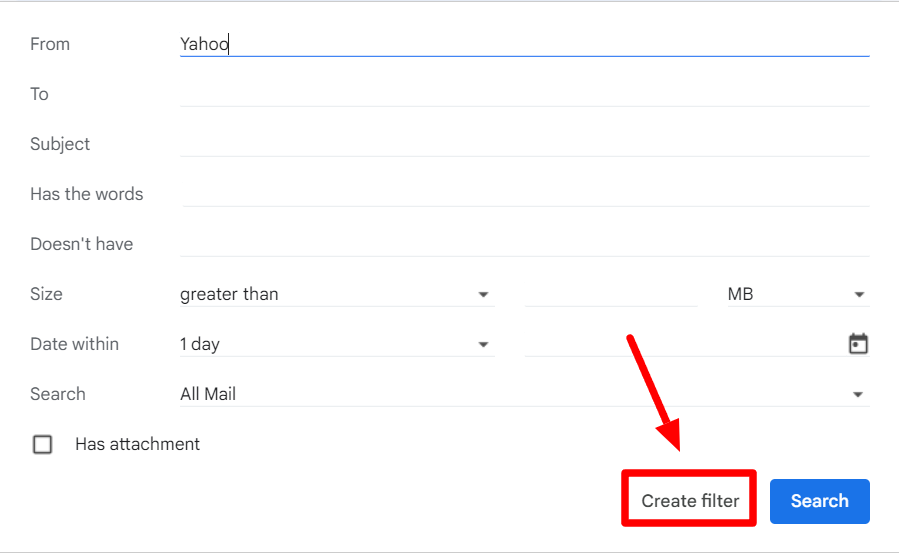
Now, click on the ‘Create filter’ button at the bottom.
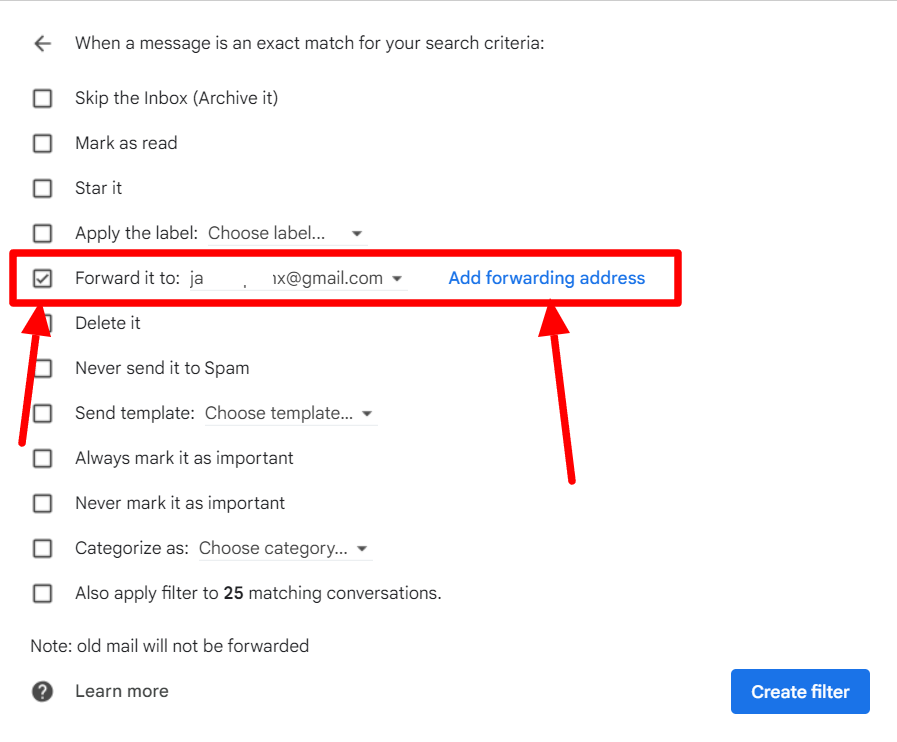
Check the ‘Forward it to:’ box. You’ll be able to select your forwarding address with the drop-down menu if you’ve already added it to your Gmail account. If you don’t have a forwarding address added yet, click the ‘Add forwarding address’ button and follow the steps.

Click the ‘Create filter’ button at the bottom when you’re done adding your forwarding address. Now, the emails that you specifically selected with the filter will be forwarded. Learn about the other ways to filter messages in Gmail.
Learn more about Gmail features on the YAMM blog
If you found that helpful, you can explore the YAMM blog to discover a wealth of information on Gmail features that can transform your email experience.
From mastering Gmail forwarding settings to using advanced filters, the YAMM blog offers detailed guides to enhance your productivity. Stay updated with the latest features and optimize your email management. Explore the YAMM blog today!