
One easy way of leaving a lasting impression with your emails is by changing the font settings in Gmail. You can customize the text's type, size, and color in your emails to reflect your personality and stand out in front of your audience.
In the tutorial below, we’ll show you how to change font in Gmail. Then, we’ll also show you how to change the default Gmail font so that you don’t have to do it every time you compose a new message. Ready? Let’s get started!
How to change font in Gmail messages
Here’s how to change the font for a Gmail message. You should keep in mind that this will only change the font for that particular message.
Step 1: Open up a new Gmail message
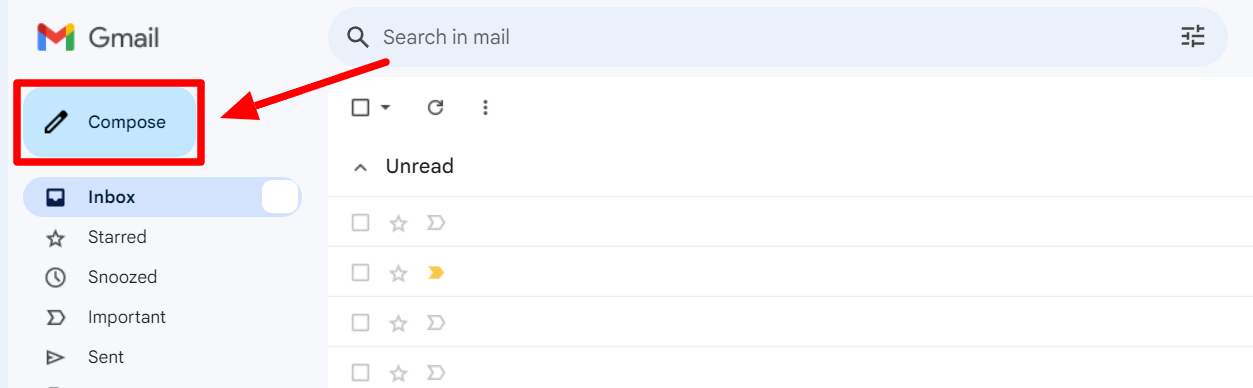
In your Gmail, click the “Compose” button to open up a new Gmail message.
Step 2: Change font type in Gmail compose window
Type the message in the new message window.
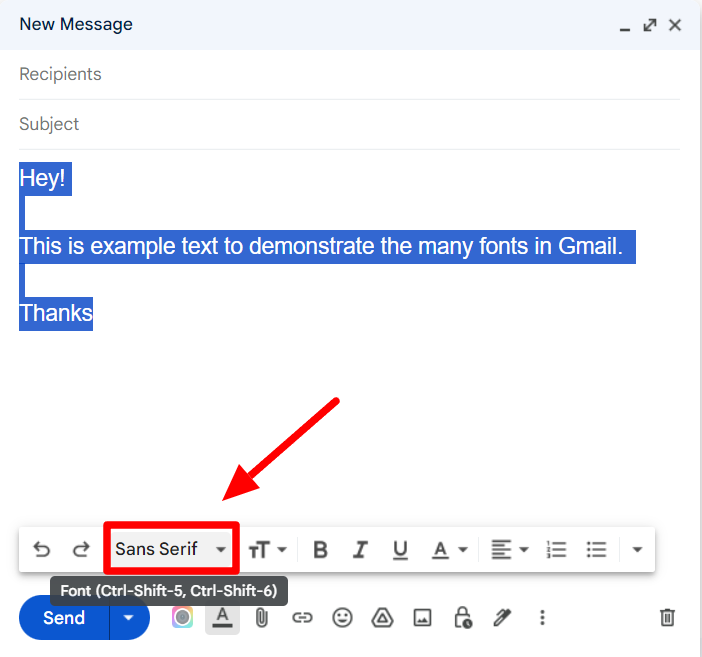
Select the text for which you want to change the font and click the “Font” button in the formatting menu at the bottom.
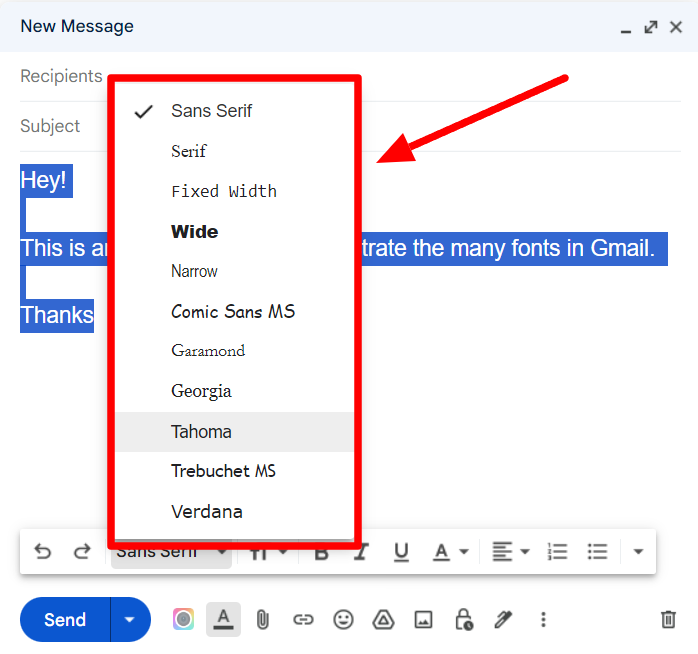
This will open up a new pop-up menu. Select the font you’d like applied to your text.
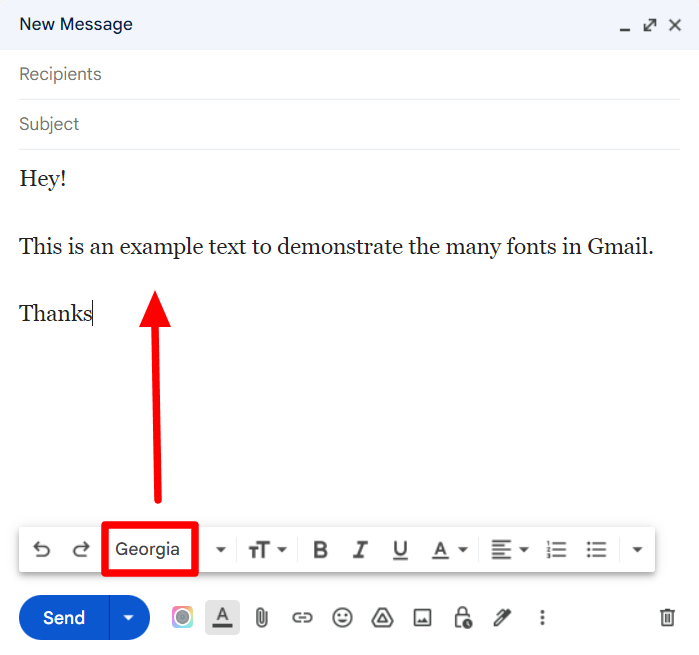
The font of the text will now change, and the new font name will show in the “Font” button.
Step 3: Change font size in Gmail compose window
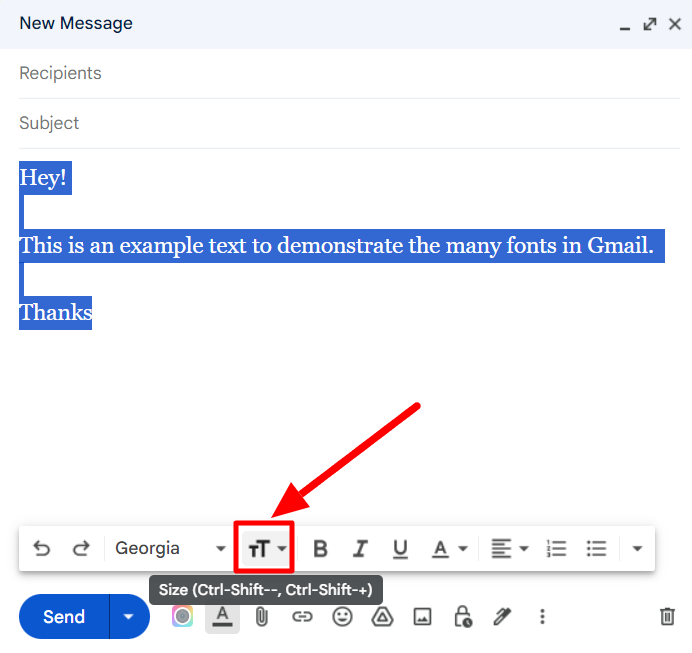
To change the font size, select the text and click the “Size” button. It’s right next to the “Font” button.
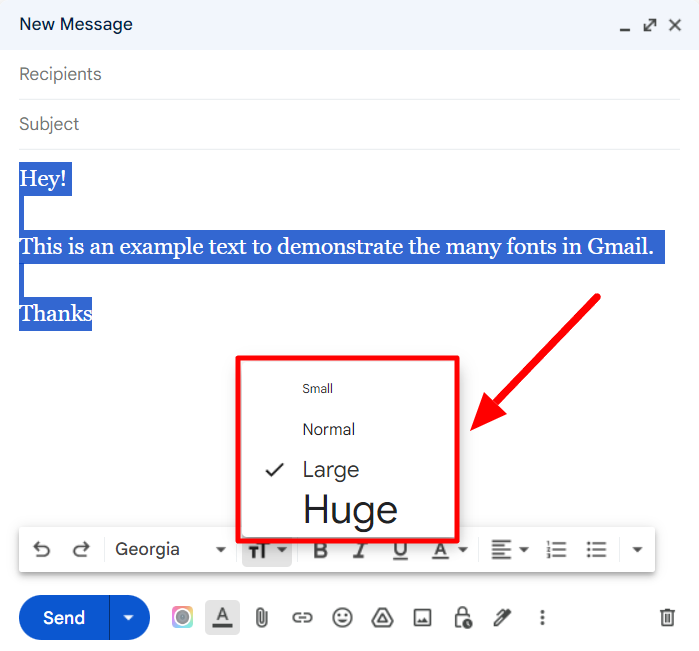
Select the font size you want to change the size. Gmail only offers four font sizes.
Step 4: Change font color in Gmail compose window
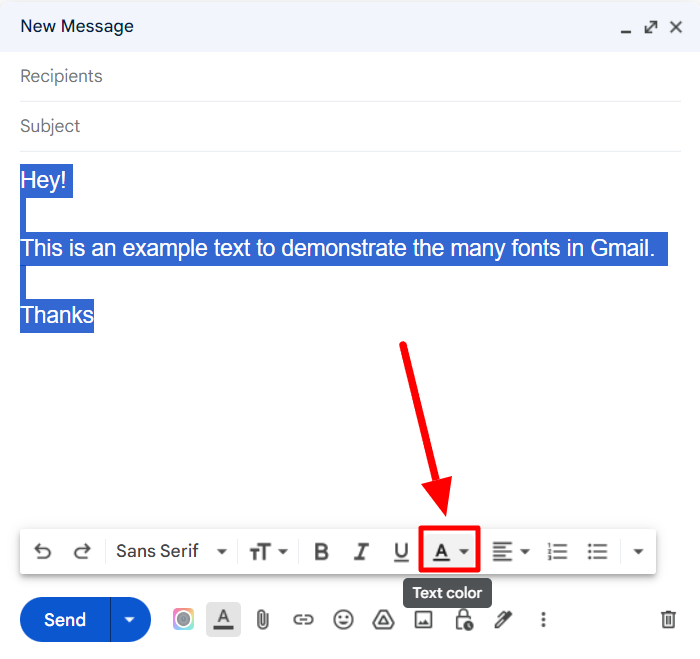
Select your text and click the “Text color” button.
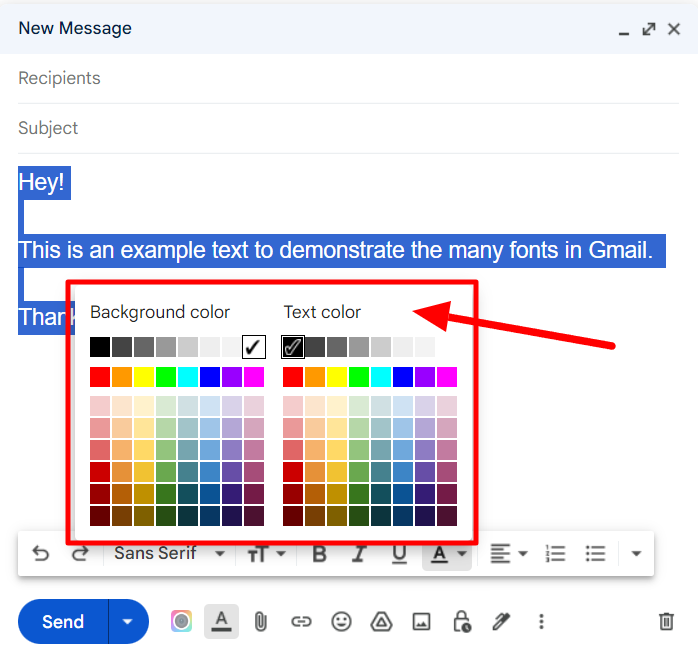
Pick the color you want to change the color of the text in your message. There is also an option available to change the background color of the text.
YAMM tip: Be careful with font in marketing emails!
While Gmail provides many options to change the font, size, and color of the text, you should be very careful about your choices if you're sending marketing messages. Your font color and style not only have to gel with your brand identity, but they can also have a critical effect on customer engagement and conversion rates.
You should choose clear, readable text to enhance the message's impact and foster engagement. It’s also important to take a moment to select fonts that convey professionalism and credibility. Gmail Layouts is a great feature to make marketing-friendly customizable templates with which you can create stunning messages for your audience in minutes.
Sending marketing messages with Gmail? YAMM works seamlessly with Gmail, so there’s practically no learning curve. All you need to do is learn how to create and edit a Gmail template, and YAMM will take care of the rest.
Now, let’s move on to how to change the default font in Gmail.
How to change the default font in Gmail
Step 1: Open up Settings
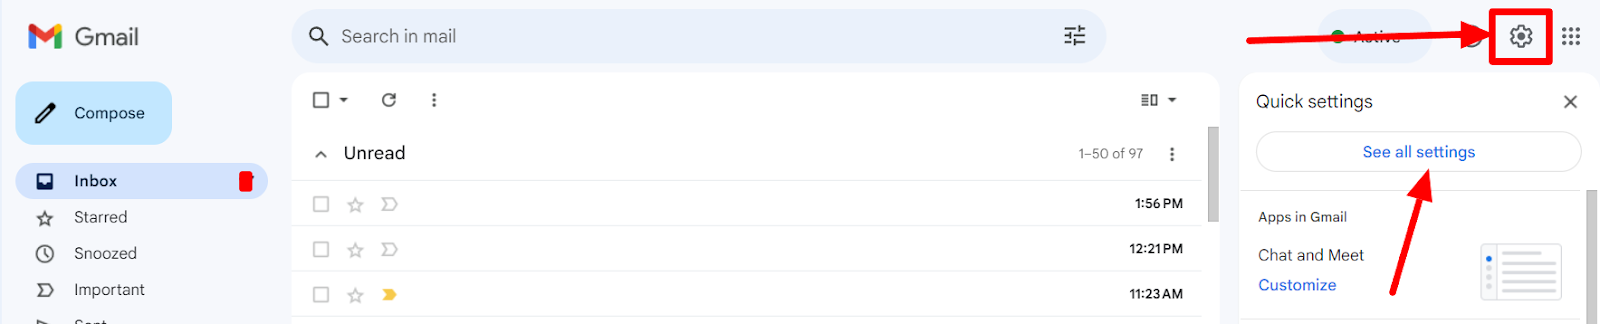
Click the gear icon in your Gmail and then click “See all settings.”
Step 2: Find default text style setting
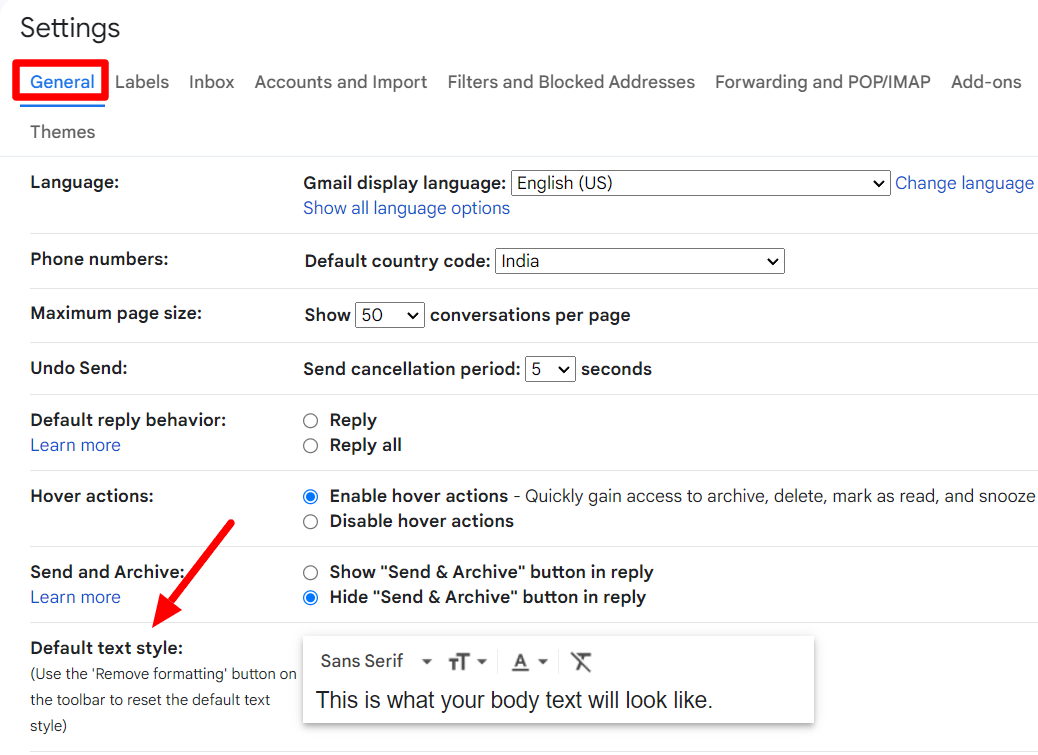
In the detailed settings, find the default text styles under the “General” tab.
Step 3: Change your preferred style in the box
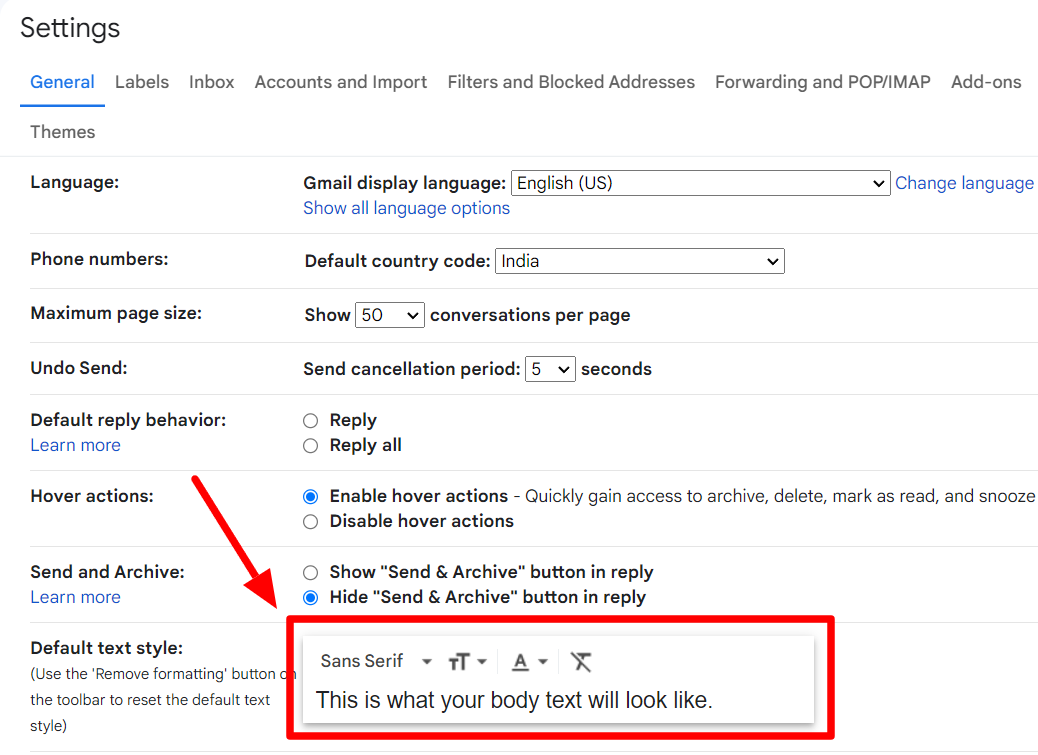
Make the changes that you want here. Select the “Remove Formatting” option if you wish to remove any previously applied formatting changes. It's the button that looks like a struck-out T.
Step 4: Save changes
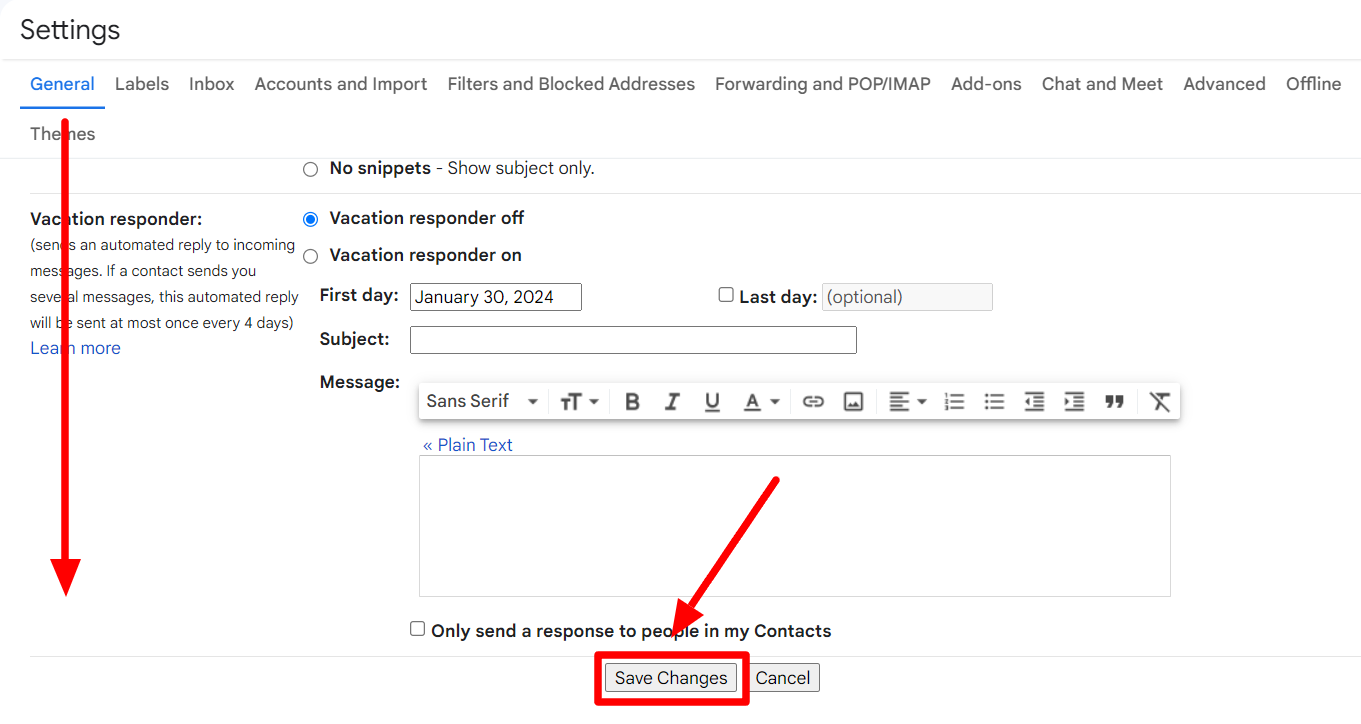
Once you’ve made the changes as per your preference, don’t forget to scroll down to “Save Changes.” Without this, your default settings won’t take effect.
Send your pre-formatted emails with Gmail using YAMM
If you’re formatting your emails in Gmail for marketing purposes, your next step should be to try YAMM.
YAMM is designed for people who like working from the familiarity of the Gmail platform. YAMM enhances the capabilities of Gmail and allows you to send mass messages from Google Sheets.
You can do things with YAMM that Gmail alone can’t do, like personalization and tracking key metrics. If you want to send mass messages like a pro, try YAMM today.