
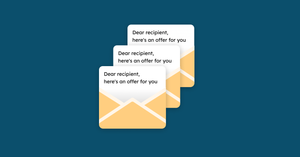
In Gmail, email templates are a way to create and save email messages that you can use over and over again. If there’s a message you need to send out regularly, it’s probably best to use an email template.
Gmail allows you to have up to 50 email templates. These can include thank-you messages, answers to common questions, or follow-ups after a customer interaction. With a template, you can reduce the number of mistakes you might make from repeatedly writing out the same message.
This tutorial will show you how to create a template in Gmail and some best practices for managing your Gmail email templates.
How to make and save an email template in Gmail
Step 1: Enable email templates in Gmail Settings
Before you can create email templates in Gmail, you'll need to enable the feature in your account settings. To do so, click on the gear icon in the top-right corner of your Gmail screen and select “See all settings.” Next, scroll down to the “Advanced” tab and find the “Templates” section.
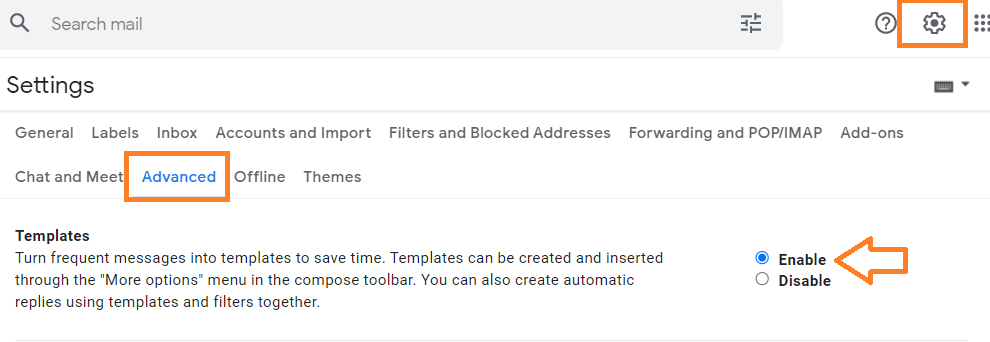
Finally, select “Enable” next to “Templates” and save your changes at the bottom of the page. The page will refresh, and you'll be able to start using templates in Gmail.
Step 2: Start drafting Gmail email template
Now that Gmail email templates are enabled in your account, it's time to start drafting your message. Simply compose your message as you normally would, putting markers in for names whenever you need to address someone. You’ll be able to change the name before you send it out.
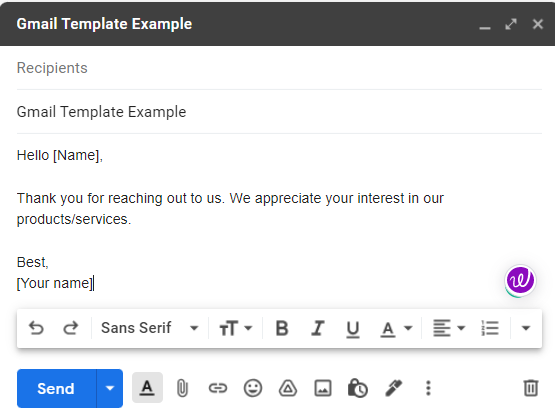
Maybe you’re creating a newsletter or a thank-you message following a purchase.
Include any text and images that you want in your template. Write out a subject line, too. However, keep the recipient fields blank, as you’ll need to add these later when sending out your template.
If you’re planning on creating a template with an attachment, you’ll have to save the attachment to Google Drive first. Go to “Insert files using Drive,” and you can upload a file to Drive or choose an existing file on your Drive. Once you do that, your attachment should be added to your template.
This is your time to polish the email. Make sure there are no errors in your message before saving the template in Gmail.
Step 3: Save email as template in Gmail
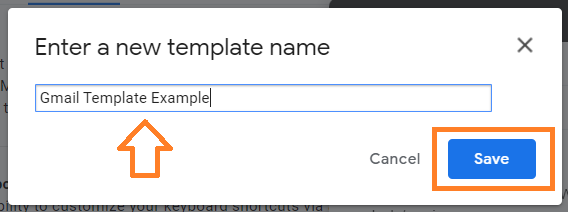
Once satisfied with your message, click on the three dots in the bottom-right corner of the screen and select “Templates” from the menu. Next, go to ''Save draft as a template'' from the insert template box and click ''Save as a new template'' in the following pop-up window.
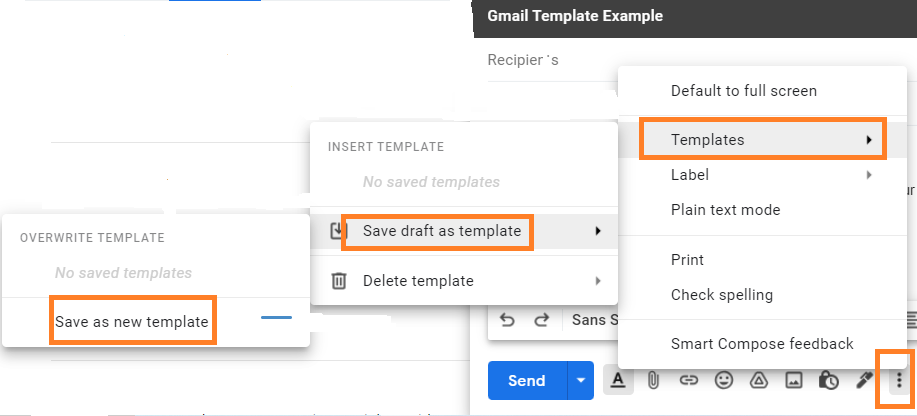
It'll ask you to name your Gmail email template, so choose something that makes it easy to find later and then click the ''Save'' button.
Your template will now be saved in Gmail, and you can use it whenever you need to send a similar message.
Remember that templates are only available in the account where you create them. If you have a Gmail account for personal use and work, you'll need to create separate templates for each account.
Step 4: Send your Gmail email template
Now that you've saved your template in Gmail, sending it out is easy! Start by clicking “Compose” again. A new email draft will pop up.
Click the three dots in the bottom-right corner of your Gmail screen and select “Templates.” Choose the template you want to use from the list.
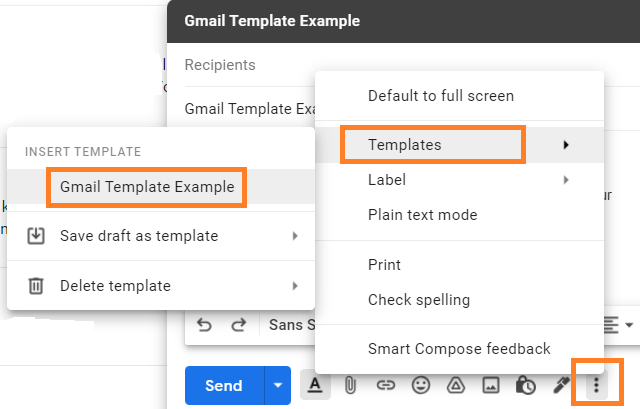
The content of your template will now be copied into your new email. Change the name markers and add your recipients. Once you’re satisfied with your message, click “Send.” You’ve now created and sent out a template!
How to use templates in Gmail?
You can overwrite your Gmail email templates to edit them
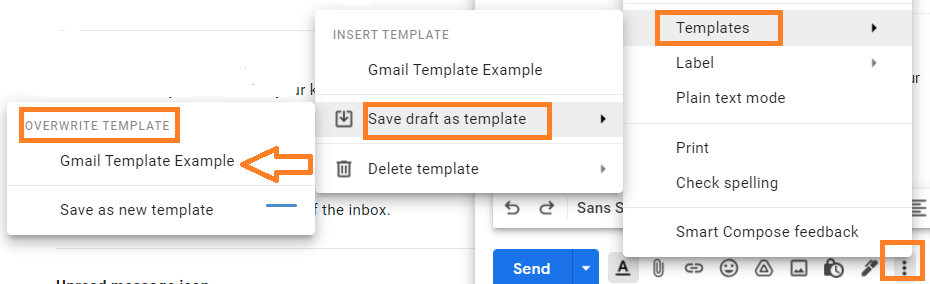
While you can't edit a template after you've saved it, you can overwrite the template with new content.
To overwrite a template in Gmail, compose a new version of the template you wish to overwrite. Then, go through the same process you did when creating a template the first time, except in the last window. Under the “Overwrite Template” box, instead of “Save as new template,” select the template you want to overwrite. Once you click “Save,” that old template will be replaced with your new one.
This feature is helpful if you want to make some changes to an old template or if there are updates to the content you need to make. Remember that you only have a limited number of templates you can create, so if templates are piling up, you may just want to overwrite an old one.
You can delete email templates in Gmail at any time
Gmail also allows you to delete any template you no longer need. To do this, click on the three-dot icon and select "Templates" from the drop-down menu. Then, click on “Delete template,'' and it'll show you the list of all your templates. Click on the trash icon next to the template you wish to delete.
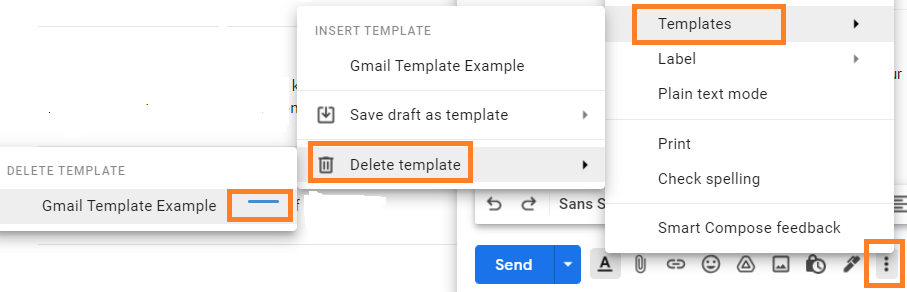
A confirmation message will pop up, and you can just click “Delete.” This is a helpful feature if you have created templates you no longer need. You can also tidy up your template list so that it's easier to find the ones you do use.
You can create email templates with Gmail Layouts
You might be familiar with custom layouts if you’re a Google Workspace user. With Layouts, you can add branding to your template, making your customer-facing emails more attractive and stylish. These work a lot like Google Doc templates, where there's a pre-made layout with styling you can customize for yourself.
First, you’ll have to compose a new email. Click the “Layouts” button at the bottom of the window, which looks like a box divided into three parts.

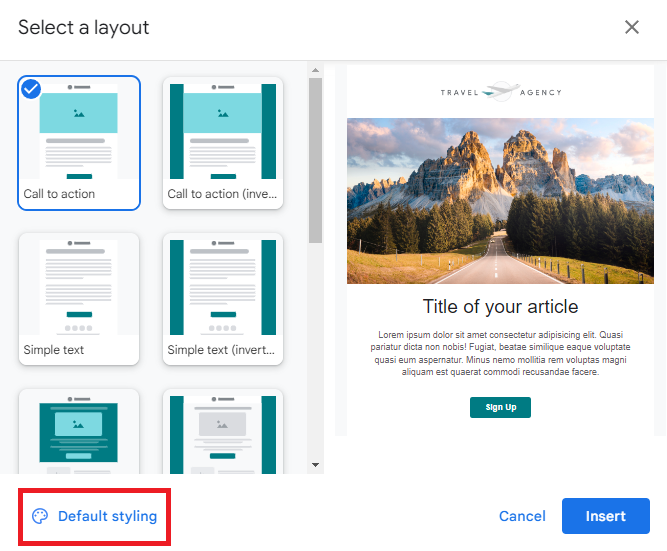
If you haven’t used this feature before, you’ll want to click “Default styling” to detail your preferences.
You’ll build your design with the kinds of logos, color, font, images, or links that you want. Once your preferences are set, click “Save & continue.”
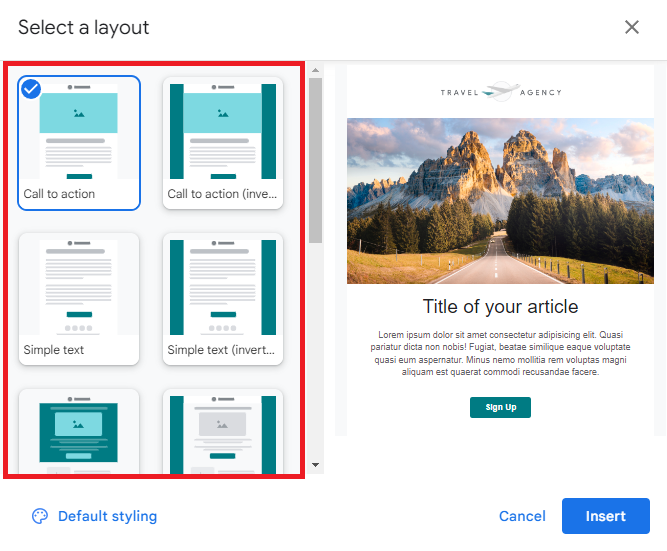
Select a layout from their library and click “Insert” to have it added to your draft.
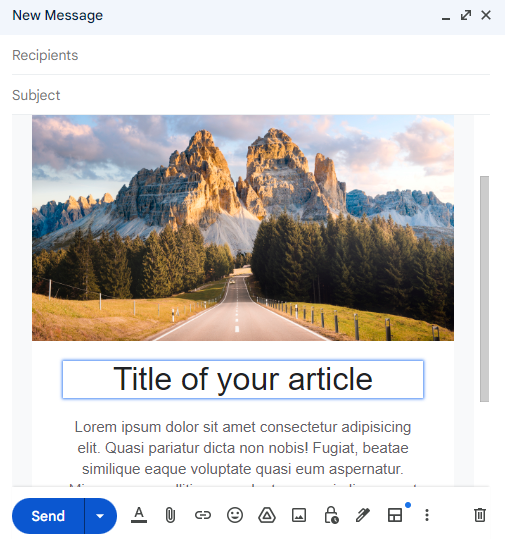
Now, you can change the layout to your liking. This could include adding links to buttons or removing sections you don’t need. Once you’re all finished, just save it as a template like you did before.
You now have a branded template you can use for welcome messages, post-purchase emails, or newsletters. And with YAMM, you can send out that branded template to all of your subscribers at once!
Need to send out the same message to a group? Use a mail merge!
That’s it! You should now have no trouble creating a bunch of different templates for any occasion. If you’re sending out your message to an individual, you should have no problem doing so. However, if you’re planning to send out that template en-masse, we suggest using a mail merge like YAMM.
YAMM is an excellent tool for sending mass emails with Gmail. With YAMM, you can upload your contact list from Google Sheets, select the template that you want to use, and YAMM will personalize the email for you in your name markers. With templates and layouts at your disposal, you can use YAMM to build your email marketing efforts right from Gmail.
Install YAMM today and build better email newsletters, announcements, and promotions.