When your email really matters, there are certain things you want to get right. Formatting, phrasing, structure, content: all things that are hard to do in Gmail’s cramped compose window.
In this article I’ll show you how to make pretty emails in Gmail with the help of email templates in Google Docs. Specifically, we’ll go through multiple steps for creating beautiful email templates in Google Docs, and even add headers, content margins, and footers, while ensuring perfect alignment and style to engage your audience.

Leaving the Gmail compose window for Docs will also give you tools like comments and suggestions, so you can better collaborate with coworkers or review your work. Let’s get started 👏.
Making beautiful emails from Google Docs templates
If you’ve been wondering how to create a template email in Gmail or think you need a designer, HTML, CSS, or an expensive email marketing tool like Mailchimp to make a great email, you’re wrong. I’m going to show you how to create beautiful emails, with nothing more than simple tables, alignment, and formatting.
Things to keep in mind when creating pretty emails with Google Docs email templates
- Beautiful doesn’t have to mean complicated. Adhere to simple design principles like proper alignment, white space, and color (all things we can do well in Google Docs).
- Design in a way that is easy to achieve with tables by relying heavily on block layouts.
- Maintain readability for all users by ensuring your content looks good on small screens. Advanced responsive design requires other tools.
Three steps to create pretty templates in Google Docs
Let’s go through the steps to creating an email template in Google Docs and Gmail. Build a header, create the body, and close with a footer. If you’ve been wondering how to decorate a Google Doc to make it look good, you can apply the same principles there too.
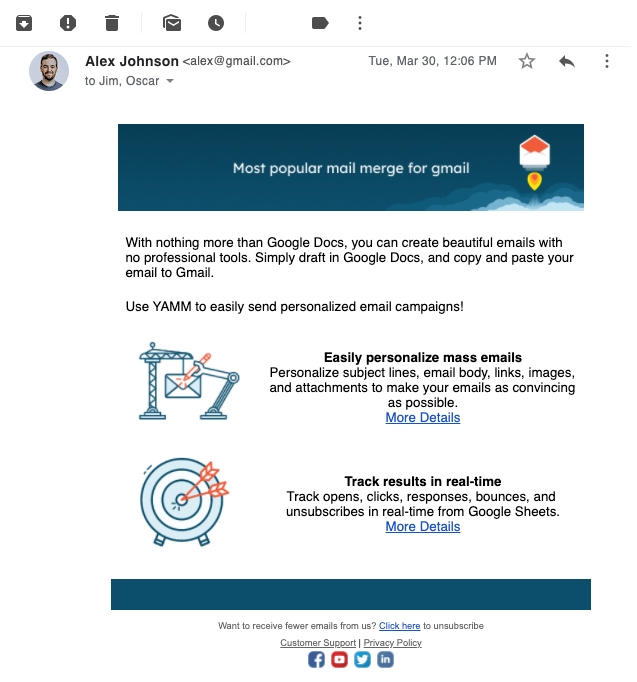
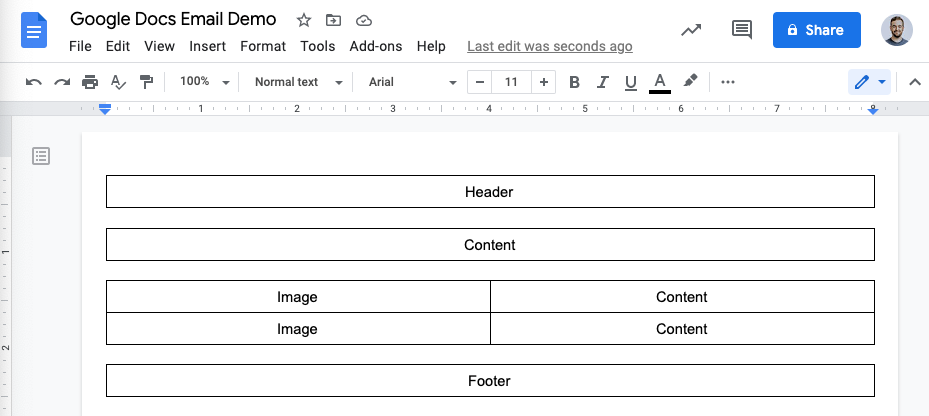
To learn how to make pretty emails in Gmail, it’s helpful to think of your email as a stack of tables, each fulfilling a key role in the email’s design. This email can look however you want it to but we’ll demonstrate using the following simple design.
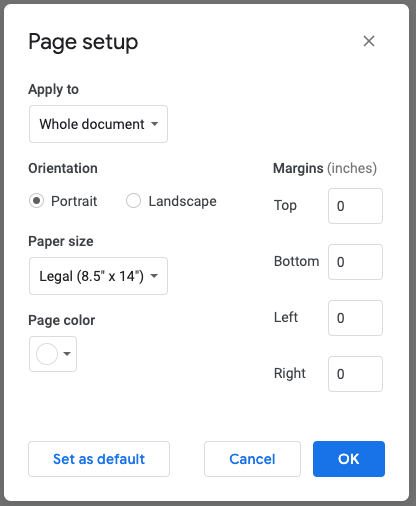
Before you start, use page setup to optimize your document size and margin
It’s best to set the page margins to 0 and create a big canvas to work with. This isn’t a required step, but it will make it easier to create your email.
- Open the File menu and select ‘Page setup.’
- Set each margin to 0
- Set the paper size to Legal
Step 1: Start your email with a header
We will use a table with one row and one column to serve as our email header. A couple of different design options will work well for this step. You could:
- Use a solid block of color to frame the email.
- Use some text combined with a small image (like your logo, for example).
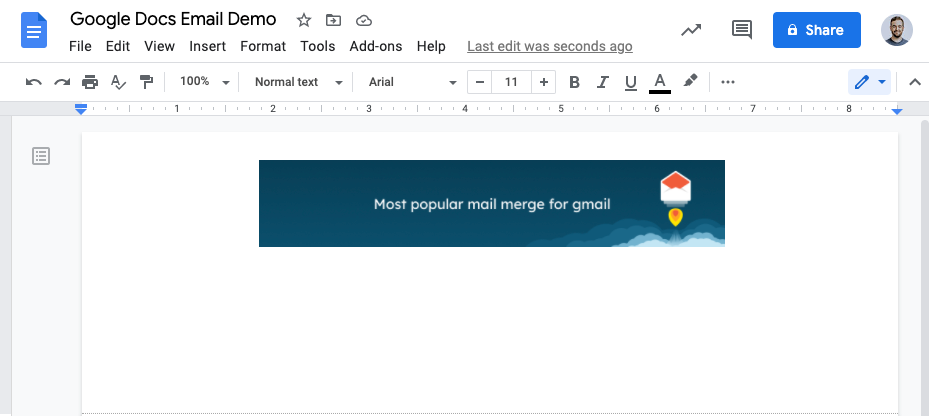
- Use a wide, well-cropped image (which is what we will demonstrate here).
If you don’t have a great selection of images to work with, try one of the many great resources online for free images like Unsplash.com.
Follow these instructions to complete step 1:
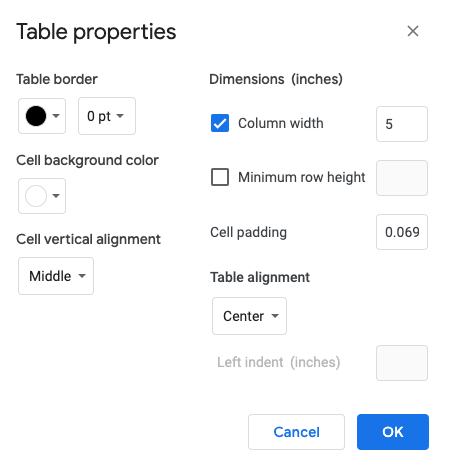
- Add a table with one row and one column
- Right-click to open ‘Table properties’
- Set the Column width to 5 inches
- Set the table border to 0 pt
- Set the ‘Cell vertical alignment’ to ‘Middle’
- Set the ‘Table alignment’ to ‘Center’
- If using a text header, we recommend adding a Cell padding. Start with 0.15 but try different options to get the right look.
- Insert your image into the cell.
- If your image isn’t cropped correctly, or if it didn’t automatically resize, use ‘Image options’ to correct things.
Customize your emails for different devices:
As you progress, continue to test your content on both mobile and desktop to ensure it’s readable. An email designed for a desktop experience will not look the same on mobile. This demo uses a 5 inch width for it’s tables. For a primarily desktop audience, a 7 or even 8-inch width might be optimal. 5 inches is a middle ground that works well in both but your experience may vary depending on your content.
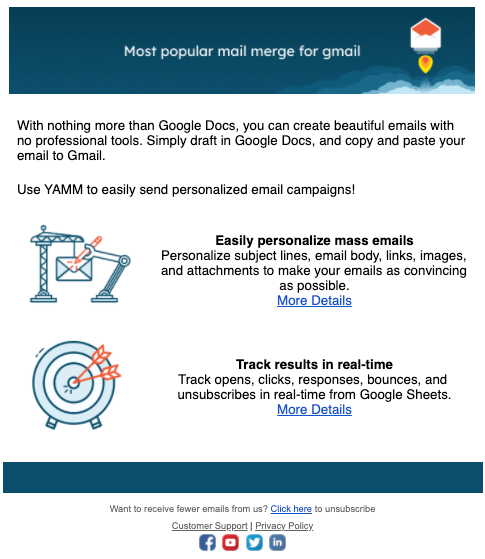
Learn more about YAMM's mail merge on Google Docs
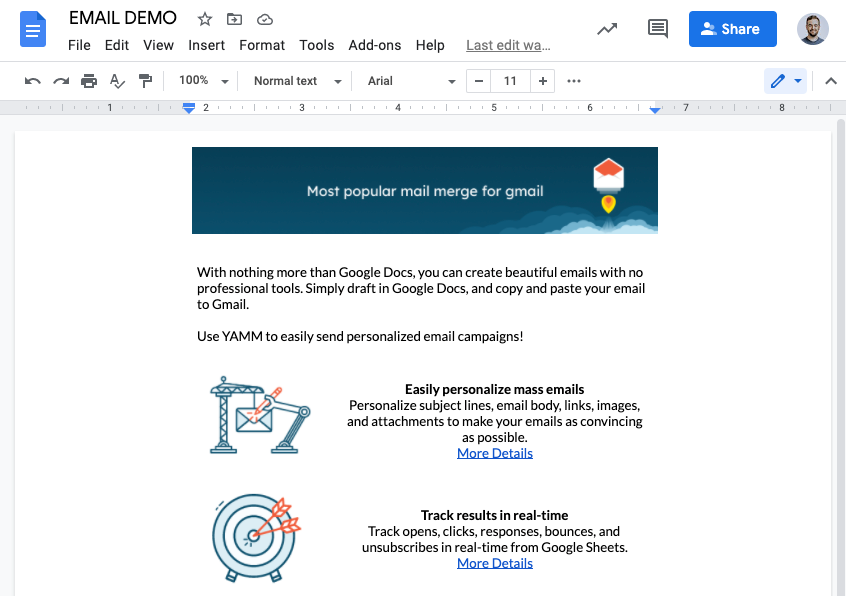
Step 2: Put content containers in your Google email template for your email body
The next step is to create centered content tables with white space on each side.
Two types of content work well with this design and they can be combined to customize your email template as per your needs.
- A single column, which works best to display text.
- Two columns, which can be used to highlight important items one by one, each with an image. Column widths can vary, if you want each to be the same, or one slightly larger to fit different contents.
Follow these instructions to complete step 2:
Single column table for text content
- Add a table with one row and one column
- Set the Column width to 4 inches
- For the remaining options, use the same table properties as before
- Optional: Set the cell padding to 0.15 for a more balanced look
- Add your text content
Multiple columns to display images alongside other content
- Add a table with two columns and a row for each pair of images and content. In our example, we are using 2 rows and 2 columns.
- Using table properties, set the first column width to 1.5 with cell padding of 0
- Set the second column width to 3.5 with cell padding of 0.15
- Add your images and text content.
- For images, using Image options, try resizing the images to get the right look. In this demo, our icons are set to 1’’ size. This will center them in the 1.5’’ column.
- For text, style appropriately with bolded headings and links.
- Remember to check the cell vertical alignment to ensure everything is set to middle.
Tip: During this step, it is helpful to leave the cell border on until you’ve finished. This makes it easier to ensure your column height and padding settings were done correctly.
Step 3: Close your email with a clean footer
Follow these instructions to complete step 3:
Start with a blocked footer
To visually block off the end of your email, a simple table with 1 cell and 1 column can be used with a solid color background. Alternatively, you can repeat the same steps from our header to include an image here.
Add necessary information to the end of your email
Continue to add any necessary text beneath the footer. To avoid distracting from your email, try small, centered text for details that go at the end of mailers like an unsubscribe link, your business address, and links to customer support.
Tip: Add icons to link out to your profile on other web properties or social media sites. Icons in all shapes, sizes, and colors can be found online at sites like Iconfinder.com.
Useful resources to make pretty Google Docs email templates
Unsplash.com
 Iconfinder
iconfinder.com

pixlr.com
Other styling tips to create nice emails
Customize your emails by trying different fonts:
Try different combinations of font size, typeface, and color to customize your email you see something you like online or in another email, use the inspect element tool in your browser to learn what it is.
How to create custom emails for dark mode:
A few simple tweaks to your email can ensure dark mode compatibility without too much work. Swap white images or icons for those with color or simply add an outer glow with a tool like Pixlr or Photoshop. If you haven’t heard of dark mode and the challenges that come along with it, you can read about it here.
Sending professional looking emails with Gmail
Now that you know how to make beautiful email templates in Google Docs, you also need to know how to send it in Gmail. Luckily, it is very easy to port these pretty email templates into Gmail. All you need to do is copy and paste the contents of our Google Doc into Gmail. While this might feel “too easy,” in most circumstances, the email should transfer over exactly how you want it to.
If you run into issues with this step, try adjusting the width of your tables, padding, and content size to ensure nothing is cut off or misaligned.
Bonus: Edit your existing Word documents in Google Docs
Do you prefer drafting in Microsoft Word? Is your content already in Word? Try opening it with Google Docs before pasting into Gmail, which can greatly reduce formatting issues.
Follow these simple steps:
- Upload your document into Google drive and select ‘Open with Google Docs.’
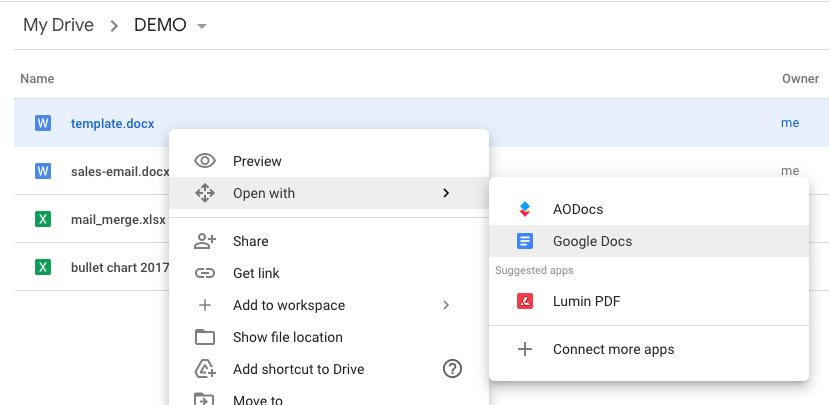
- Look for this .DOCX icon, which confirms you’re working with a Word file and not a Google Doc.