Google Sheets: Send Emails Based on Cell Value
5 min read
Table of contents
When it comes to efficient data management, Google Sheets is a powerful ally. The cells and the formulae make it easy to maintain and manipulate a lot of data effortlessly.
Learning how to send emails based on cell values can take your data management efficiency to the next level. In this tutorial, we’ll explain how you can start sending emails from the cells of your Google Sheet. Ready? Let’s go!
How can you send emails with Google Sheets?
There are two ways to send emails through Google Sheets. One of these is an advanced technique, and the other is a much simpler option within most users' skillset. Let’s look at both.
Google Apps Script: Advanced
With Google Apps Script, you can turn Google Sheets into a tool for sending emails based on cell values. Google Apps Script allows users to create custom scripts and automate tasks within Google Workspace applications.
With just a few lines of code, you can implement a custom script by which email addresses from one column are combined with other details like names and addresses, and messages are automatically sent out to a list of contacts.
The downside is that for most users, this isn’t the easiest thing to do, as it requires a basic level of coding knowledge. Moreover, even if you can set up the script by referring to online resources, troubleshooting scripts in Google Apps Script will still be difficult.
YAMM: Simple
There’s another method that is better suited for most users. Instead of creating your own scripts for integrating platforms, rely on a third-party add-on to do it for you. YAMM is a Gmail add-on entirely based on Google Apps Script and allows you to send messages from Google Sheets.
This means you get all the benefits of Google Apps Script without the hassle of learning and managing code. It's user-friendly, with features like scheduling, personalizing, and tracking emails, making it suitable for people unfamiliar with coding.
If you want a simple solution for basic yet efficient email campaigns, YAMM is the better option. In the steps below, we’ll teach you how to prepare a contact sheet and send an email based on cell value.
How to prepare a contact sheet in Google Sheets
Creating contact sheets for mail merge is easy. Here are the steps.
Step 1: Create a new spreadsheet
Navigate to your Google Sheets.
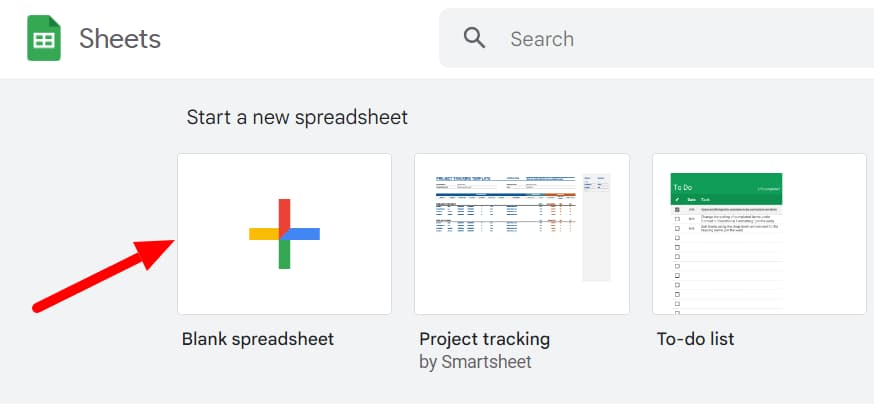
Click on the ‘Blank spreadsheet’ to start a new spreadsheet.
Step 2: Create columns for email, first name, and last name
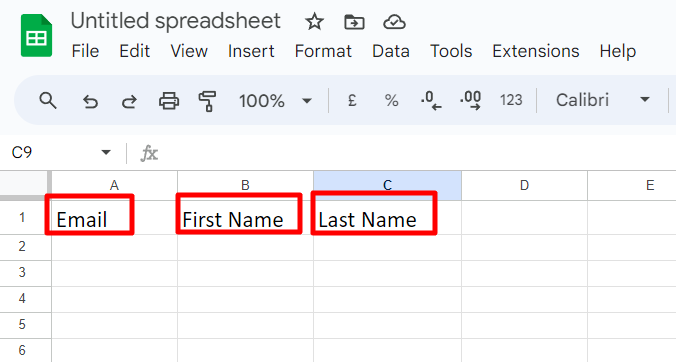
Create a separate column for email, first name, and last name. The only thing to remember here is that the ‘Email’ column has to come first. The rest can be ordered in any way you prefer.
Optional: Add other columns if you wish
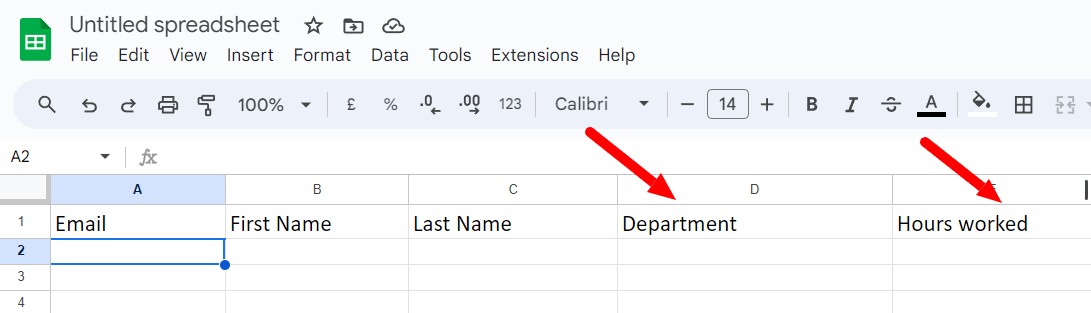
Now, add more columns for any other information you want to personalize your emails with. It could be addresses, products purchased, or specific employee information like hours worked.
Optional: Set up notifications for changing cell values
If you want to send emails based on changing cell values, you can do that, too. You just have to set up your notifications in Google Sheets so that you’re notified by email when there’s a change in the cell values. Then, you can manually send out the emails.
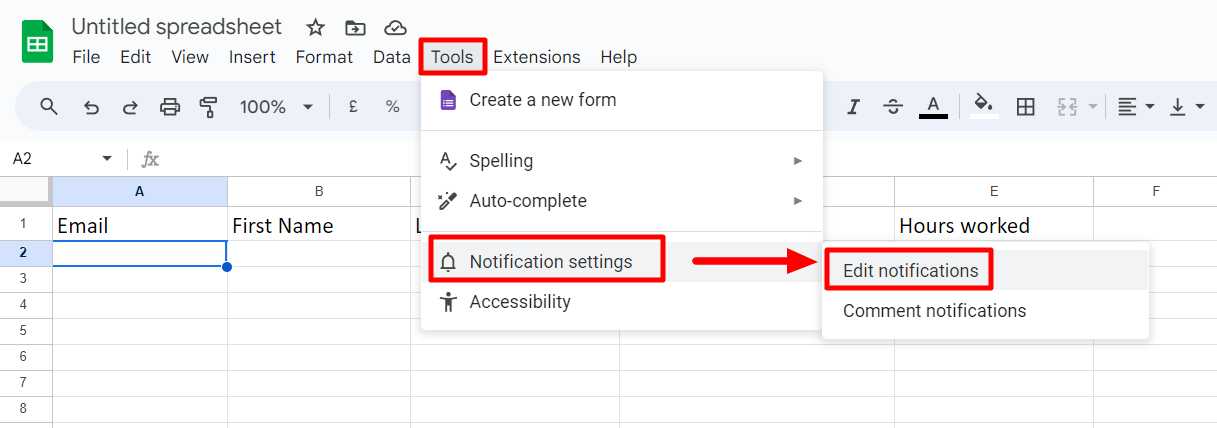
To set up notifications, click on ‘Tools,’ then ‘Notification settings,’ and finally ‘Edit notifications’
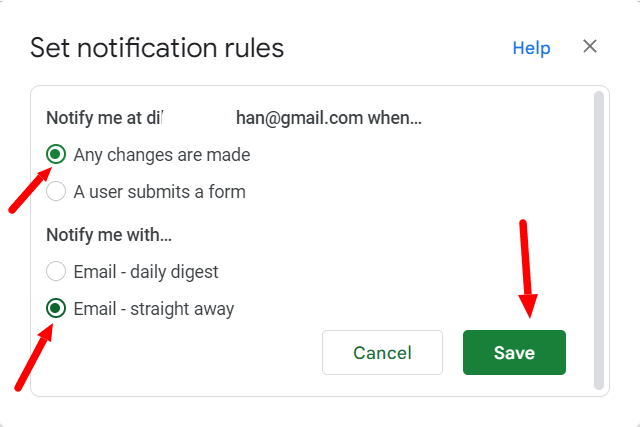
Now, you can set notification rules to receive a daily or immediate notification if any changes are made. Once you’ve selected the correct settings, click ‘Save’. Next, it’s time to complete the contact sheet.
Step 3: Fill out all the contact information
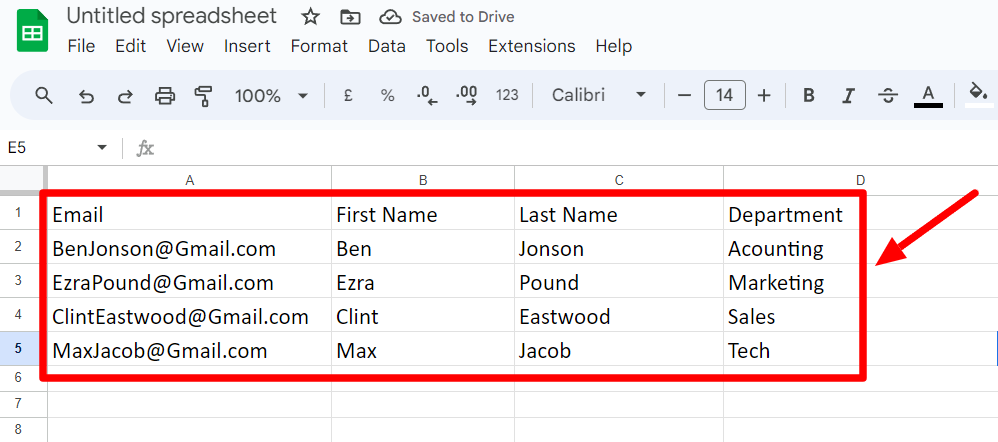
Now, all you need to do is fill out the details to complete your contact sheet. With that, you have successfully created a contact sheet based on which you can send emails.
How to send an email based on Google Sheets cell value
Step 1: Prepare an email draft with markers
Navigate to your Gmail.
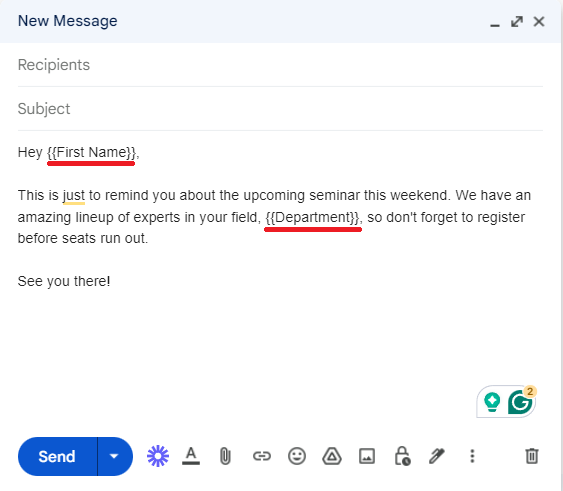
Compose a new message. It’s important to keep the information you want to personalize each message within double curly brackets.
Step 2: Go to your contact list
Now, go back to your contact sheet that you’ve already set up from the previous tutorial. We’re going to send our email right from there!
Step 3: Initiate your mail merge
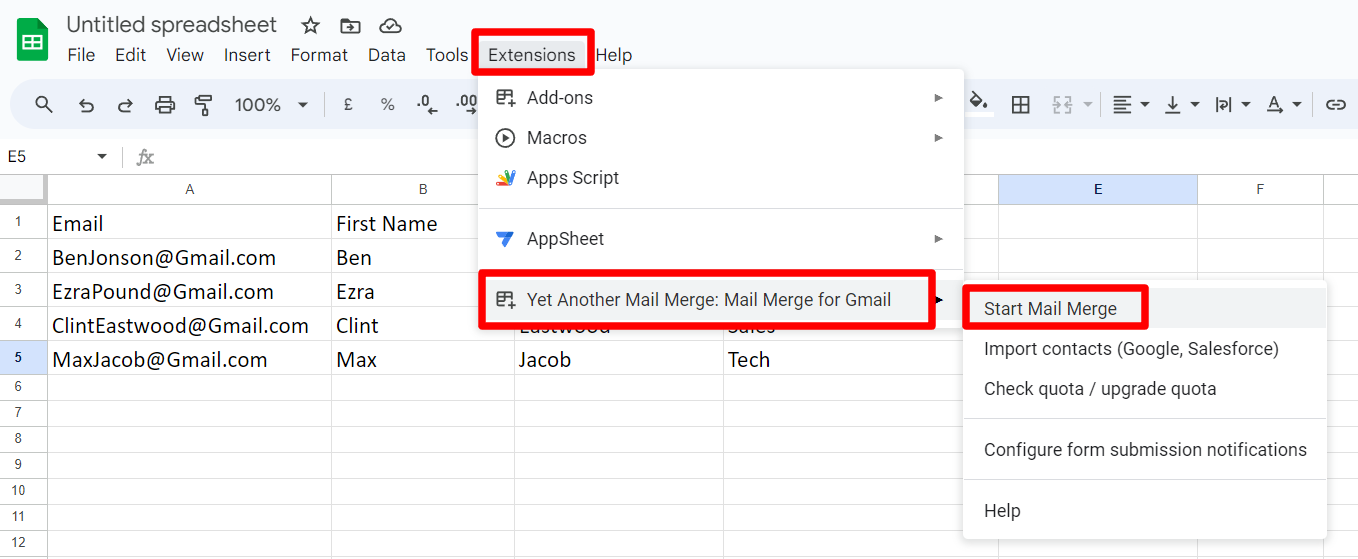
In the overhead menu, click ‘Extensions,’ then ‘Yet Another Mail Merge,’ and then click ‘Start mail merge.’
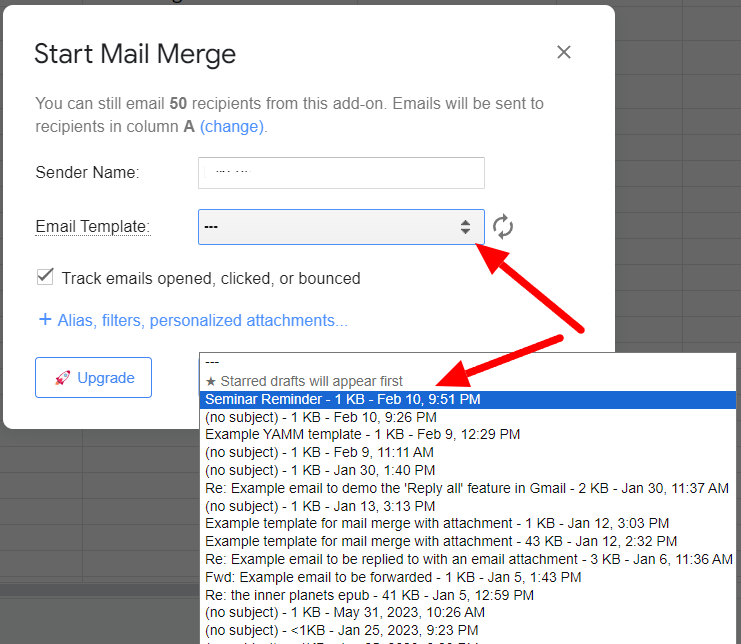
In the window that pops up, select the email template saved in the previous step and enter the ‘Sender Name.’
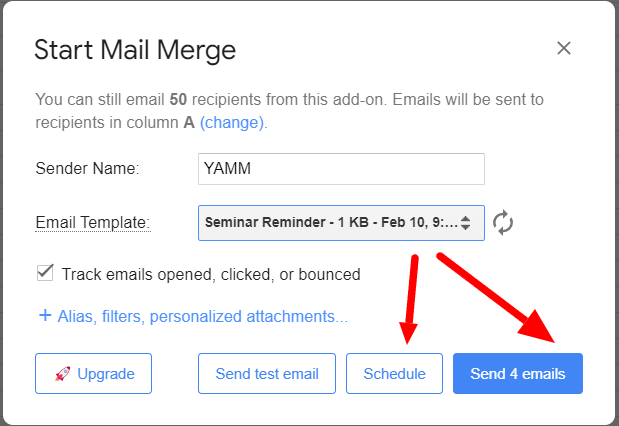
Next, you can click ‘Schedule’ or ‘Send emails’ to send the personalized emails immediately. Read another detailed tutorial on how to send a mail merge through YAMM.
YAMM can send emails right from your Google Sheet
That’s how easy it is to send emails based on cell value. YAMM, with its user-friendly interface, eliminates the need to switch between applications and operates within the Google platform.
With YAMM, there’s no need to grapple with the complexities of Google Apps Script. Simply create a Gmail template and a contact sheet in Google Sheets and leave the rest to YAMM.
Interested in this kind of ease and simplicity? Try YAMM you’ll love it!