Schedule a mail merge
Run your mail merge later, on a chosen date and time. You can only schedule one mail merge at a time, but you can always cancel a scheduled mail merge from the YAMM dashboard.
Schedule mail merges for later delivery
Prerequisites
-
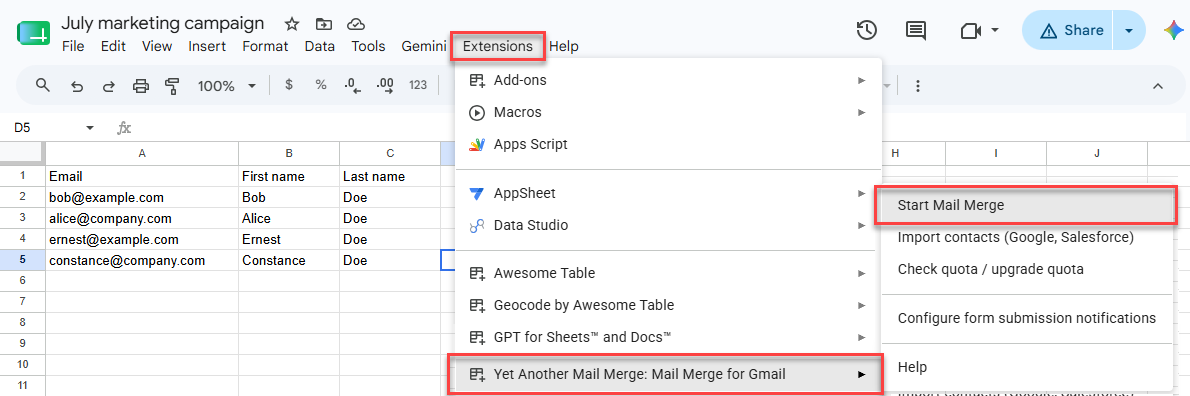
In Google Sheets, open your contact list spreadsheet.
-
Select Extensions > Yet Another Mail Merge: Mail Merge for Gmail > Start Mail Merge.
-
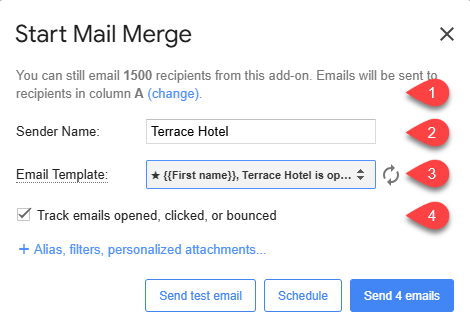
In the Start Mail Merge window:
-
Check that YAMM correctly detected the recipient column.
-
(Optional) Enter a Sender Name.
-
Select your Gmail draft from the Email Template dropdown. Click Refresh if your draft does not appear.
-
Select the tracking option to measure the performance of your campaign. If your template contains an unsubscribe link, tracking must be enabled for it to work.
-
-
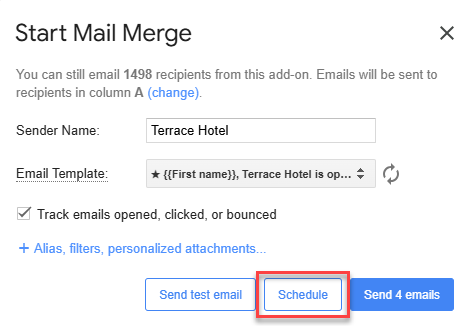
Click Schedule.
-
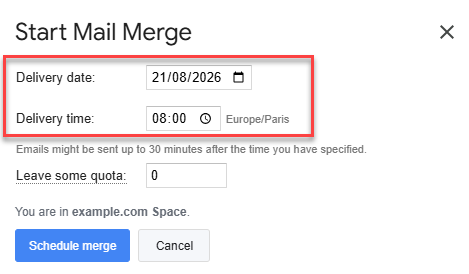
Select a date and time. You can schedule up to 2 weeks in advance. The delivery time is approximate: YAMM checks your Google spreadsheet every 30 minutes, so emails may be sent up to 30 minutes after the specified time.
-
(Optional) Leave some Gmail account quota for other emails after the scheduled mail merge. For example, if you have 20 recipients remaining in your Gmail quota and want to keep 10 after the merge, enter
10in the Leave some quota field. -
Click Schedule merge.
The mail merge is scheduled. In your contact list spreadsheet, the SCHEDULED status appears under the Merge status column. When the mail merge is sent, the status changes to EMAIL_SENT.
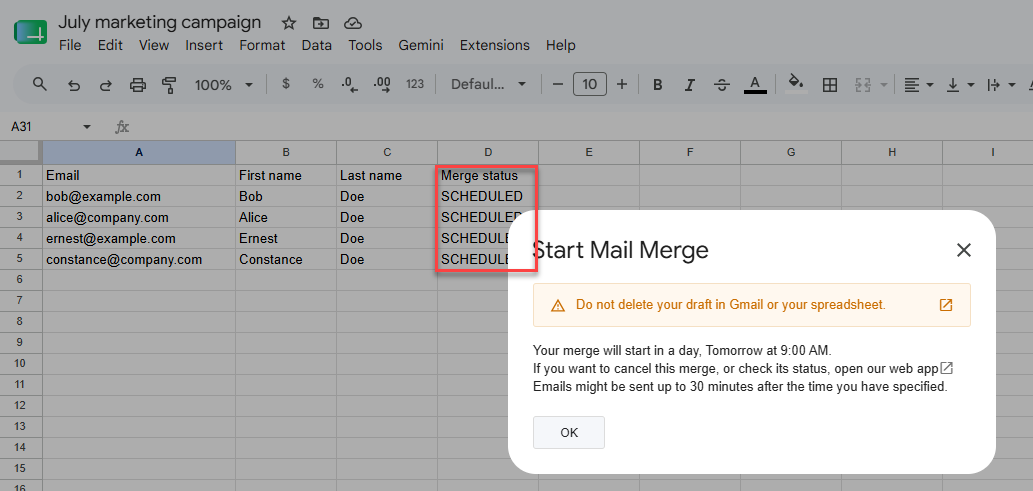
You can check its status or cancel it from the YAMM dashboard.
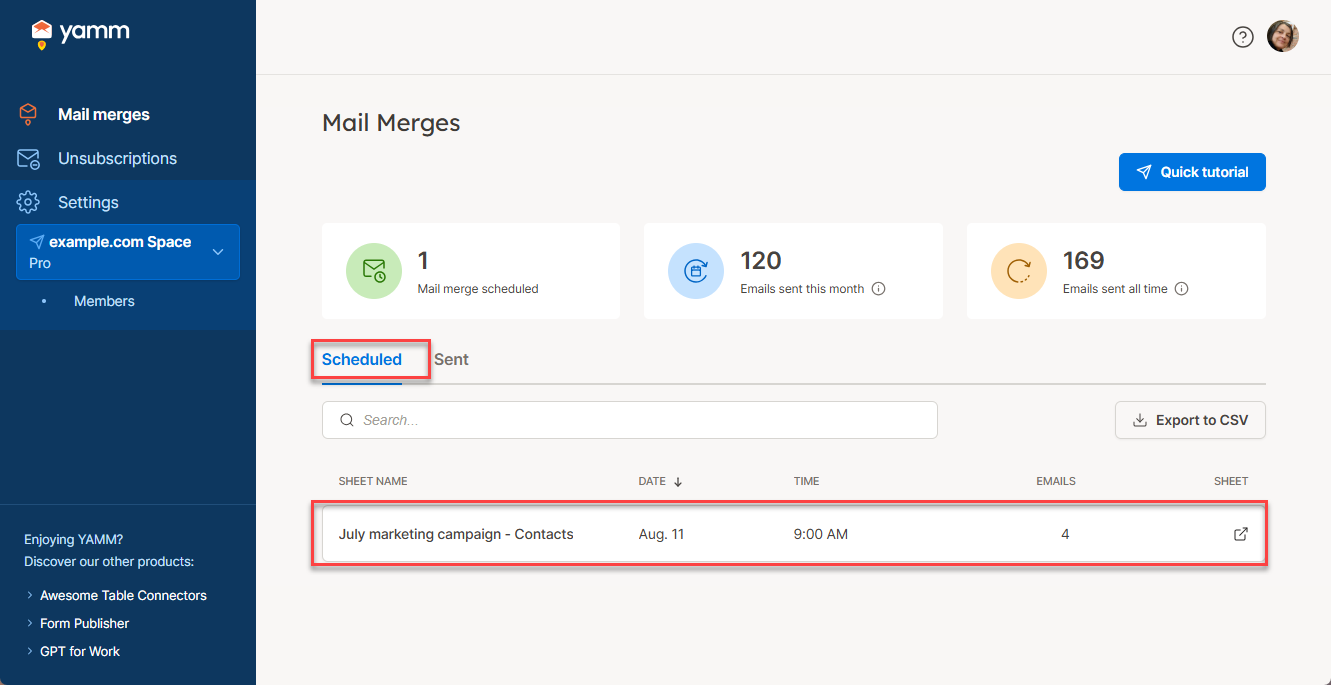
You can schedule only one mail merge at a time. If you try to schedule another, a warning appears — clicking Schedule merge again cancels the previously scheduled merge.
Cancel a scheduled mail merge
Cancel a scheduled mail merge from the YAMM dashboard.
Deleting the SCHEDULED status (or the Merge status column) in your contact list spreadsheet doesn't fully cancel the scheduled merge.
-
Sign in to your YAMM dashboard.
-
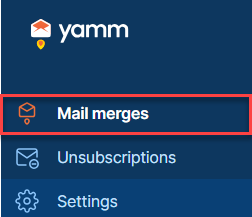
In the sidebar, click Mail merges.
-
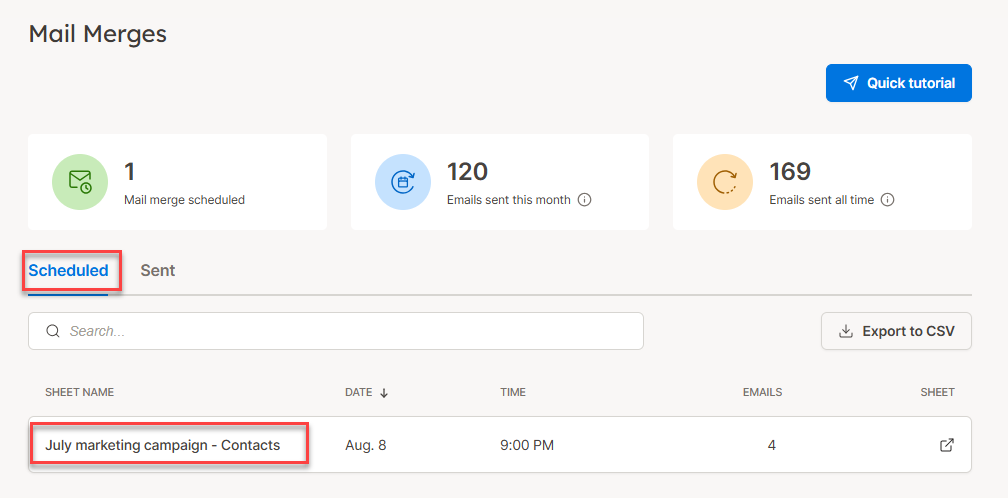
In the Scheduled tab, click the sheet name for the scheduled mail merge.
-
Click Cancel mail merge.
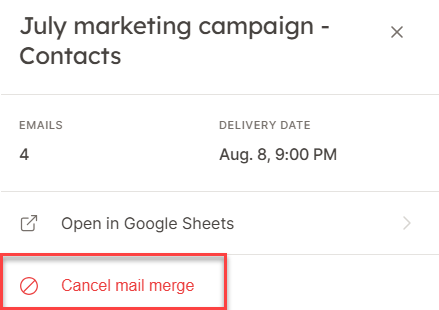
-
(Optional) In the contact list spreadsheet, right-click the
Merge statuscolumn and choose Delete column to remove the outdated status.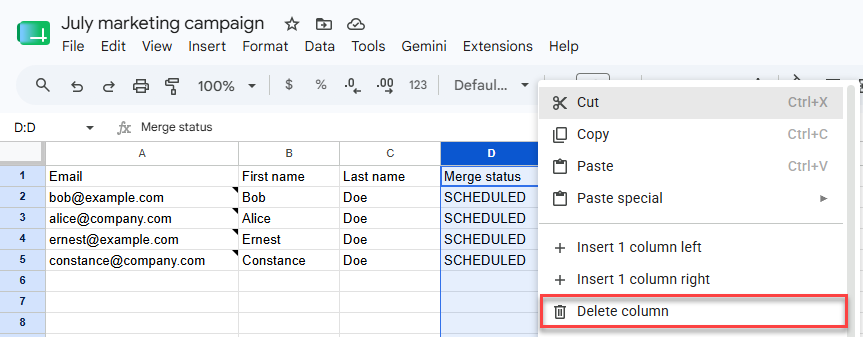
The scheduled mail merge is canceled.
What's next
-
Track your campaign for opens, clicks, responses, bounces, unsubscribes.
-
Re-run a mail merge, or run a follow-up with non-openers or non-repliers.