Set sender and reply-to addresses
Send from an alias to use a brand or shared address, or set a reply-to so replies land in a specific inbox rather than your sending account. Both options require a small Gmail forwarding configuration to keep YAMM's response tracking working.
Send from an alias
Define Gmail settings to run your mail merge from a different email address.
1. Add the alias in your Gmail settings
-
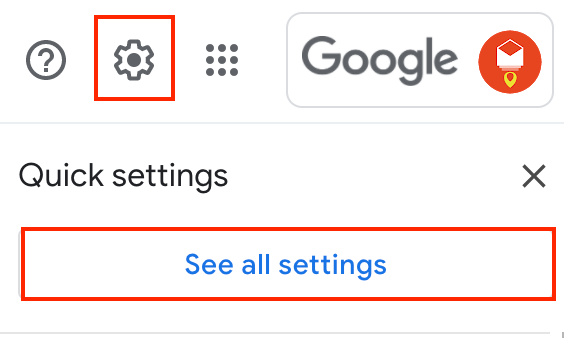
Click the gear icon > See all settings.
-
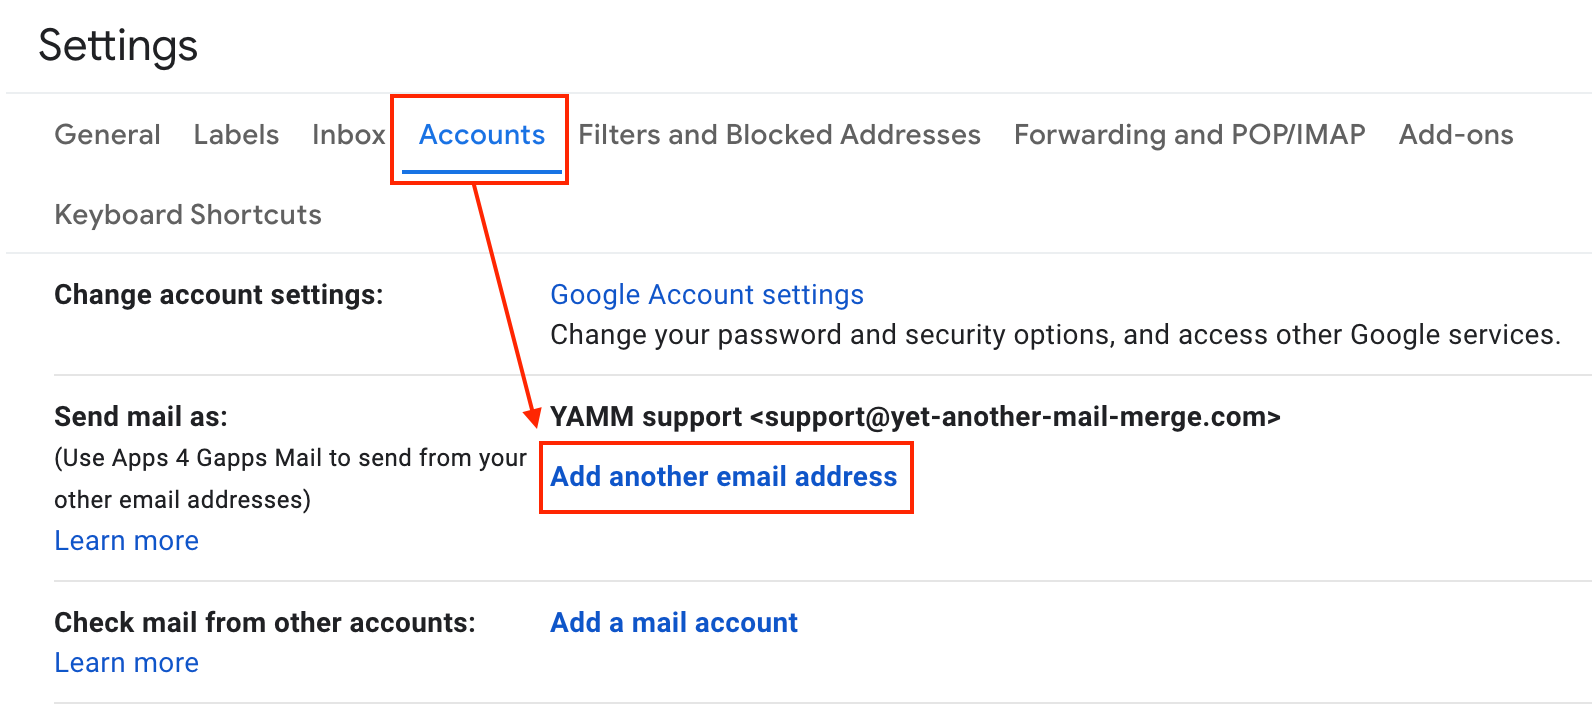
In the Accounts tab, next to Send mail as, click Add another email address.
-
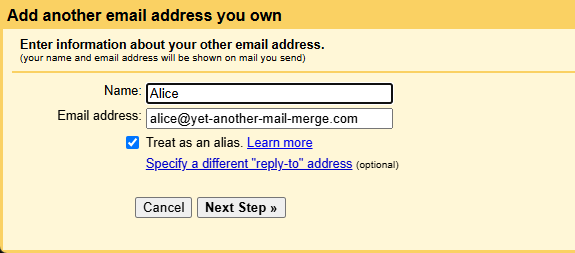
Enter a name and the alias address. Make sure Treat as an alias is checked. Click Next Step.
-
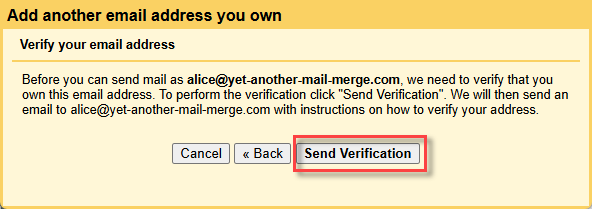
Click Send verification.
-
From the alias account inbox, open the verification email Google sent, and click on the verification link.
The new email address appears next to Send mail as in your Gmail settings.

For more help, see Send emails from a different address or alias.
To send from an alias domain on Google Workspace, turn on DKIM on the alias domain. Otherwise messages from your alias are more likely to be marked as spam. Configure DKIM in the Authenticate email page of your Google Admin console.
2. Run a mail merge with your alias
-
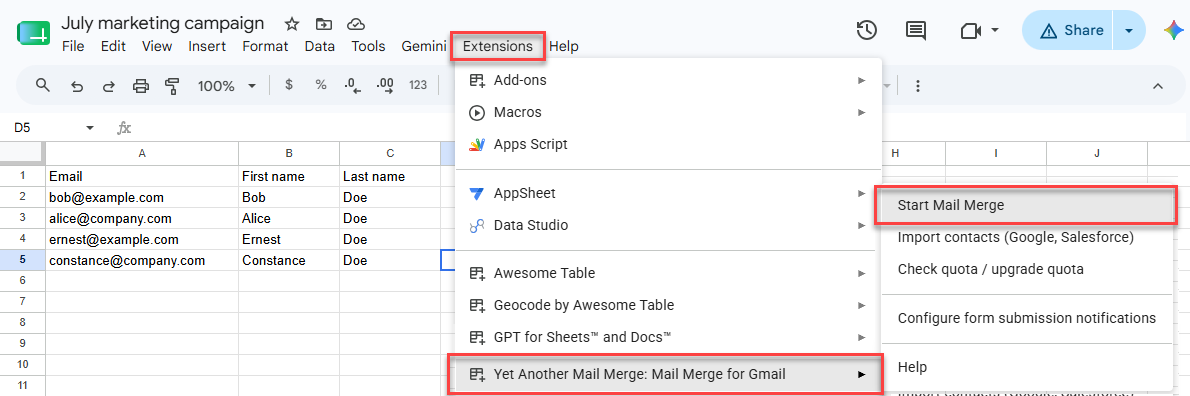
Open your spreadsheet. Extensions > Yet Another Mail Merge: Mail Merge for Gmail > Start Mail Merge.
-
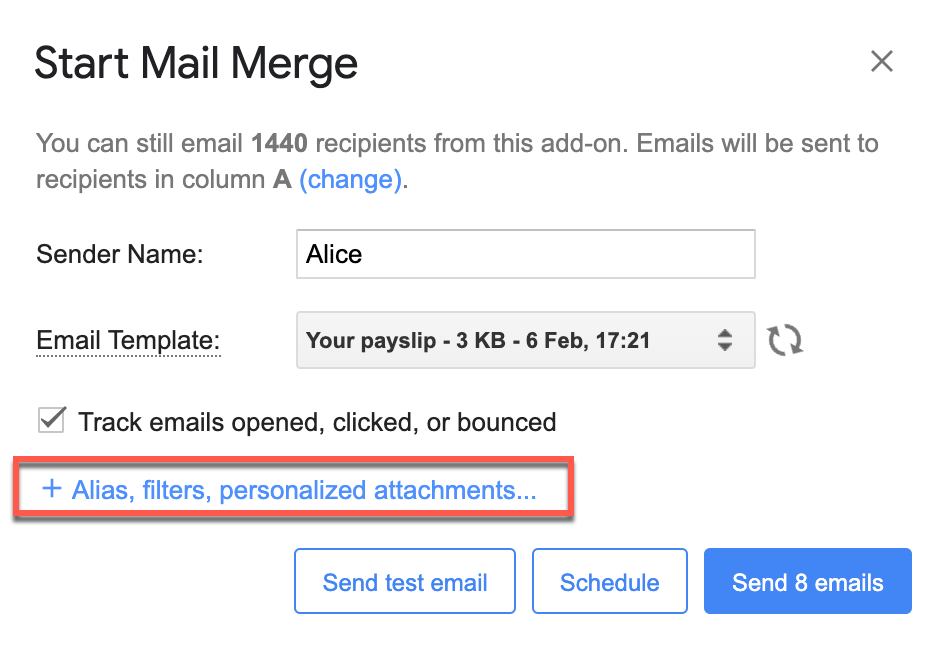
Click + Alias, filters, personalized attachments...
 warning
If you send from a different address (alias) and want to track responses, further Gmail configuration is necessary — see Track responses below.
-
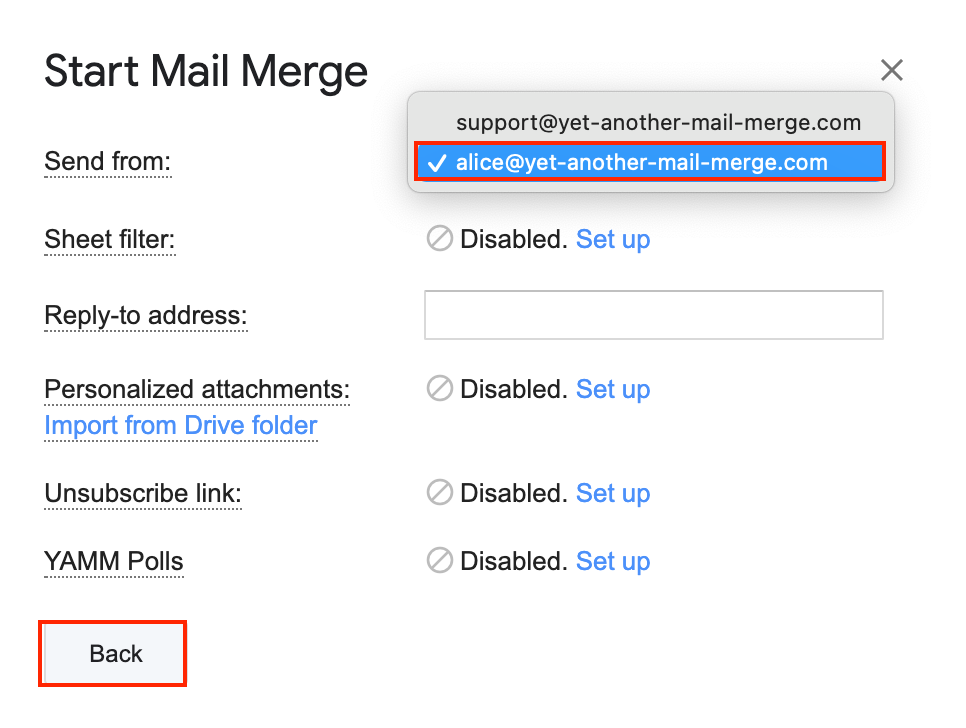
Select your alias address and click Back.
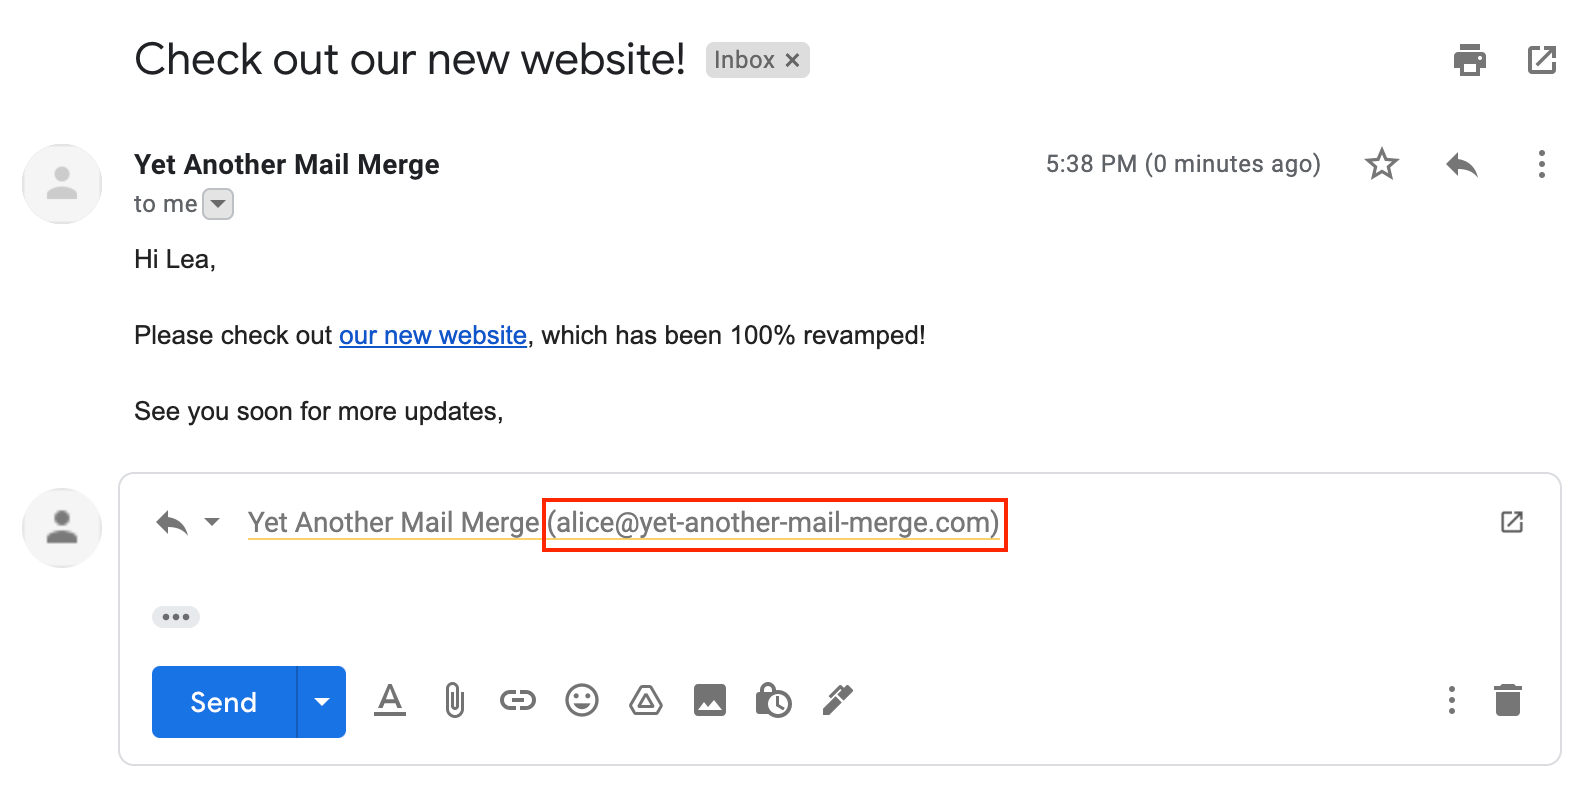
Recipients receive an email from the alias account.
The alias feature does not work with the test email option. See The 'Send from' field (alias picker) isn't working if needed.
How aliases affect deliverability
An alias is useful if you don't want recipients to see your real email address, or if you want brand consistency through a personalized domain, but sending from an alias can impact your email deliverability.
Your emails may not be delivered through Gmail servers if:
-
Recipients perceive the alias as spoofing and report your email as phishing. Their servers may then block your emails for future campaigns.
-
Your emails get flagged as spam too often. See What is spam?
Follow these best practices to protect your deliverability:
-
Use a domain that reflects your company or organization's activity.
-
Avoid spammy names (e.g.,
makefastcash.com) — they trigger spam filters. -
Always include an unsubscribe link so recipients don't click the spam button to unsubscribe.
Set a reply-to address
Use the reply-to option if you want recipients to reply to a different email address than the one you run your mail merge from.
-
Open your spreadsheet. Extensions > Yet Another Mail Merge: Mail Merge for Gmail > Start Mail Merge.
-
Click + Alias, filters, personalized attachments...
-
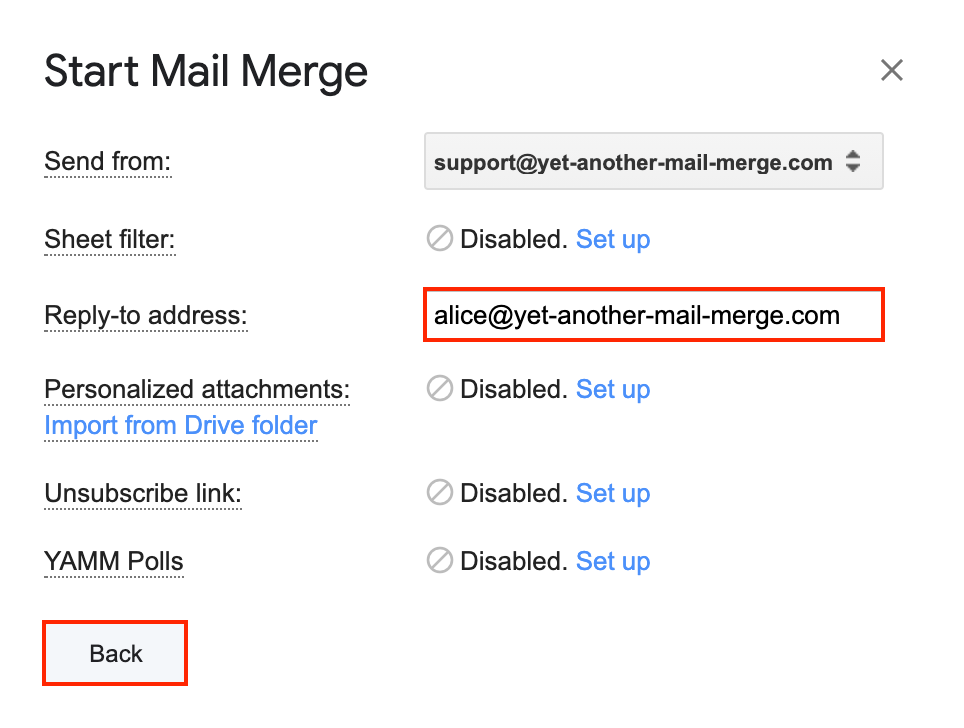
In the Reply-to address field, enter the email address you want to receive your recipients' responses.
 tip
tipTo send responses to several inboxes, enter multiple addresses separated with a comma and space.
-
Click Back.
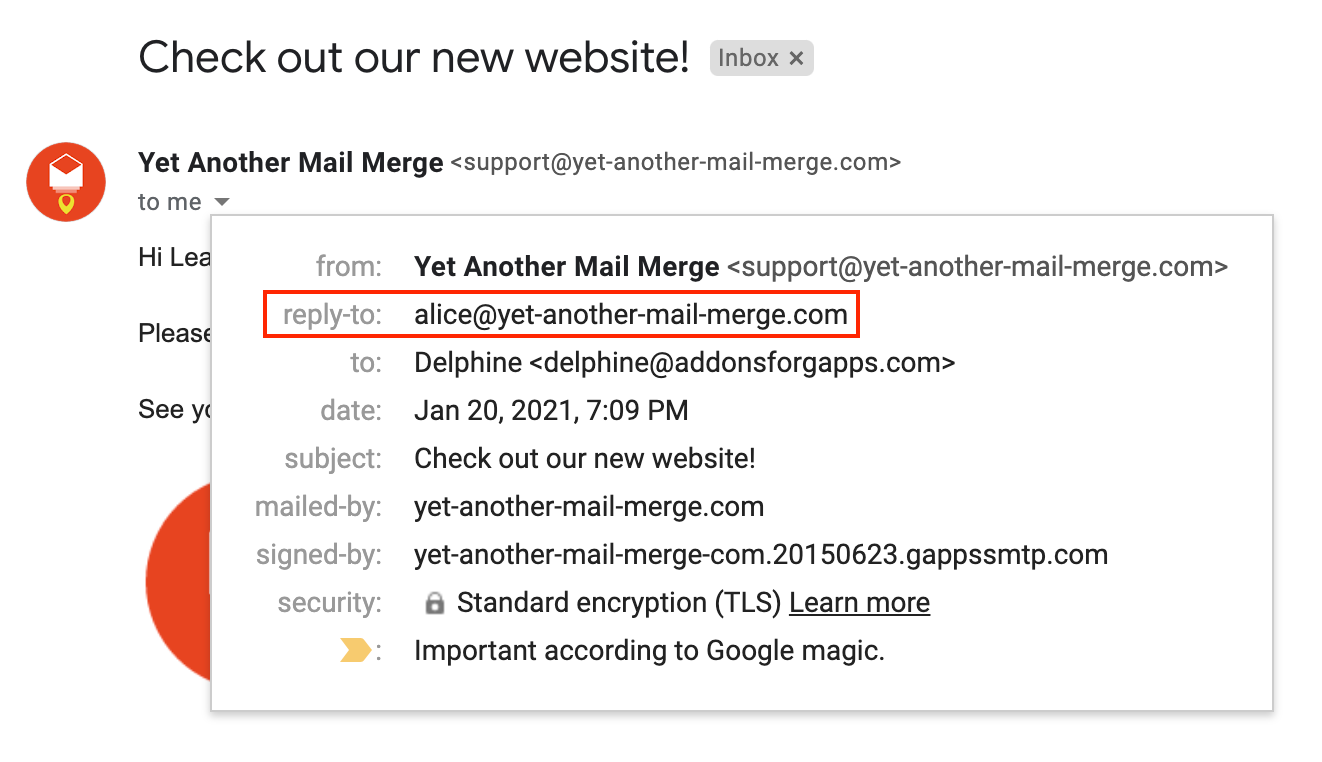
The reply-to address appears in the email.
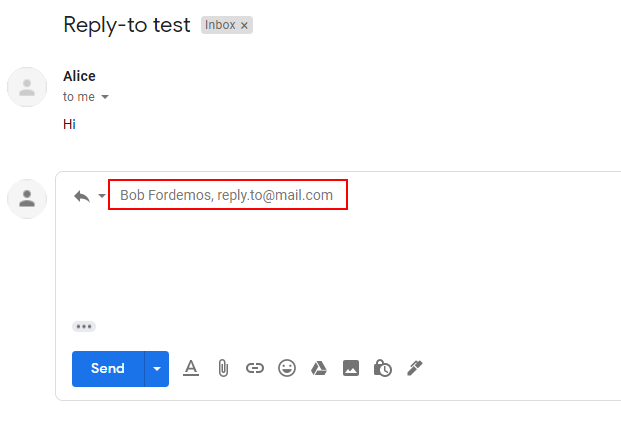
If you entered several addresses, recipients reply to all of them when they click Reply.
Track responses
If you run a mail merge with an alias or have configured a different reply-to address, responses don't arrive at the email address from which the mail merge is sent. To track all responses, configure your alias or reply-to address to forward to the sender address.
-
Log in to your second Gmail account (your alias or "reply-to" account).
-
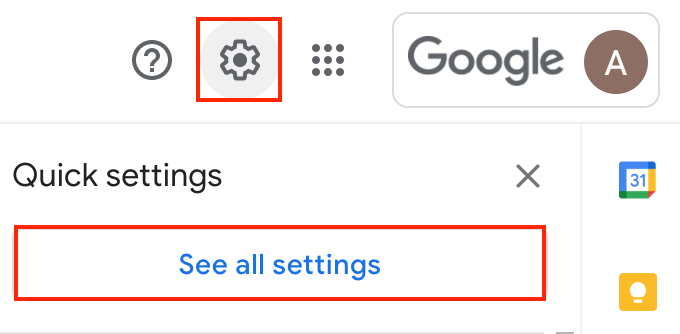
From the top-right corner, click the Settings icon and click See all settings.
-
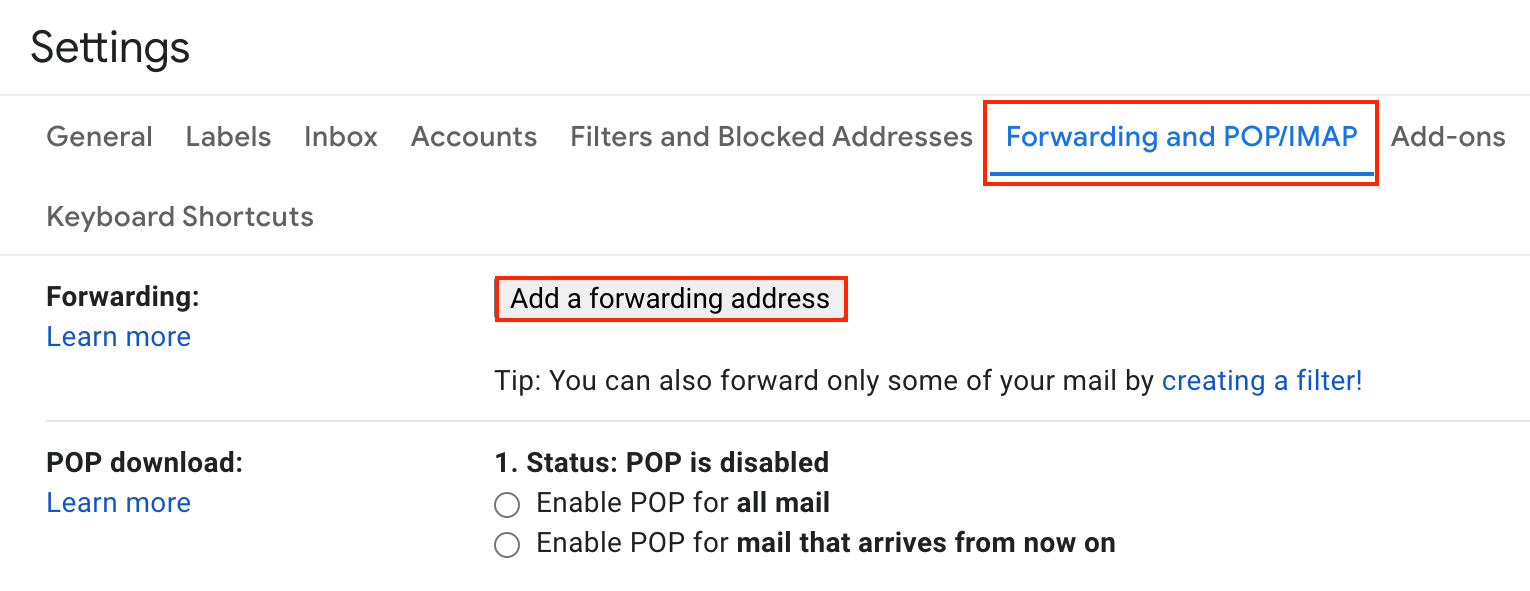
Click the Forwarding and POP/IMAP tab > Add a forwarding address.
-
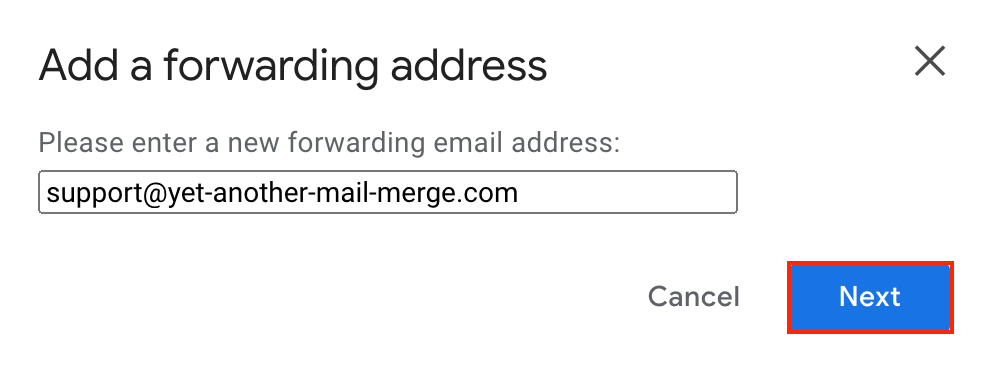
Enter your primary email address and click Next.
-
Follow the on-screen instructions to verify the forwarding address.
-
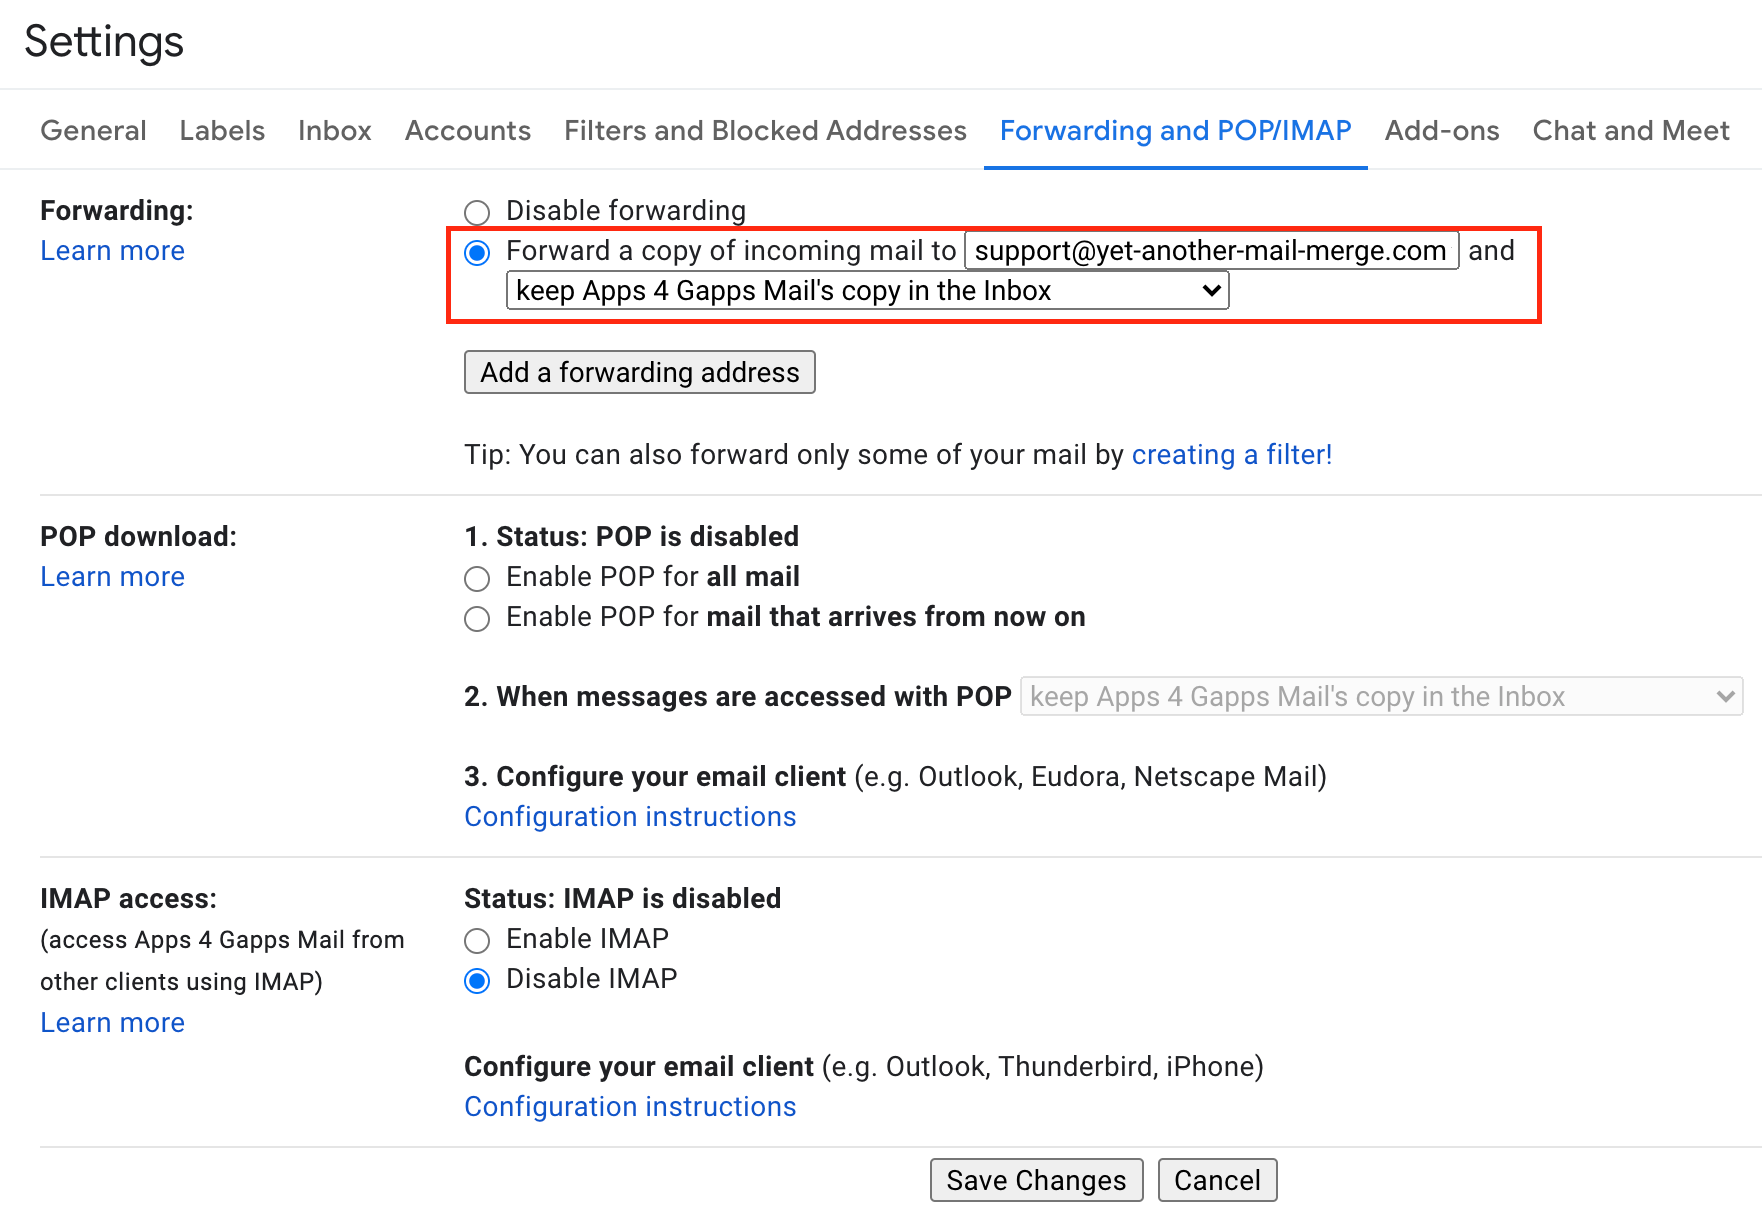
Back in the Forwarding and POP/IMAP tab, select Forward a copy of incoming mail to and enter your primary address.
-
Click Save Changes.
Responses sent to the alias or reply-to address are now forwarded to your sender address and correctly counted in the tracking report.
What's next
-
Check your response rate to confirm replies are detected.